Having the legal parts in place on your blog is a vital aspect of creating a successful blog. Plus it helps you to sleep at night!
Today I will be sharing with you the steps I took to ensure that my blog contains the correct legal pages.
Recently I researched the legal requirements for my blog, and of course, I am keen to share everything with you that I think would be helpful for your blog too.
Here is a perfect example of what I have learned recently in the form of my disclaimer:
Disclaimer: I am not a lawyer. The information in this post is for informational purposes and does not constitute legal advice in any way. I am not liable for any damages resulting from using the information in this article. Please consult a lawyer for advice on your unique situation.
This disclaimer is added to any post I write, which contains information that I do not want to be held responsible.
Here are the essential three pages you need on your blog:
Disclosures and disclaimers page
Disclosure statements are a legal requirement in blog posts in the following conditions:
- The post contains affiliate links where you earn a commission should your site visitor click them and make a purchase
- Sponsored posts, where you are paid to talk about a product or service
- Content for which you receive compensation in the form of free products
The disclosure should be unobscured and clearly positioned, ideally at the top of the post or near to the affiliated link or content.
You should also add a disclosure in social media posts. You can do this by adding hashtags like #ad, #paid, #sponsored, #afflink, or #affiliate link.
Disclosures and disclaimers page
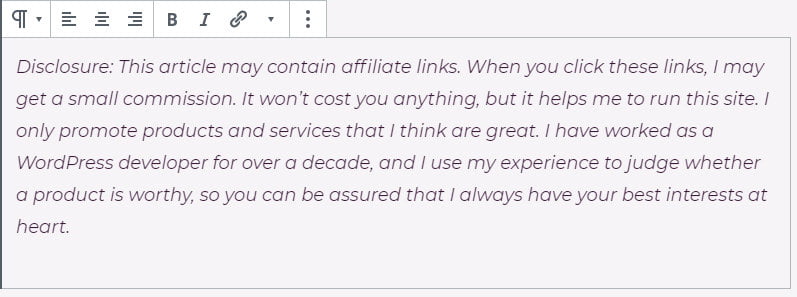
I have made a reusable block for my disclosure. I add it to the top of any post that includes affiliate links.
Here it is:
Here is how I made it reusable:
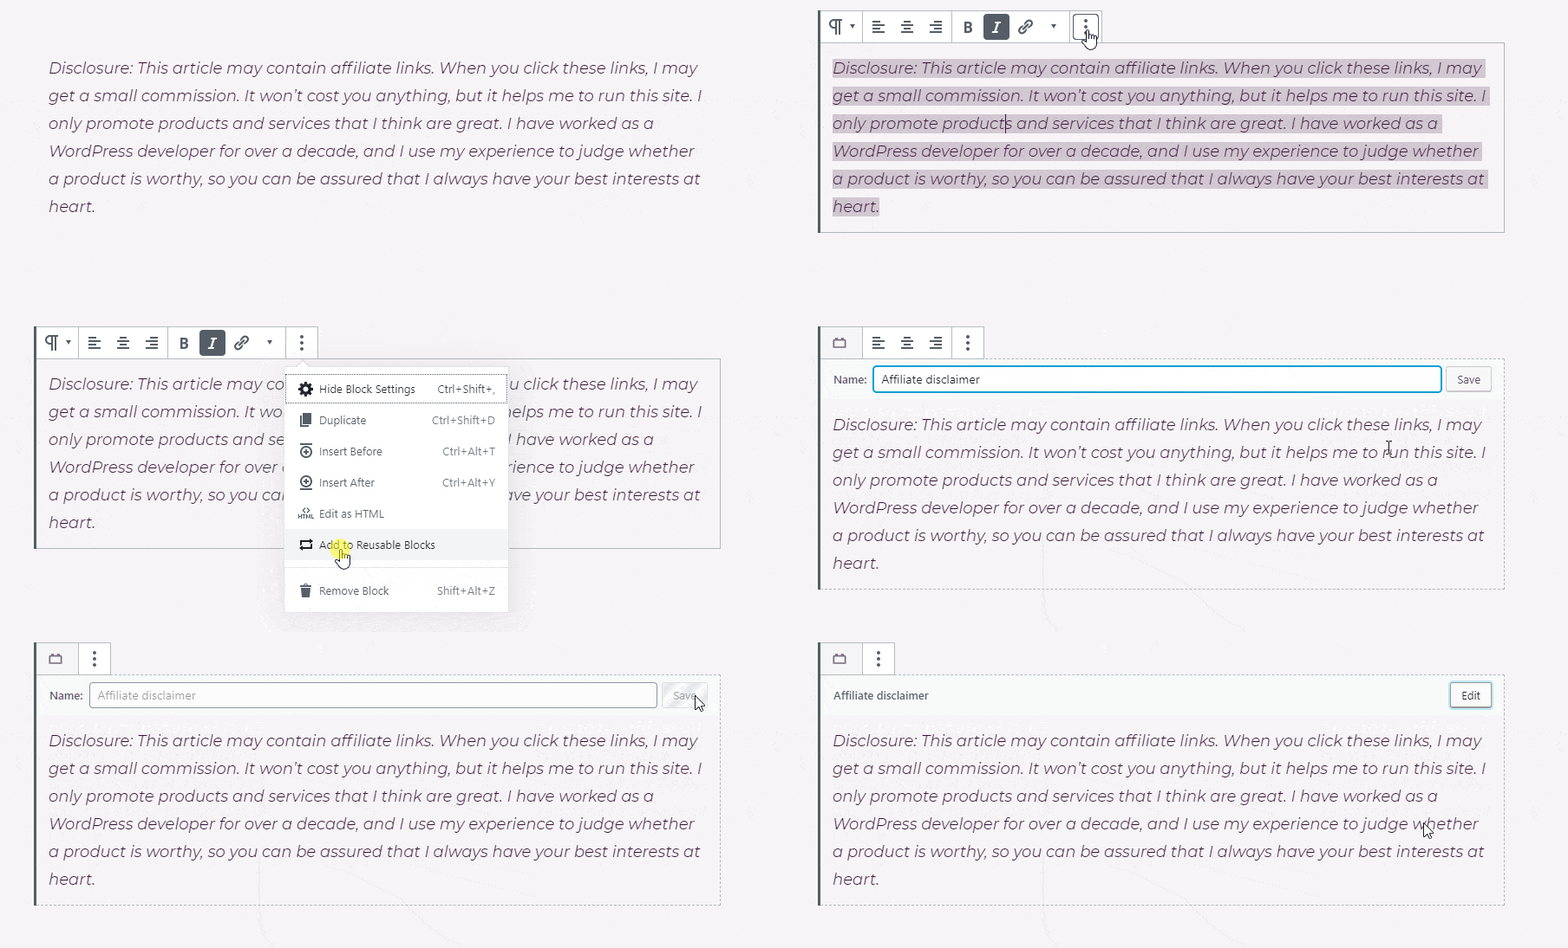
Now I can select it like any other block and use it in any blog post. The great thing is that I can change the text later, and it will update everywhere.
Privacy policy page
If you blog about anything legal, medical or health-related, or indeed anything that you do not want to be held responsible, then you need a dedicated Disclaimer Page.
Make your disclaimer page in the same way you would create any other page, i.e Pages->Add New.
I can’t advise on the content, as it depends on your blog topic. You will be well advised to consult a lawyer. At the very least you should say that you cannot be held responsible for any adverse effects caused as a result of taking advice from this website.
You should add a link to your disclaimer page in the footer. I have directions for adding footer links further down this post.
You could also add a disclaimer block to the top of posts as I have done above, and make that reusable too.
Update: If you don’t have the budget for a lawyer, there is an affordable alternative. For a small one-off fee, TermsFeed will generate legal pages for you tailored for your individual needs. I tried them out for my terms and conditions page and it was a fantastic service.
Privacy policy page
The GDPR requires you to have a privacy page on your blog. GDPR is a European law that came into effect in 2018. Citizens of EU countries have a legal right to know what data is stored about them, where it is kept and for how long.
A privacy page should contain details on what personal information is collected and how it is used.
You may think, well, I don’t collect any personal information, so why do I need it?
Well, actually, you probably do …
- If you have Google Analytics installed on your blog, as most blogs do, it will store cookies on your site visitors’ browsers, allowing their behaviour to be tracked.
- If you have a contact form on your site, you will store email addresses on your computer.
- If you allow comments on your blog, then you have people’s email addresses, website address, plus any information they choose to disclose in a comment.
- If you allow people to register on your blog, again you have names and email addresses.
- Any other plugins that track users, including social media plugins, and tracking pixels like Facebook and Pinterest.
The privacy page should be linked to somewhere on your site. The best place to put it is in the footer.
Terms and conditions page
In its basic form, a privacy policy page should cover the following clauses:
- Who you are, your domain address, and where you can be contacted.
- Information collected from site visitors.
- The ways that the information is collected, for example, in cookies, comments, and contact forms, this will depend on what you have on your site.
- If you have Google Analytics installed, then you must disclose it, plus any other third-party plugins or widgets that collect data. If you have advertising on your blog, then include that too.
- How users can block cookies and opt-out of third party advertisements.
Iubenda.com has some great information on what to include, plus they have a sample privacy policy to help you write your own.
Here is my privacy policy page, please feel free to copy any part of it.
Wrapping up
WordPress makes it very easy to create a privacy policy page, even filling out the most common parts for you.
- Go to Settings->Privacy
- You will see that WordPress has already created a draft page for you.
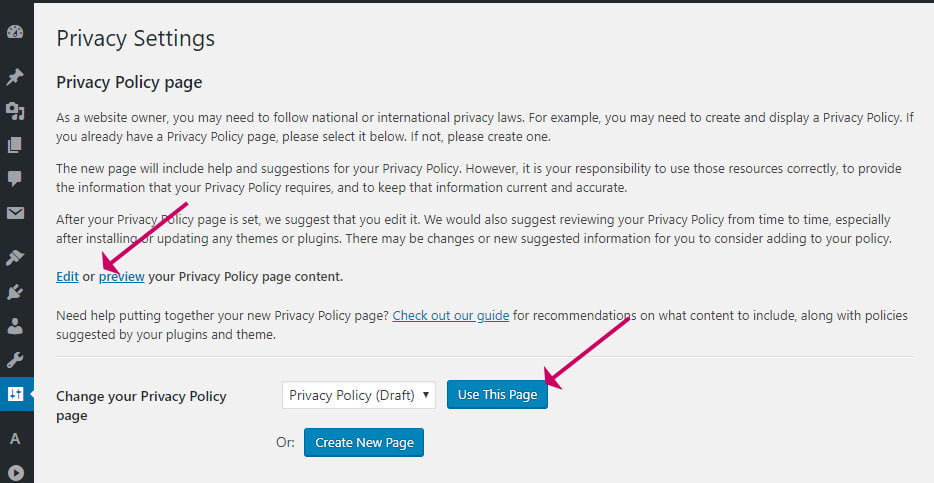
- You can review and edit the draft by clicking the Edit or Preview links
- To use the draft page click Use This Page
- If you want to create an entirely new page, click Create New Page. WordPress will create a new page and open it for you to make changes.
The generated page will have some empty sections for you to fill in depending on what you have on your website.
The Contact Form section, for example, needs to be filled in if you have one or removed if you do not.
How to make a disclosure section on your blog post
Your privacy page mustn’t be hidden from view. People normally look for a link to it in the footer.
Here is how to add a footer link.
Most good themes come with a footer menu. If yours doesn’t, then do contact the theme developer to find out the best way, or switch to a different theme.
If you already have a menu in your footer, do the following:
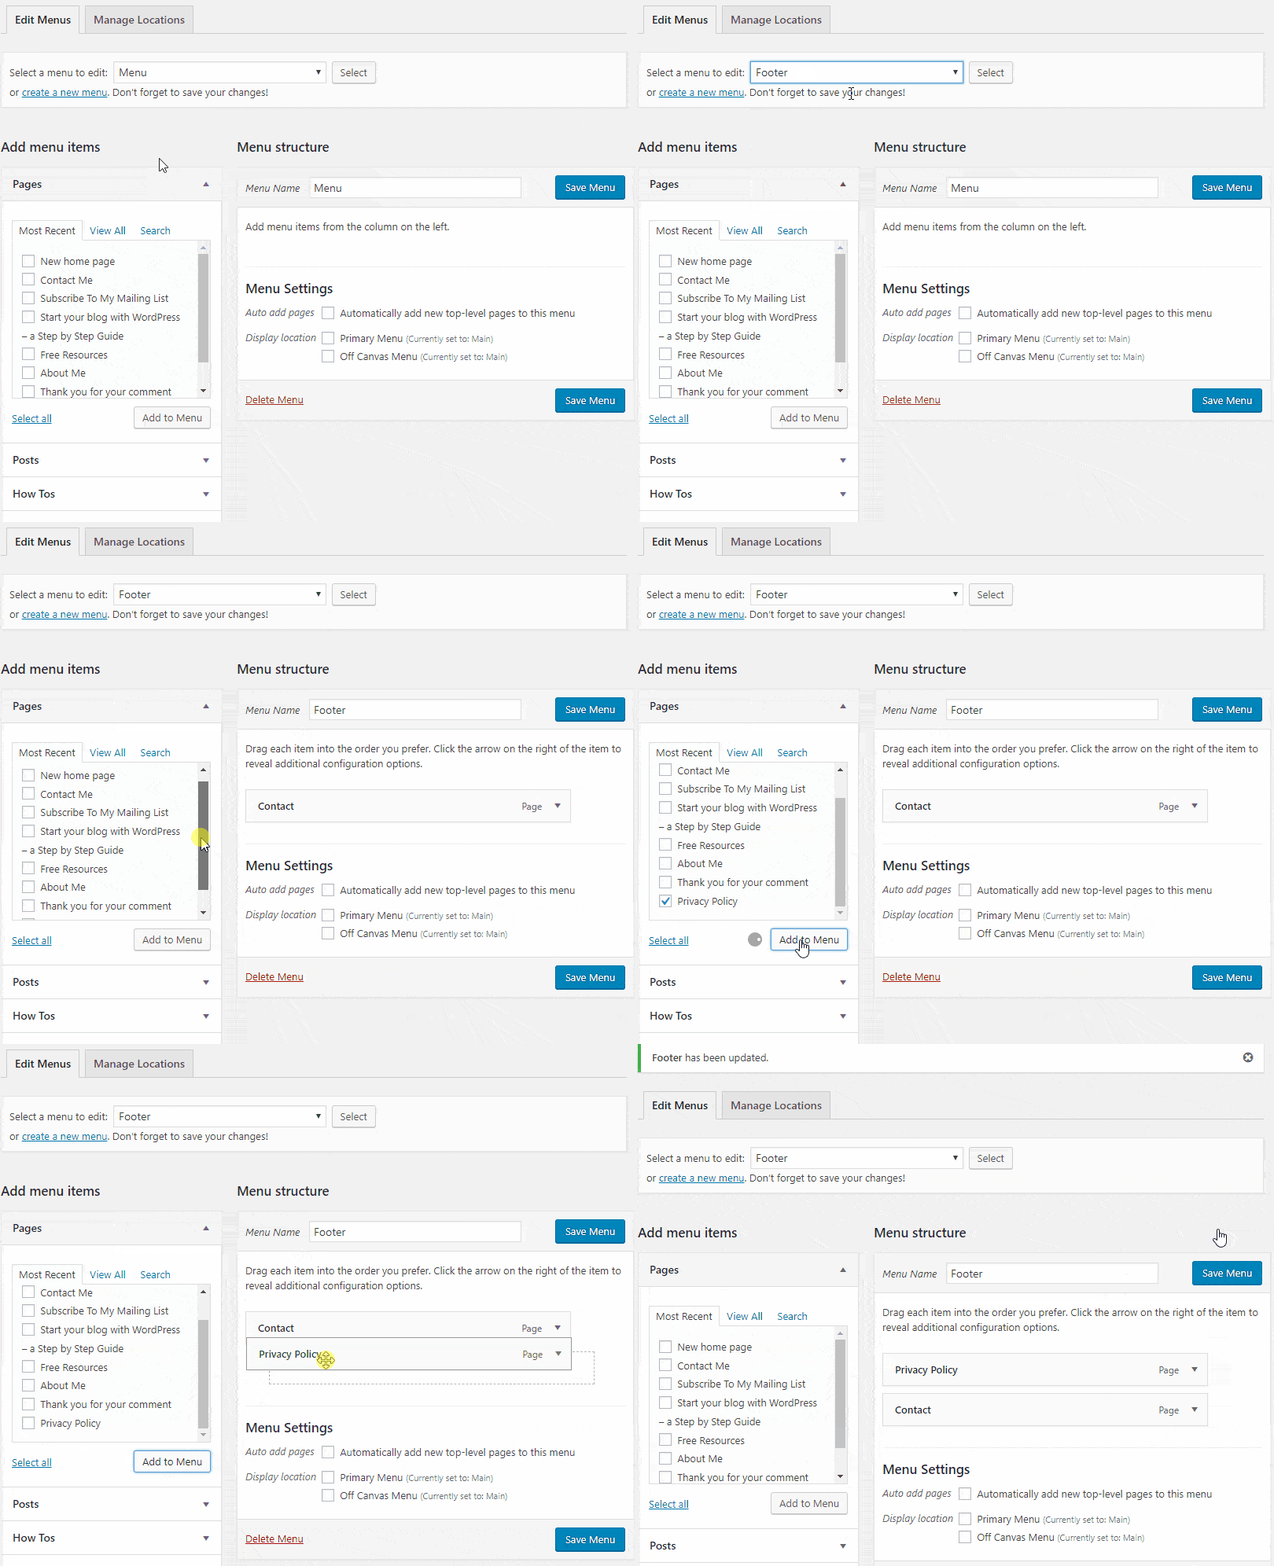
- Go to Appearance->Menus
- Select the Footer Menu
- Find your Privacy Policy page in the list and click Add To Menu
- Click Save Menu
The link should then show up in your footer menu, and you can skip the rest of this section.
If you do not already have a menu in your footer will need to create one:
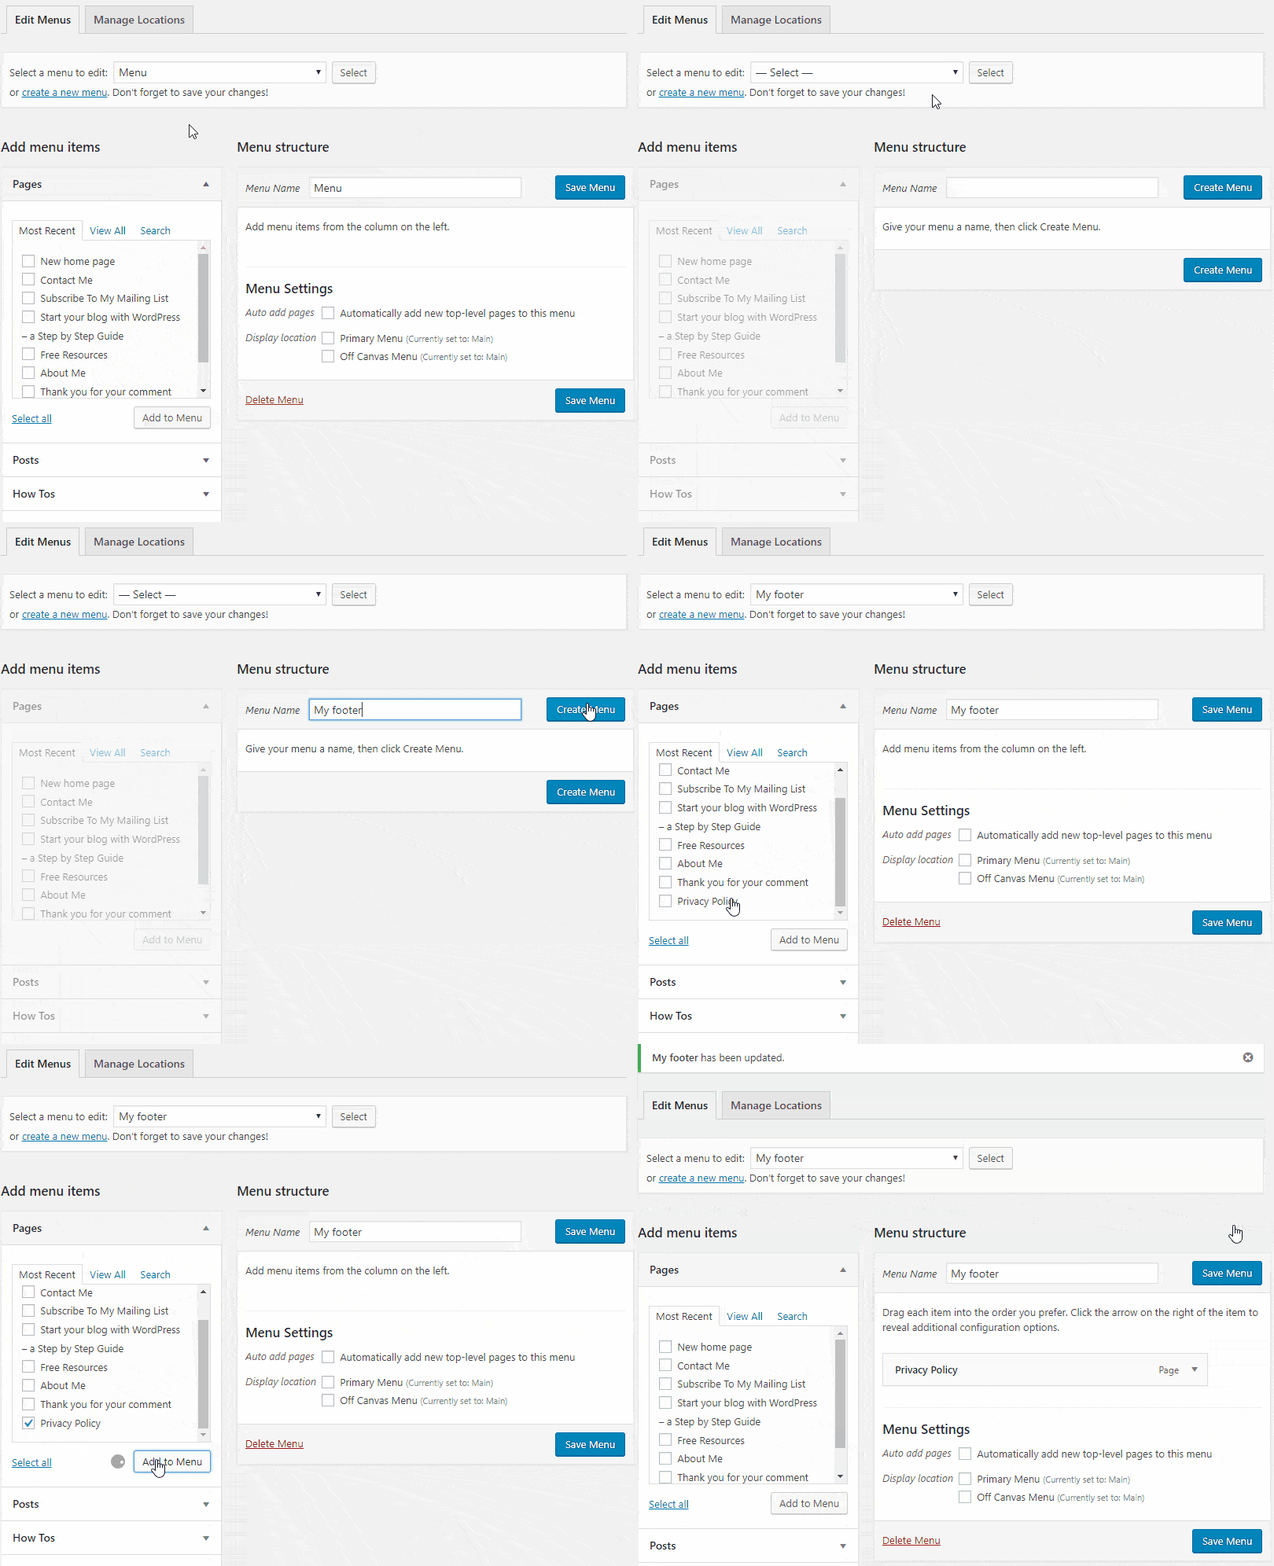
- Go to Appearance->Menus
- Click Create a New Menu link
- Enter Footer in the Menu Name box
- Click Create Menu
- Find your Privacy Policy page in the left-hand list and click Add To Menu
- Click Save Menu
Now we need to add the new menu we created to the Footer Widget.
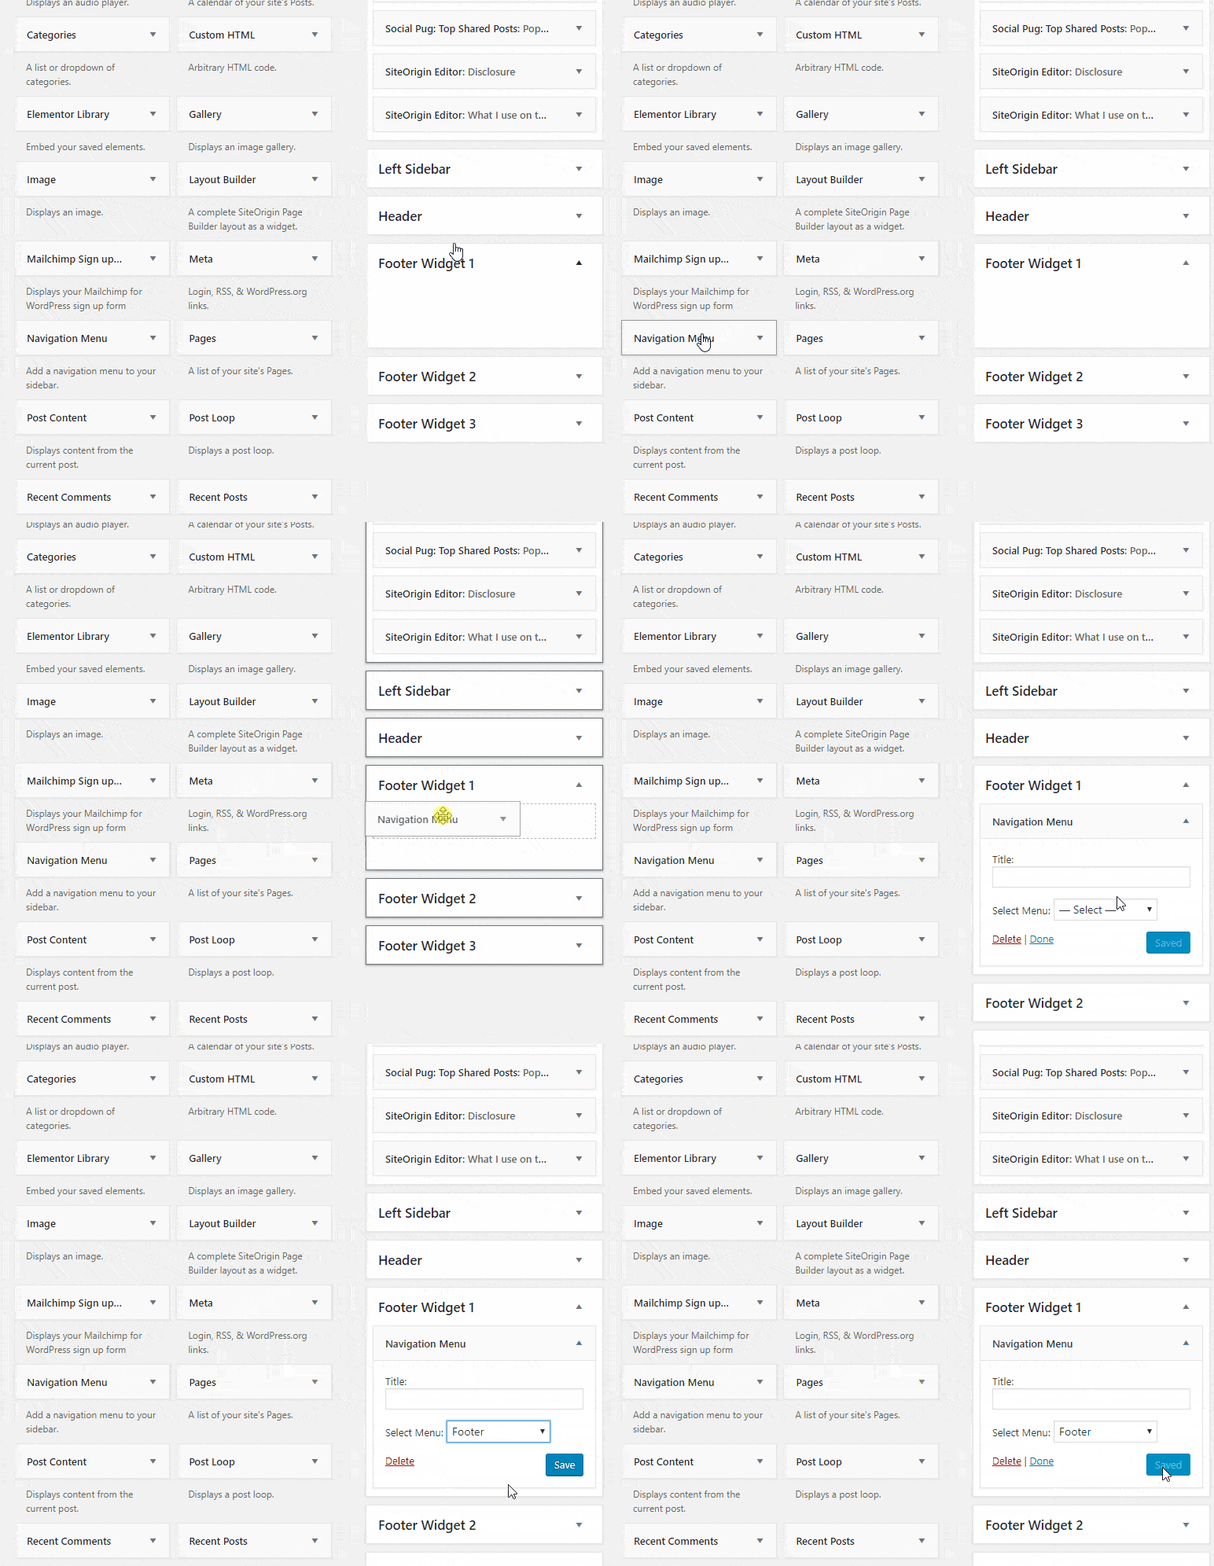
- Go to Appearance->Widgets
- Look for a widget area on the right-hand side called Footer or similar
- Find the Navigation Widget on the left and drag it into the Footer widget area
- In the drop-down, select your new Footer menu.
For more help on editing the navigation menu, see my post – How to Add a WordPress Navigation Menu.
Terms and conditions page
You are not required by law to include a terms and conditions page on your blog. However, it is advisable, particularly if you sell goods or services on your site. It can help you in the event of complaints and sets expectations for delivery times, for example.
You can add a terms and conditions page just like any other normal page. (Pages->Add New).
Once you have made your T&C page, then you should add a link to it, usually in the footer. Use the same directions as described above for the privacy page.
If you’re stuck on the wording for your T&Cs and don’t have the budget for a lawyer, you could try a T&Cs generator site. Here is one I found – TermsFeed. I have not used this service myself. If you do find it useful, do let me know.
Update: Since I put a shop on my site, I had a need for a terms and conditions page which I made at TermsFeed. You can see it here.
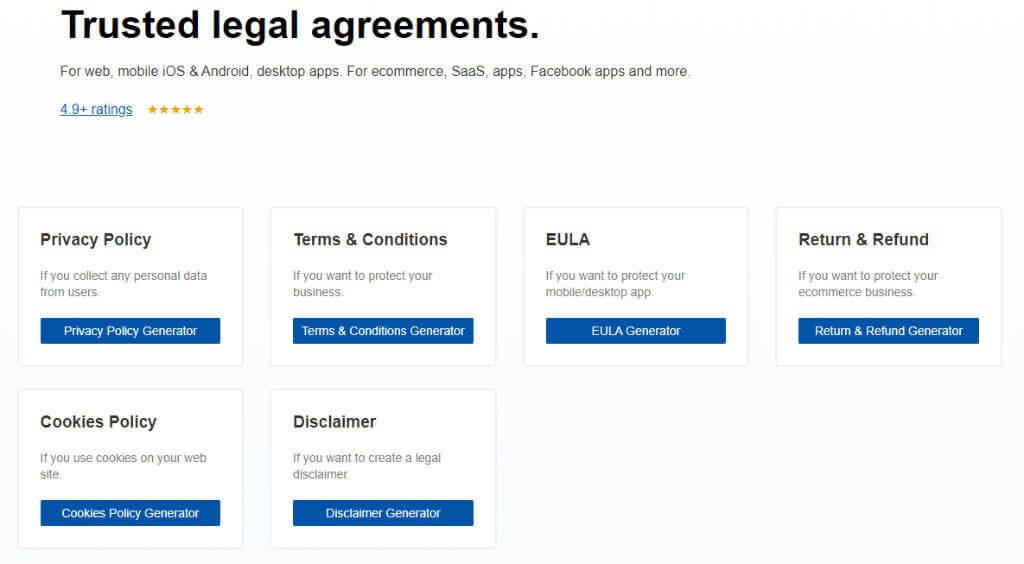
I found TermsFeed very easy to use and reasonably priced with a one-off fee. All I had to do was answer questions and it sent me the exact text to put on on my page, according to my specific requirements.
TermsFeed is for more than just T&Cs. It will also generate disclaimers, cookie policies, privacy policies and more.
Wrapping up
In this post, I have taken you through the three pages that you should have on your site. The privacy page and disclosure elements are both legal requirements.
You should also include a disclaimer section or page to absolve you from responsibility for any adverse effects suffered as a result of taking advice on your blog.
The terms and conditions page is not a legal requirement but can cover you in the event of complaints. It is advisable to include it, especially if you sell products or services.


