Have you ever wished that the little piece of text that you keep retyping into posts could be repeatable automatically?
Or, wished that the sign-up form that you keep having to add and configure could be repeated automatically too?
When you come to need a change to the text you have added everywhere, do you wish you could change it in one place, and magically it changes everywhere without you having to do anything?
Well, with the latest version of WordPress you can do just that!
Read on to find out how you can save oodles of time maintaining your posts by making a WordPress Gutenberg block reusable.
What is a WordPress reusable block?
With the introduction of WordPress version 5.0 came the block editor, so-called, Gutenberg.
The new block editor has revolutionized the post editor experience, taking it from a plain linear typing experience to a series of blocks that you can reorder, each of which can have its own behaviour and settings, such as header, paragraph, image, video and much more!
If you haven’t used the new block editor yet I thoroughly recommend you give it a try. First, make sure you have the latest version of WordPress.
For me, the block editor has made WordPress a much more satisfying tool to use. After initial trepidation, I am now a full-time block editor user, and I absolutely love it!
I love it so much that I am in the process of creating as many tutorials as I can about it because I want you to use and love it too. See them all here: WordPress block editor articles.
In a nutshell …
- A reusable block starts out as an ordinary block, e.g., text, image, Pinterest feed, signup form, etc..
- You click a button in the block’s toolbar to make it a reusable.
- You then use that block in other posts or pages.
- When you edit the reusable block, the changes reflect everywhere that the block is used.

How to create a reusable block
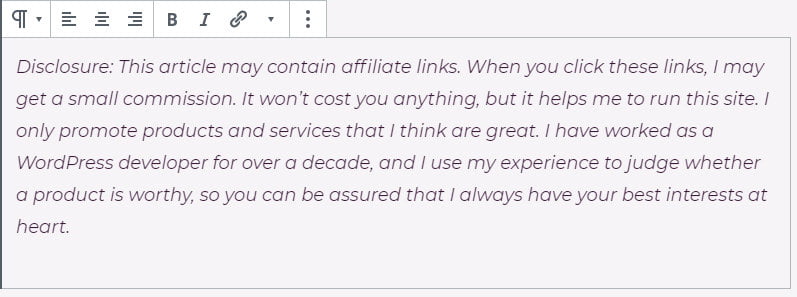
In this example, I will be adding a new paragraph block containing some text for my affiliate disclaimer, but you can use these directions for anything else too, such as an image, or sign-up form widget and more.
I want the same text for my affiliate disclaimer to appear on several posts without having to retype it everywhere, and I want to avoid the extra work later when I want to edit it.
Here is how to make this happen in two simple steps:
What is a WordPress reusable block?
- Add a new paragraph block to your post by clicking the
 button that appears either side of a block
or
- Press return at the end of a block
- Enter the text for your disclaimer
To make a different type of block, select a different block type from the list.
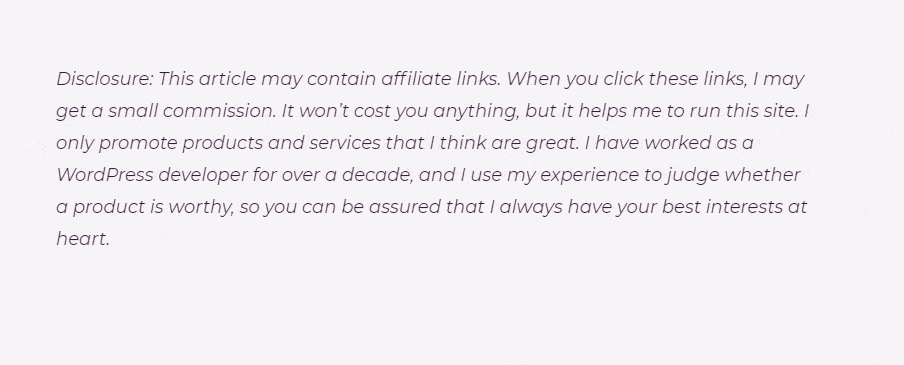
Here is the text block I created:
How to create a reusable block
- Click on the block to make the toolbar appear
- Click on the three vertical dots icon at the end of the toolbar
- Click Add to Reusable Blocks
- Enter a suitable name
- Click Save
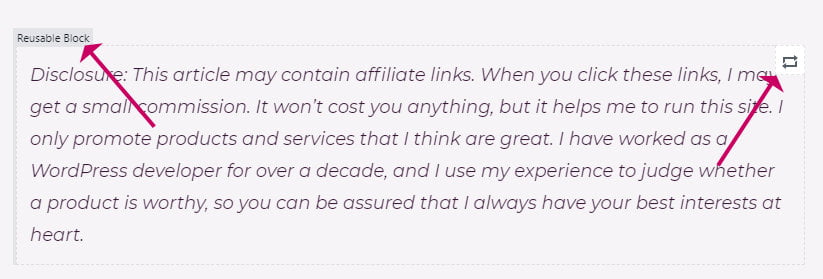
When a block becomes reusable it will have a special icon on the top right of the block and the block type will change to Reusable Block.
How to edit a reusable block
To edit a reusable block:
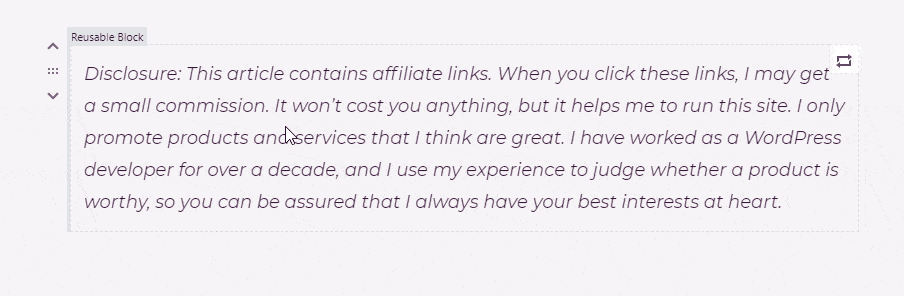
- Locate it in the post and click it to reveal the toolbar
- Click the Edit button
- You can then edit the block and/or change its name
- Click Save when you have finished editing
If you are not sure where the reusable block is located, you can also edit blocks in the Manage Blocks screen, see further down this post for details.
Heads up: you can change the name of the block, and this won’t cause it to be disconnected from any other places that you have used the block.
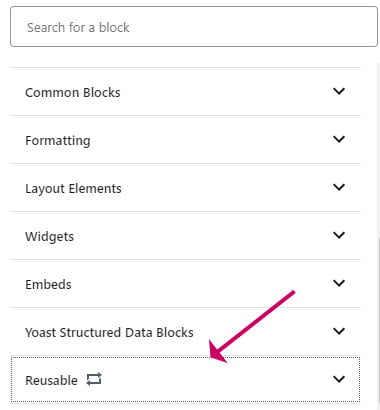
How to reuse a block in another post or page
- Once you have created a reusable block, it becomes available in the block list just like any other block.
- You will find your new block under a tab called Reusable.
- Expand the block to find your new block and click on it to insert it into the post.
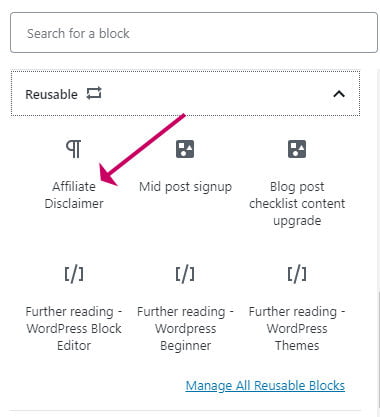
- You can also use the shortcut by typing / followed by the name of the block to quickly find and insert the new block.
When you have placed a reusable block on your post or page, you also have the option of disconnecting it so it becomes a regular block again. You can then edit the block and changes will not affect the original block.
To do this click on the block and open the block menu, then click Convert to Regular Block.
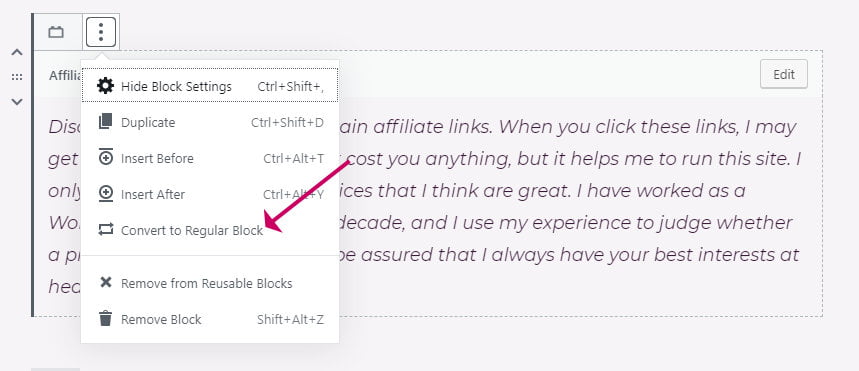
If you select Remove from Reusable Blocks, the block will be deleted and it will not be available for reuse again.
If you do this by mistake, you can retrieve it from the bin in the Manage Blocks screen.
How to view and manage all reusable blocks
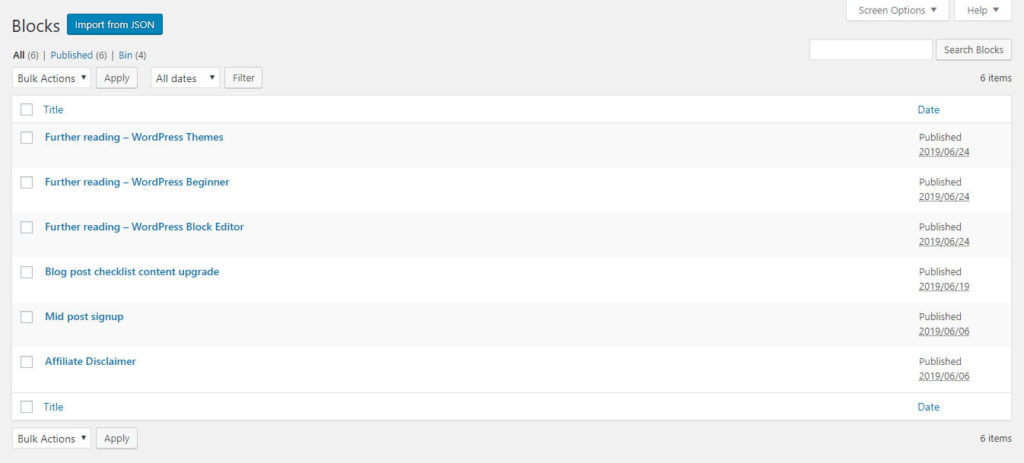
In the Manage Blocks screen, you can view a list of all the reusable blocks and edit their names and content in one place.
When you go to add a reusable block there is a handy link for managing blocks.
Heads up: Make sure you save your post before you click the link, or open it in a new window otherwise you will lose your post edits.
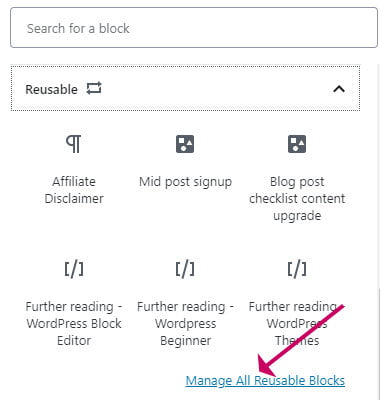
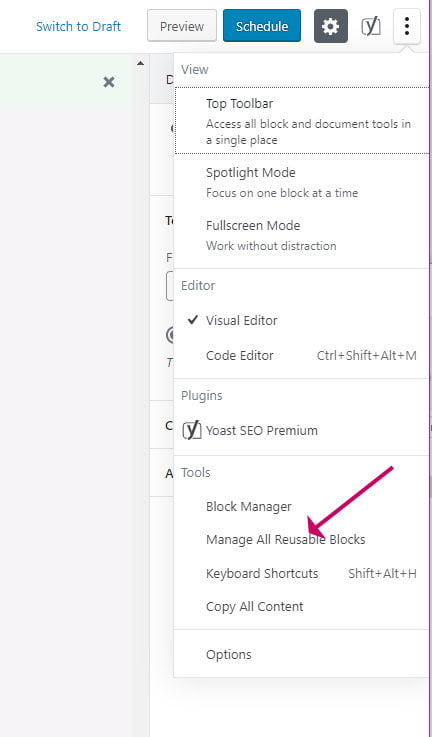
Or, click on the three vertical dots on the top right of the screen and select Manage All Reusable Blocks.
You will see a list of blocks, that you can click on to edit, delete, or export.
- Click on the block name to edit it.
- You can then edit the block contents in the same way as you would if you were editing a post.
Heads up: It is perfectly safe to edit the name of the block. Renaming won’t cause it to disconnect from any other places that you have used it.
- On this screen, you can add further block elements, which isn’t possible when you edit the block in-place within a post.
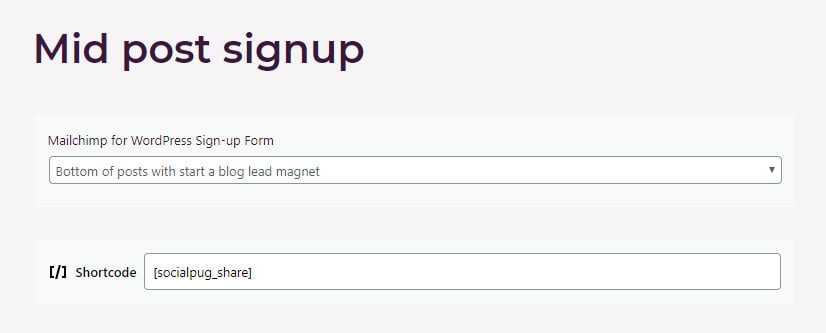
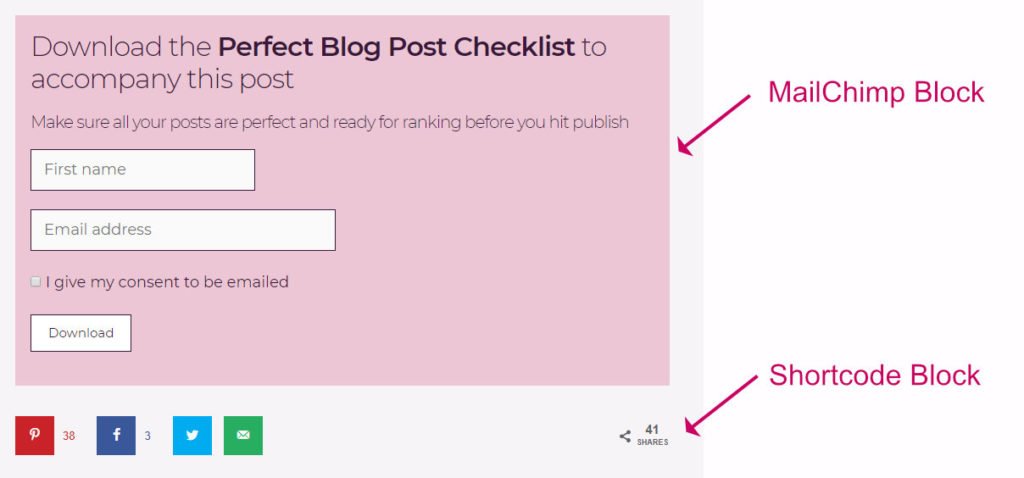
- Here I have a block that I use in the body of my post. It contains a MailChimp signup form. By adding a shortcode block for the Social Pug plugin I can also have some social sharing buttons underneath.
Here’s how the block looks in my post:
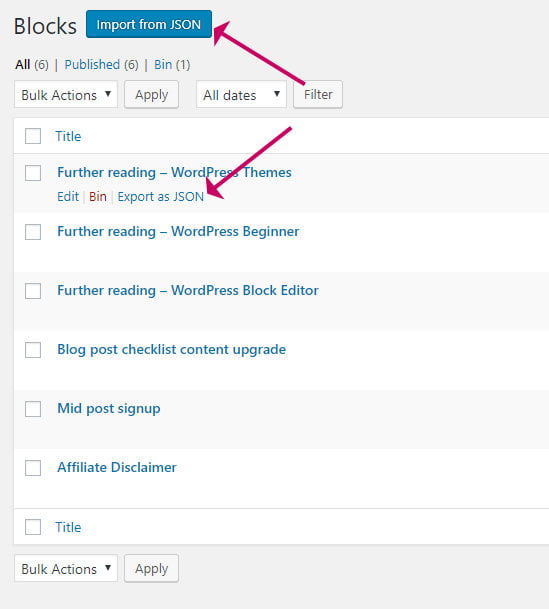
How to export/import reusable blocks
- You can export individual blocks out to a file on your computer ready for use on another WordPress site.
- You can also import blocks you have created on another site.
Do this is the Manage Blocks screen.
Unfortunately, there is no quick link to getting to the Manage Blocks page. You will need to open a post and then click on the options button and select Manage All Reusable Blocks.
In the Blocks list there is an Import button and for each block there is an export link.
Wrapping up
In this post, we have learned about the power of reusable blocks in WordPress and how to use them in a practical way to create some affiliate disclaimer text that you can add to your other posts.
I hope you can find lots more uses for reusable blocks, let me know your ideas!


