Do you find yourself adding the same things repeatedly to your blog posts?
Today I want to share with you how to add social share buttons or a disclosure statement, or a table of contents (anything in-fact!) to the top and/or bottom of every blog post on your website without having to edit every single post.
This is a huge timesaver of course. But also, should you want to change text, change your buttons, or add something else like an author box then you can do it very quickly and easily.
First, I will say that this tutorial is meant only for the GeneratePress theme, and you must have the premium add-on for this to work. You could actually do this in code too, but I don’t recommend it if that is something you are not comfortable with.
Ok, let’s get started!
Video – How to add Gutenberg blocks to the top or bottom of every post
No time to read? Watch the video instead.
Step 1 – Enable the Elements module
Yes! As I said these directions are only applicable for the GeneratePress theme. That is not to say this is not possible in other themes, but you will need another tutorial for that.
- Make sure the GeneratePress Premium plugin is installed and activated. If you don’t have it you can buy it here.
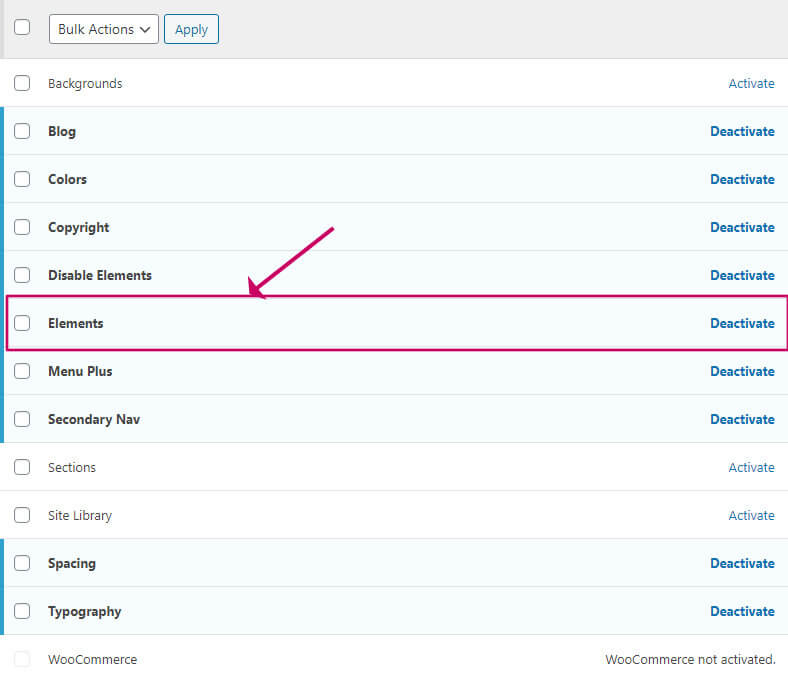
- Now, make sure the Elements module is enabled. You can check it by going to Appearance->GeneratePress, and then checking that the Elements module is enabled
Step 2 – Add a new block element
- Go to Appearance->Elements
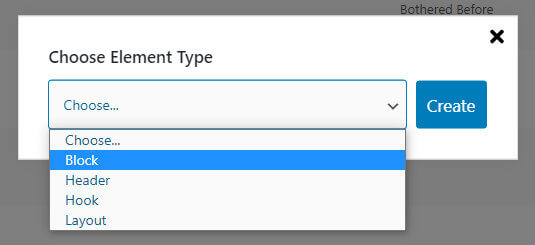
- Click Add New Element to create a new GeneratePress element.
- Choose the Block element type
- Click Create
Step 3 – Edit the block’s content
What you will see now is a block editor, exactly as you would see for a post.
You can give the block a title. This is just to help you identify the block later, it won’t be displayed on your post.
You can add anything you wish into the content. Here is what you could add:
- A shortcode block for your sharing buttons
- A paragraph block containing your affiliate disclosure or legal disclaimer
- A table of contents (Kadence Blocks have a great table of contents block)
You can format the block as you like, and add as many blocks as you want.
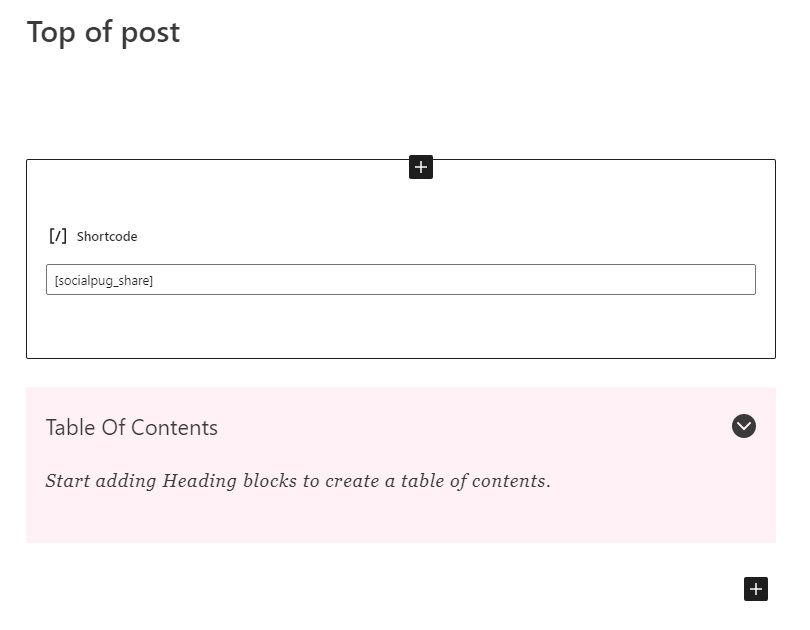
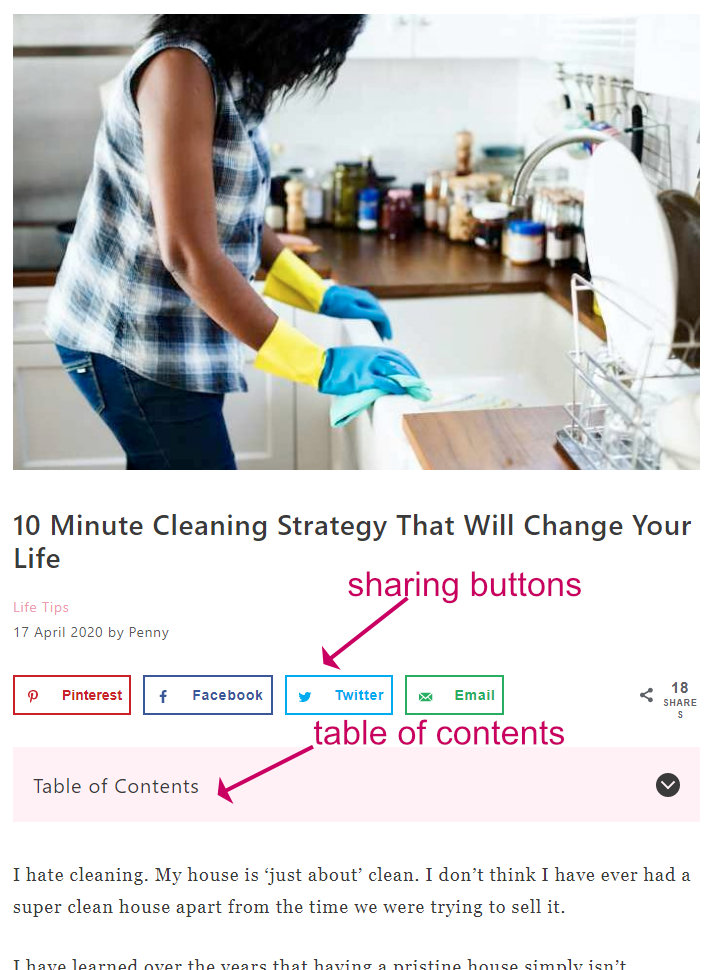
Here is a block I made for the top of my posts. I’ve added a shortcode block for Social Pug (now called Grow) sharing buttons, and a table of contents block so that readers can easily navigate through the post.
Step 4 – Define where the block will show up
In this step, we will tell GeneratePress where we want the element block to show up. We can add element blocks to pretty much anywhere on the website, but in this example, we will add a block to the top of posts.
- Scroll down to the bottom to find the settings panel.
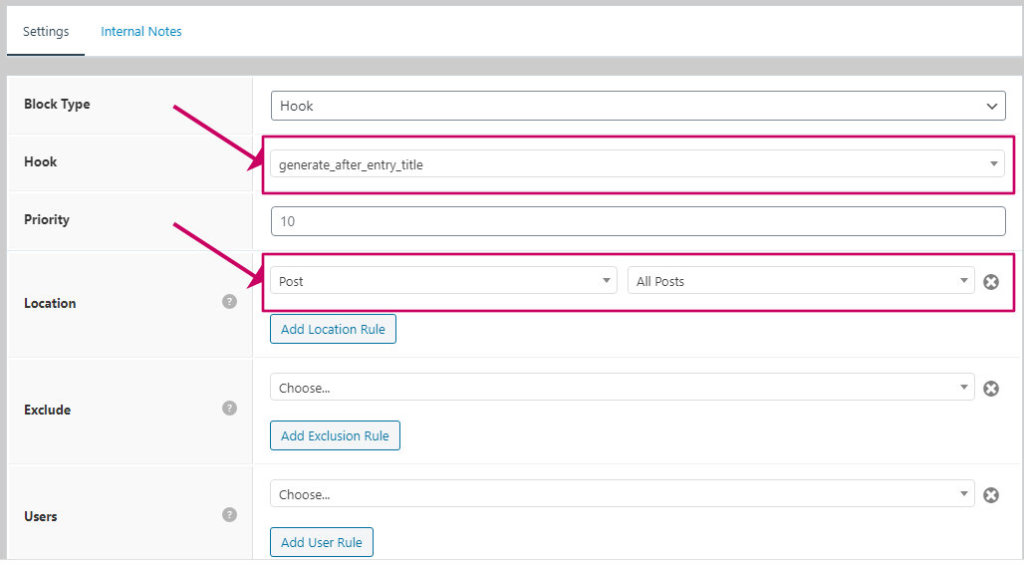
- In the Hook drop-down, select generate_after_entry_title. This will ensure that the block only appears at the top of posts.
- In the Location dropdown, select Post and then All Posts in the second list. This will ensure that the block only shows up on blog posts.
If you want your block to appear at the bottom of posts, select the generate_after_entry_content hook instead.
Now save your block, and go and look at a post. You should find that every blog post now has the content you just made at the top of each post.
Here is an example:
That’s it! Now you know how to add social sharing buttons, or a table of contents, or disclosure text to the top or bottom of every blog post.


