Today, I would like to talk about Pinterest and how easy it can be to set up your blog for Pinterest sharing with a plugin called Tasty Pins.
To help me explain what the Tasty Pins plugin can do, let’s talk about the scenario where you want to share your blog post to Pinterest, but you don’t have a specific plugin installed to help.
- When you share a blog post to Pinterest, the post’s featured image will be used which will most likely be of the wrong dimensions, and won’t look good on Pinterest.
- You can’t set descriptions and titles especially for Pinterest, the ALT text of the image will be used.
If you want success on Pinterest, you must share images that are tall rather than wide.
Here is an example of a Pinterest friendly image (feel free to pin it on Pinterest!):
A way around the problem would be to add a Pinterest friendly image within the body of the post, as I have done above, but if you do that you need a way for someone to easily pin it.
Do you see the ‘save to Pinterest’ button as you mouse over the image above? That is WP Tasty Pins at work!
Here is where WP Tasty Pins can help you to grow your presence on Pinterest:
- You can embed one or more pin images into your post and have them hidden until someone shares your post.
- You can add specific titles and descriptions to every pin.
- You can have the plugin add a little ‘save’ button to the top of each image in your post.
- You can disable pinning of particular images, and you can add a Repin ID to the image so that when people pin it becomes a repin of the pin you already shared to Pinterest.
How to set up Tasty Pins on your blog
How to set up Tasty Pins on your blog
- Pop over to WP Tasty Pins website and sign up for an account.
- On the purchase confirmation page, you should find a link to download the plugin as a ZIP file
- Go to Plugins->Add New
- Click Upload Plugin
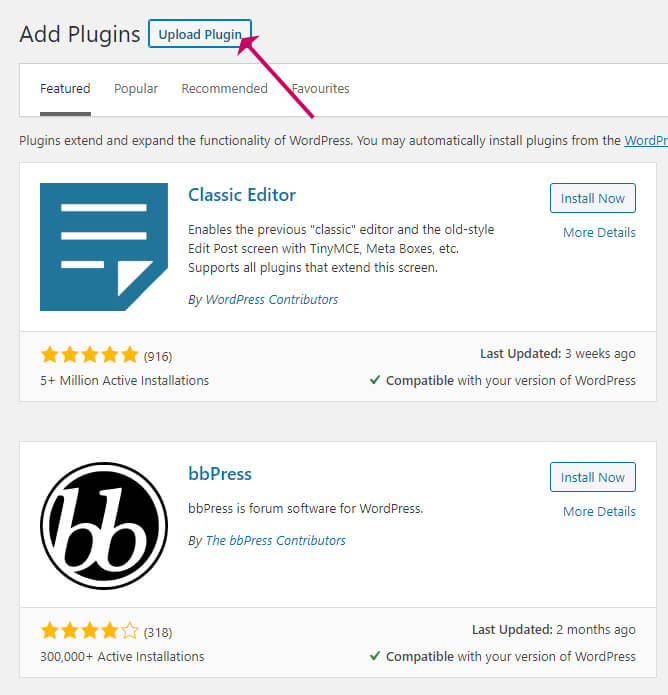
- Click Choose File and then select the ZIP file you downloaded to your computer.
- Click Install Now
- Then click Activate
WP Tasty Pins should now be active on your site and you can proceed to set it up.
How to set pin descriptions on an image
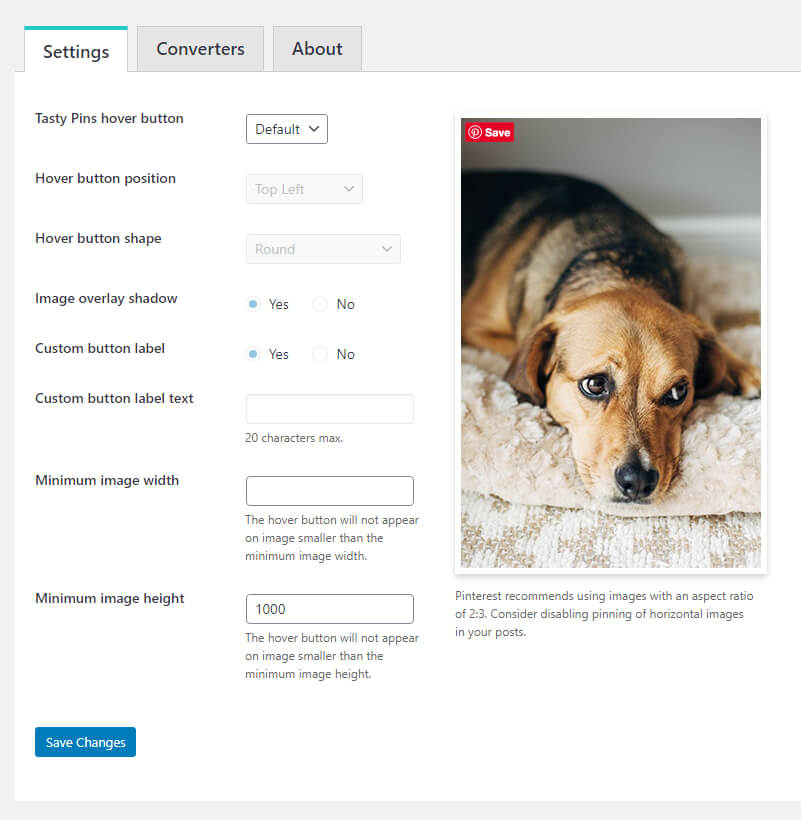
You can find the settings screen for the plugin under Setting->Tasty Pins.
You can leave everything at the default settings, apart from the Minimum image height which I explain further down this post.
How to stop every image on your blog post from being pinned
Now you have Tasty Pins installed, you have the option to add pins to your post and have them hidden from view.
Hidden pins will only show up when someone goes to share your post to Pinterest. If you have added more than one pin to your post, there will be multiple pins to choose from, and the sharer can select their favourite.
These hidden pins won’t slow down the loading of your post, because Tasty Pins adds them as tiny thumbnails which are too small to have any impact.
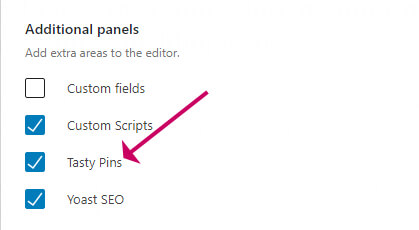
When you scroll down to the bottom of your post, you will see a new panel called Tasty Pins.
If you don’t see the Tasty Pins panel, click on the three dots on the top right of the editor and then choose Preferences and make sure that Tasty Pins is ticked in the Additional Panels section.
Here is the panel you should see at the bottom of your post:
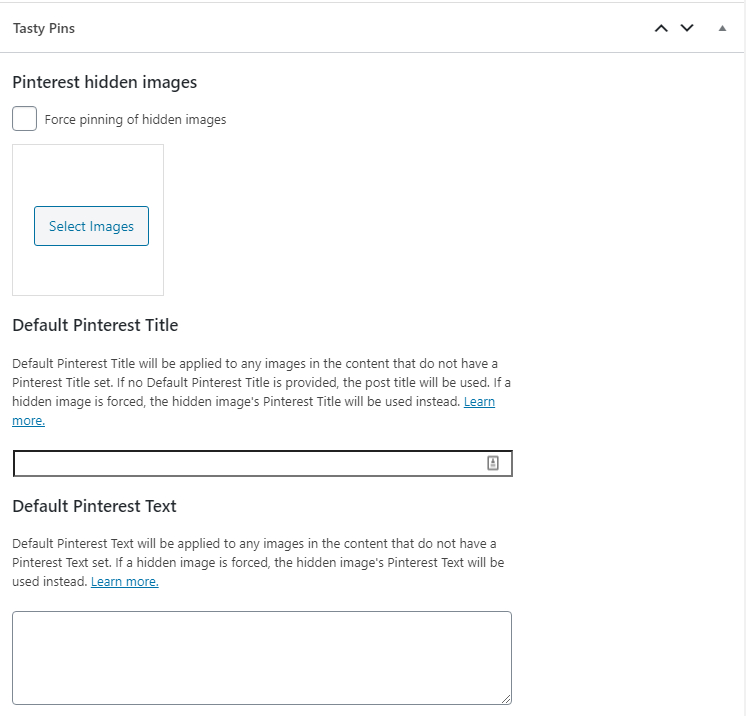
On this panel, you can select your Pinterest image for sharing and enter a title and a description which should show up on the pin when it is shared.
The title and description you add here is the default. You can add specific titles and descriptions for each pin you upload to the post.
You can add specific titles and descriptions by clicking on the pin to open it up in the media library and then enter its pin title and description.
You can add additional pins by clicking the Select images button.
How to set pin descriptions on an image
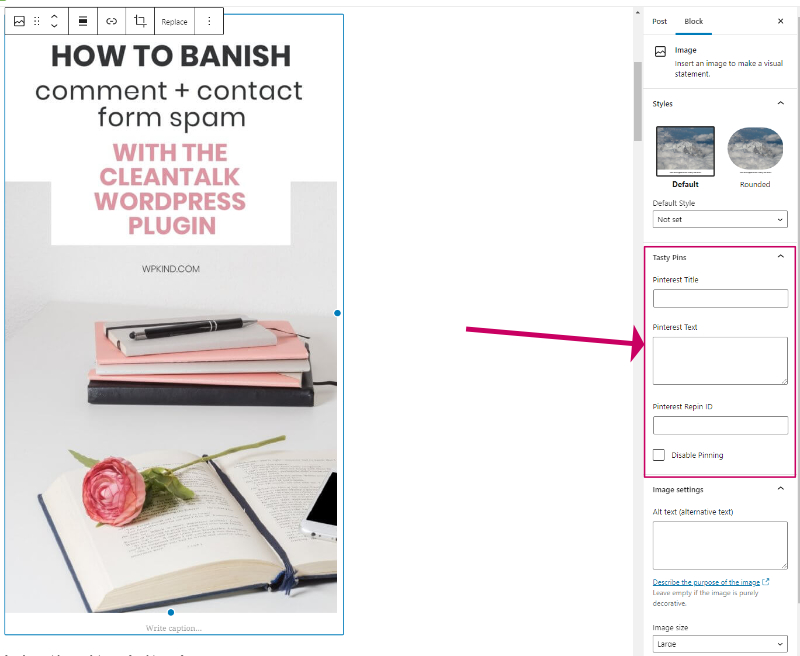
Every image you add to your blog post can have a pin description and title added to it. You can add them in the block settings for the image or find it in the media library and add it there.
How to stop every image on your blog post from being pinned
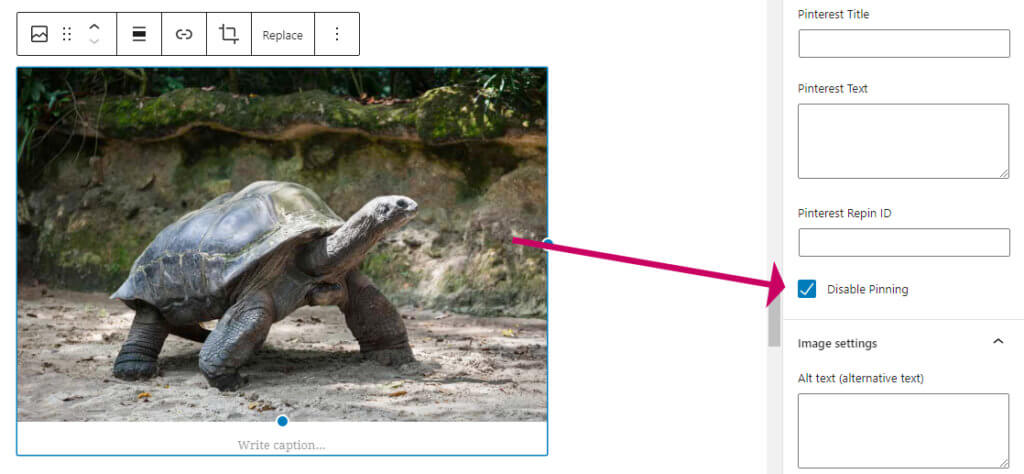
By default, the Tasty Pins plugin will add a ‘save to Pinterest’ hover button at the top of every image. However, you might not want that, as not every image on your blog will be suitable for sharing on Pinterest.
Tasty Pins plugin gives you the option to disable pinning on a particular image, and you can do this in the block settings.
If you have a lot of images that you don’t want to be pinned, it could be a nuisance to have to make this setting on every image.
However, there is a quick way around that.
Go to Settings->Tasty Pins and set the Minimum image height for pinning.
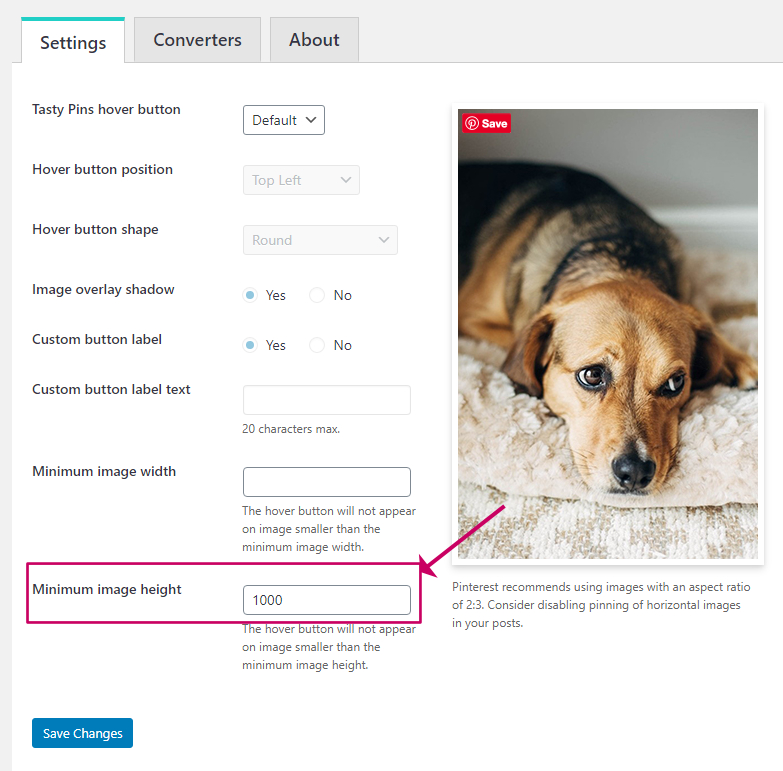
I recommend setting the minimum height to the normal height of your pins.
For me, 1000 is a good figure because all the pins I have are more than 1000 pixels high, and I’m sure I don’t have many embedded images higher than that.
Any image smaller than the minimum you set can not then be pinned. That should include your blog post’s featured image and any other images you embed.
Grow Pro by Mediavine vs Tasty Pins
Grow Pro by Mediavine (formerly Social Pug) is my favourite social sharing plugin for WordPress.
Grow has similar options to Tasty Pins, in that you can hide multiple pins inside a post and add pin descriptions and titles for each pin. It also adds the ‘pin it’ button the top left of images.
Tasty Pins does not provide social sharing buttons, it merely provides the means to add pins to a post and share individual images rather than whole posts.
If you want an all in one solution, then Grow is a very good option because you wouldn’t need to have Tasty Pins too.
The downside of using an all-in-one plug like Grow is because it is difficult to switch out. You would lose your Pinterest data if you switched to any other social sharing plugin.
Will Tasty Pins slow down your website?
Tasty Pins is a very light plugin. It needs to load a couple of JavaScript files to enable pinning of images but that it all. You should not find that it slows down your website.
The hidden pins won’t slow down the loading of your post, because Tasty Pins adds them as tiny thumbnails which are too small to have any impact on page speed.
Final thoughts on how to set up your blog for Pinterest sharing
Tasty Pins is a lightweight plugin that is very simple to set up and use. If you want your blog to rank well on Pinterest, I recommend you install it right away.
At the time of writing it is a very reasonable $29 per year.


