In today’s post, I will go through the steps needed to install WordPress on your new self-hosted hosting account.
This tutorial assumes you have already signed up to a hosting account such as Siteground, Kualo or Bluehost and are at the stage where you need to install WordPress. If you haven’t done that yet, see my post How To Choose a Perfect Host for Your WordPress Blog.
WordPress is such a popular platform for websites now. Most hosts now make it very straightforward to install WordPress automatically. There is no need to download it manually from wordpress.org as we used in the olden days!
In this tutorial, I am going to describe the steps that apply to all hosts that run the Softaculous Installer. This includes Bluehost, Siteground, Kualo, A2 Hosting and many others.
Softaculous is a popular script installer which allows you to easily install various apps including WordPress on your host.
The whole process should take only a few minutes. It is very straightforward and is beginner-friendly. You don’t need to know how to use WordPress to do this, that will come later!

Step 1 – Log in to cPanel on your hosting account
When you first created your account you will have received an email containing the URL of cPanel and login.
Step 2 – Find the WordPress installer icon
When you have logged into cPanel:
- Scroll down until you find a section called Autoinstallers or Softaculous Apps Installer.
- Click on the WordPress icon.
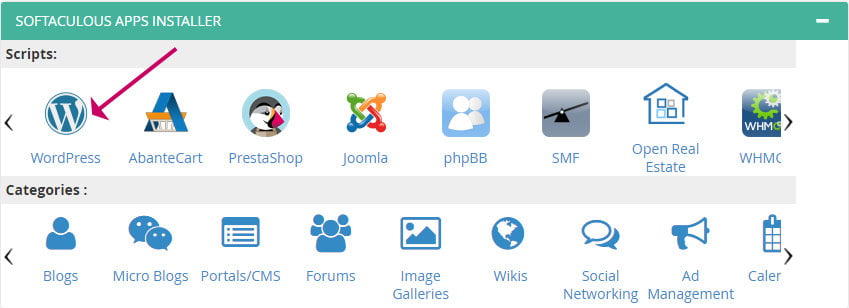
- If you don’t have a WordPress icon click on Softaculous then click WordPress on the following screen.
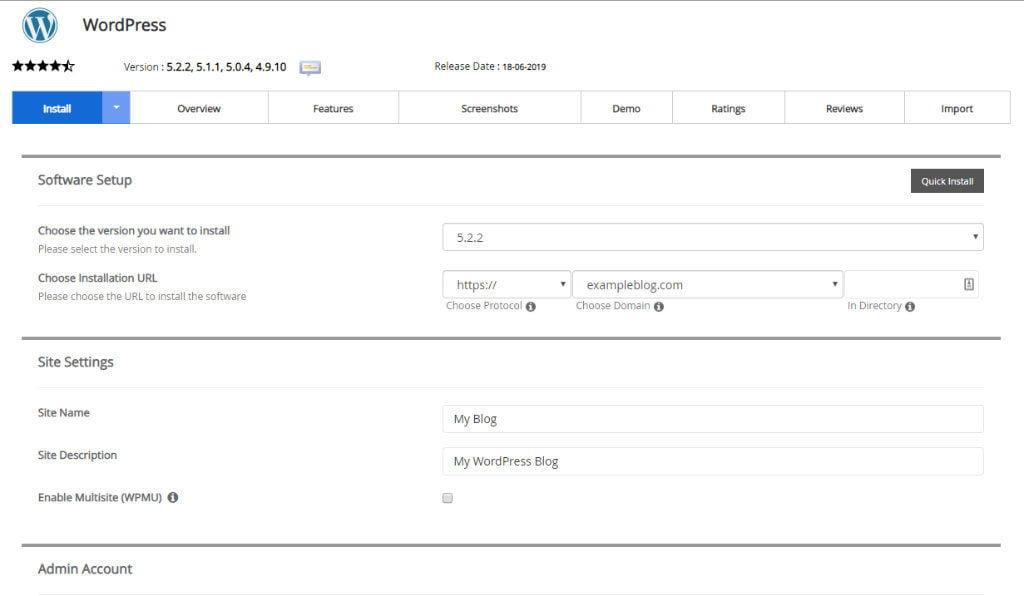
Step 3 – Enter your domain name
- Click on the Install tab.
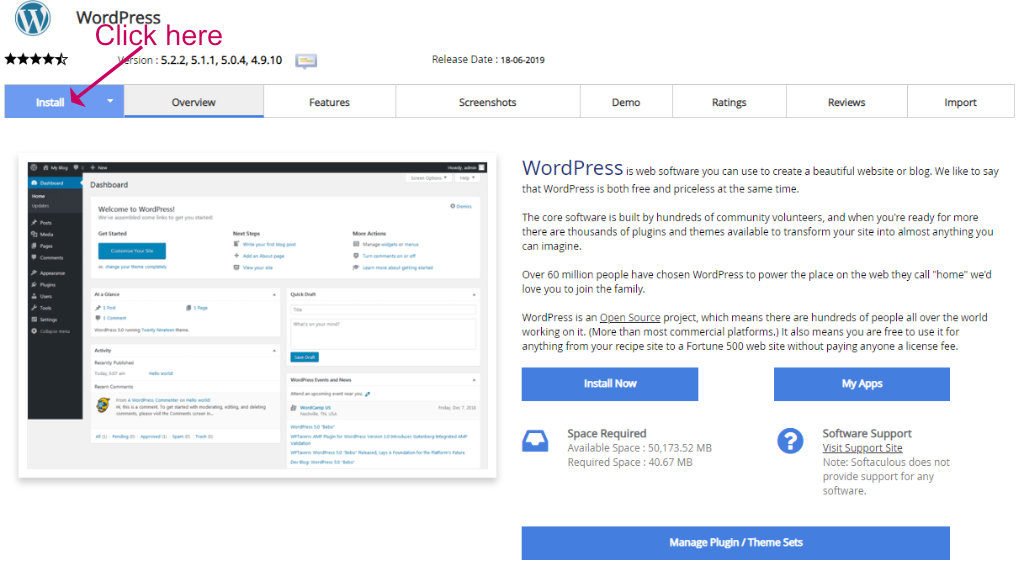
- Select https:// from the Protocol dropdown.
- Select your domain from the Domain dropdown.
- Leave the Directory box empty to install WordPress in the root folder.
Step 4 – Enter the admin username and password
- Further down the screen find the Admin Account section and enter an admin user name and password.
- The default Admin Username defaults to Admin. Make sure you change it to something else, for better security.
- Enter a strong password in the Admin Password box.
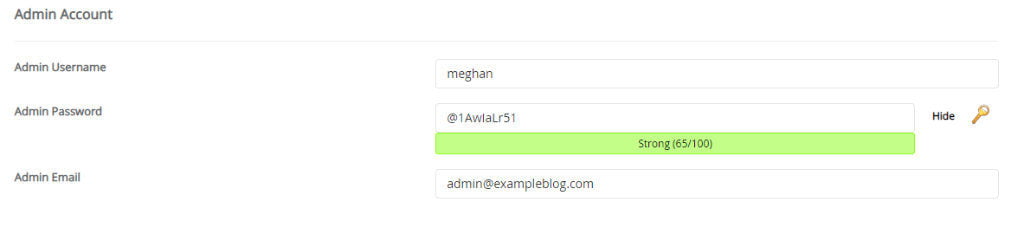
Make a note of the username and password, you will need it later to log in to the admin screen.
Step 5 – Install WordPress
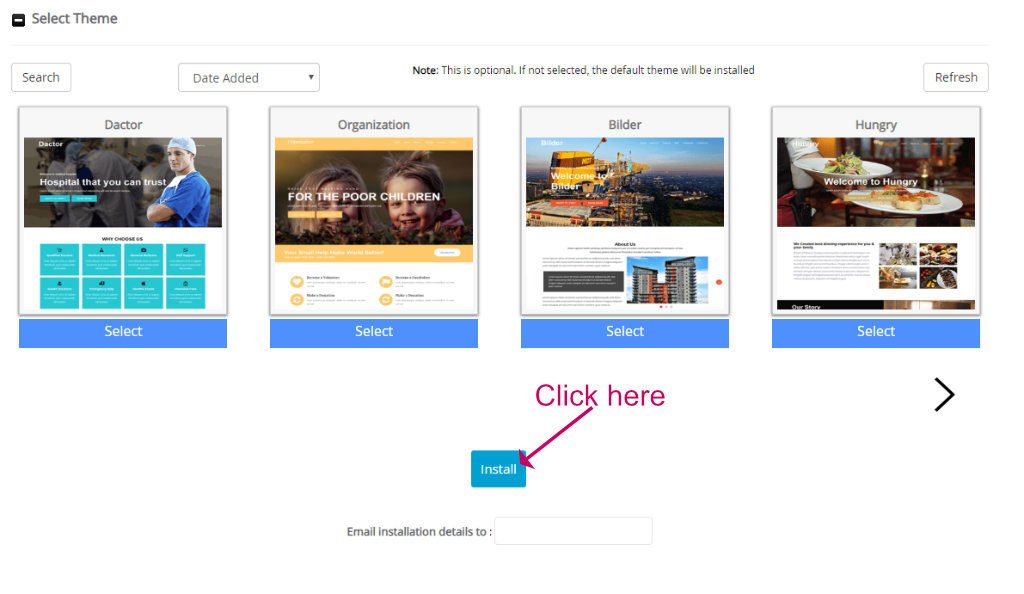
- Scroll down and you can optionally select a theme, but if you don’t, the default WordPress theme will be installed.
- You can select your theme later, don’t feel you have to decide now.
- Click the blue Install button.
- After a short time, you should see the success screen.
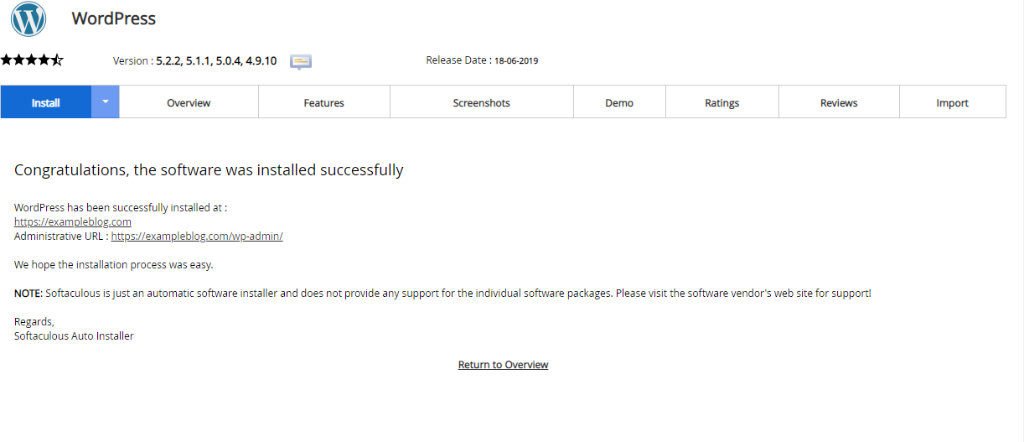
- Click the links and you can open your new WordPress site right away!
- Click the Administrative URL to start creating your new blog.
Wrapping up
In this short tutorial, we have gone through the steps need to install WordPress on your hosting account.
I hope you found this nice and straightforward to do. If you run into problems your host should be able to help you.


