In today’s tutorial, I am going to take you through how to use Cloudflare with your WordPress website or blog.
Cloudflare is a free service for small to medium-sized blogs. It provides a content delivery network, a reverse proxy, denial of service protection, and DNS in one package.

What is Cloudflare?
Cloudflare is a service that sits between the browser and your webserver, known by the more technical name ‘reverse proxy’.
A reverse proxy acts as the intermediary between the person sitting at their PC browsing your site, and the webserver.
Cloudflare is very particular about who it lets on to your website. If it thinks that a site visitor is not behaving like a real person it will block them. The result is that you have only real traffic on your site.
Cloudflare is a CDN service (content delivery network). Cloudflare can also perform a caching function, taking the pressure off your webserver. It puts the cached files in a location close to your users. Your website visitors get to see your content much quicker.
After set up, Cloudflare will become the DNS service for your domain. This means that if you later change the host for your website or email, you will make the changes at Cloudflare, not at your web host.
Why use Cloudflare with your WordPress website?
You might think that adding Cloudflare into the mix seems like an extra complication. Let me tell you why you should think seriously about introducing it.
- Cloudflare caches key parts of your site such as images, script and style files in a location close to your user. This means your site loads up much faster.
- Cloudflare protects you from bots attempting to bring down your site by overwhelming it with traffic.
- Cloudflare provides an easy to use domain record management app.
- Cloudflare provides free SSL for WordPress
- Cloudflare has a free tier that is suitable for most small to medium blogs and websites
Cloudflare protects your blog from being attacked and makes it load faster around the world.
Uptime and speed are two critical factors of a successful blog.
Once you have Cloudflare set up you can rehost your blog and email anywhere you wish by editing the DNS records directly in Cloudflare.
How to setup Cloudflare with WordPress
Let’s look at how you can install Cloudflare on your WordPress site.
Some hosts (including Siteground) have partnered with Cloudflare, and they have an automatic setup for it. The problem is that to use their version of Cloudflare, you must start using www subdomain as the main URL for your blog.
For example,
This blog URL would have to become www.wpkind.local instead of wpkind.local.
If you already have an established website or blog, this is a big problem because you would have to redirect every single link to the WWW version of the URL. This will affect your SEO with Google, and if you are on Pinterest, it will cause issues there too. Pinterest does not like pins that redirect to another URL.
My recommendation is: do not use Cloudflare automation provided by Siteground or any other host that forces you to redirect your domain to a WWW subdomain.
When you set up Cloudflare manually, you don’t have to redirect your domain.
Of course, if your website domain is already www.mydomain.com, then you don’t have a problem. However, I still recommend you setup Cloudflare manually because you then have ownership of your Cloudflare account. Your host is merely providing your originating server. You must be free to switch at any time, and you can switch hosts easily using Cloudflare’s DNS service.
The significant benefit of a DIY approach is that when you come to rehost somewhere else, it is a simple matter of changing the DNS to point to the new hosting, which is usually a case of simply changing an IP address.
Now, let’s go through how to setup Cloudflare with WordPress. It’s pretty easy to do but before we do …
Here are some pre-flight checks:
1. Find out where your domain is registered
When you go through the setup at Cloudflare, you will need to access your domain registry so you can update the nameservers to CloudFlare’s. Where you update the nameservers depends on where you registered your domain, e.g. GoDaddy, 1&1 Namecheap. It could be with your host.
If you are not sure where your domain is registered, you can check with whois.net. When you type your domain name, it should show the registrar details including the Registrar URL.
2. Make sure your site is working correctly on HTTPS
Make sure your website is working correctly on HTTPS rather than unsecured HTTP. There should be no secure warnings in the browser. If your site is not HTTPS or you are having security problems, this post will help:
3. Find and make a note of your current DNS records.
Use DNSChecker to check the current DNS records. Make a note or do a screengrab of what you see there.
How to enable Cloudflare for your blog
What is Cloudflare?
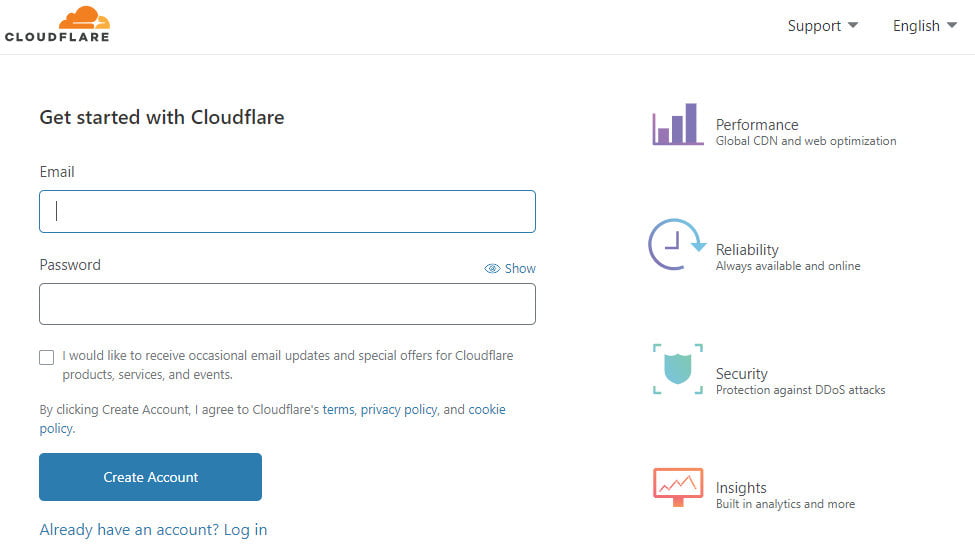
- Go to https://dash.cloudflare.com/sign-up
- Enter your email and a password and click Create Account
Why use Cloudflare with your WordPress website?
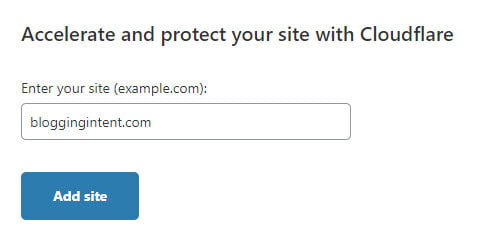
When you have your new account at Cloudflare, the next step is to add your website.
- Click the blue Add Site button
- Enter your bare domain name (without HTTPS and without WWW)
- Click Add site
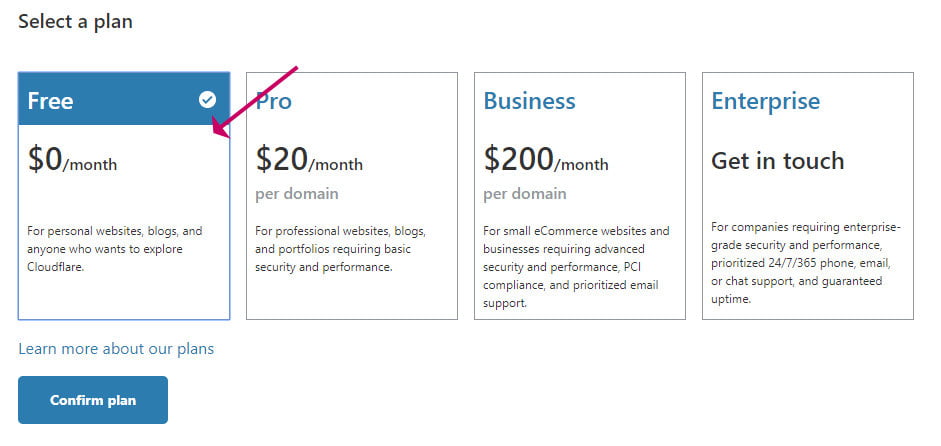
- In the next screen, choose your plan. The free account is fine for us.
- Click Confirm plan to continue.
How to setup Cloudflare with WordPress
- Cloudflare will then scan the DNS records of your domain and list out it’s finding
- Check the records. Use the notes you made in the pre-flight check to check they are the same or go to DNSChecker.
- You should at least find a couple of ‘A’ records. This is the hosting record and should contain an IP address for your web host
- You should also find ‘MX’ records. This is the record needed for email. If you use Google Gsuite for your email, there will be several MX records.
Here is an example showing the DNS for my test domain:
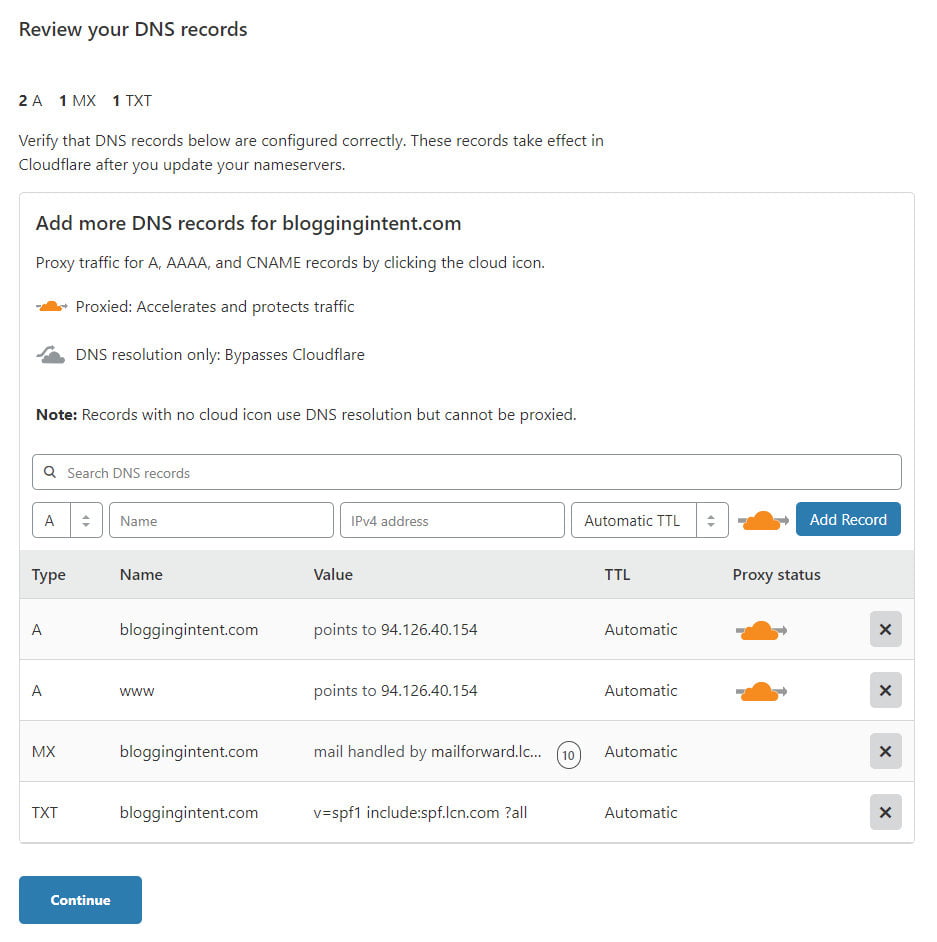
The orange cloud icon against the ‘A’ records means that requests for the domain will go through Cloudflare rather than directly to the webserver.
When you are happy that the DNS records are good, click Continue. You can change the DNS records later if you need to.
How to enable Cloudflare for your blog
The last step is to update the nameservers at your registrar.
Cloudflare will advise what your current nameservers are and what they should be changed to.
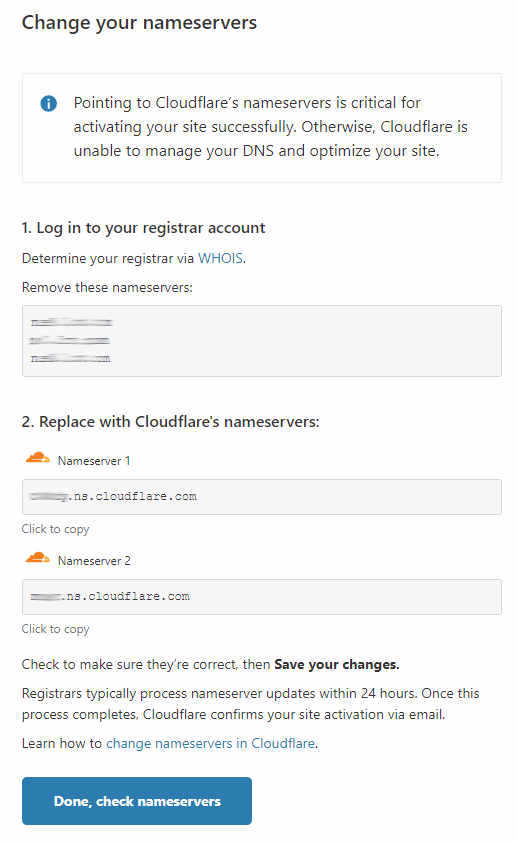
If you don’t know where your domain is registered, click the WHOIS link. The whois website will have an entry for the Registrar URL.
Log in to the site your domain is registered with and navigate to the nameserver settings. If you have trouble, raise a ticket. Here is an example of what you can say to them:
I am setting up Cloudflare with my website, and I need to update the nameservers for domain [insert domain] to [insert nameserver 1[ and [insert nameserver 2]. Please advise how to do this.
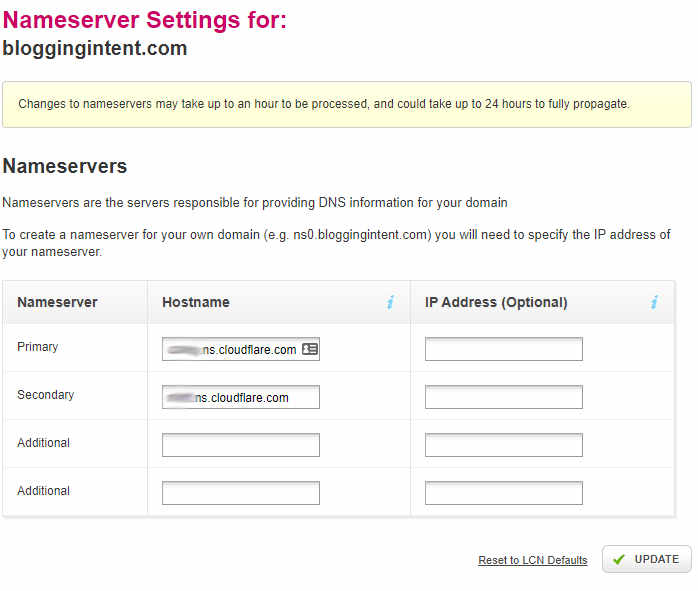
When you find where to update the nameservers, remove the existing servers from the list and add the Cloudflare nameservers instead.
Here is an example.
When you have updated the nameservers, go back to the Cloudflare screen and click the blue Done, check nameservers button.
There can be a delay of up to 24 hours before your site will switch over to Cloudflare. But, I find it usually happens within an hour or two.
On the next screen, you can make some settings for SSL and speed.
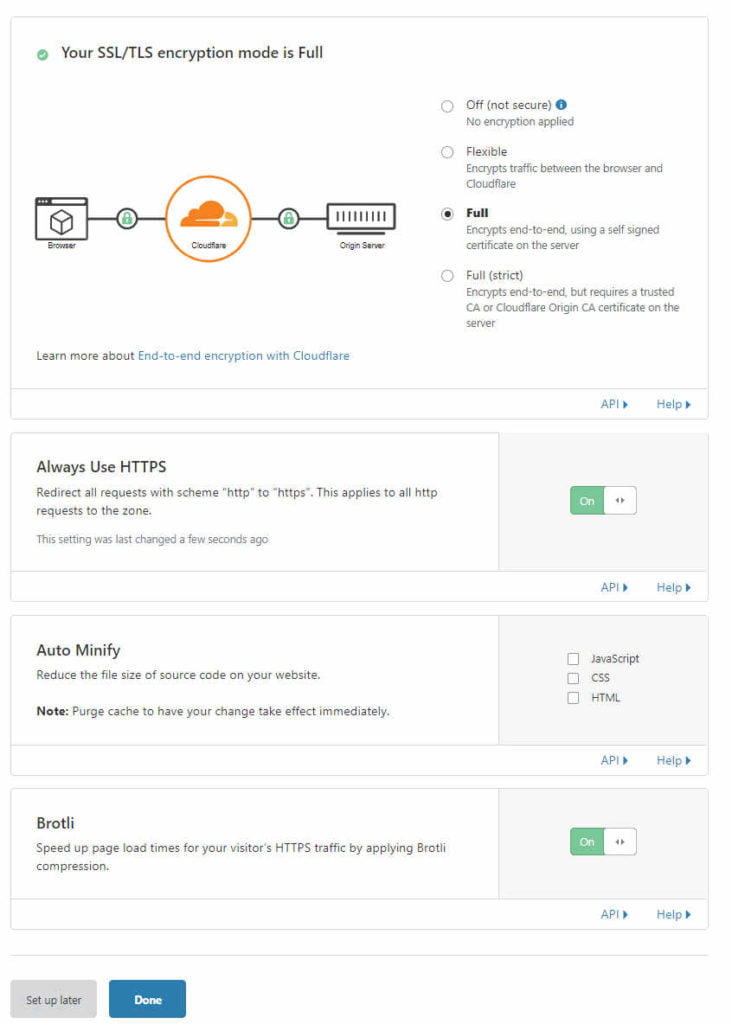
For the SSL setting: If your site was previously working on HTTPS with a padlock (rather than HTTP) select the Full setting. You can also use Full (strict), but this can cause problems when your certificate expires.
If your site wasn’t on HTTPS previously, you can still have HTTPS with Cloudflare, but you will need to select Flexible. This means that the connection between the browser and Cloudflare will be secure but between Cloudflare and your webserver traffic might be sent in plain form, i.e. not secure.
If your site is HTTPS, make sure that Always Use HTTPS is switched on.
You can Auto Minify files if your theme isn’t already doing that. If in doubt tick the boxes to minify.
Brotli compression is turned on by default. I recommend you leave it on for better speed.
FAQs
After your site has switched over to Cloudflare it, you should see no difference visually and functionally. Be sure to give it a good test to make sure all the pages are working correctly.
The most common issue is that you get a ‘not secure’ warning in your browser. This is most likely because due to the SSL configuration within Cloudflare.
- Go back the Cloudflare dashboard
- Select SSL/TLS tab
- At a minimum, you should have Flexible selected. If you have an SSL certificate installed at your web host, then you can select Full or Full (strict).
Finishing up
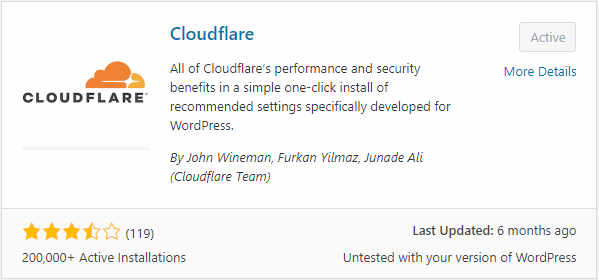
Cloudflare has an official plugin that you can install on your WordPress blog. The primary benefits of the plugin are:
- You can use it to make some Cloudflare settings specifically for your WordPress site
- The Cloudflare cache will clear automatically when you update the site.
Here is how to install it:
- Go to Plugins->Add New
- Search for Cloudflare
- Click Install then Activate
- After the plugin installs go to Settings->Cloudflare
- Sign in to your Cloudflare account
- Click the link ‘Get your API key‘
- Click the ‘API Tokens’ link and click View in the Global API Key row
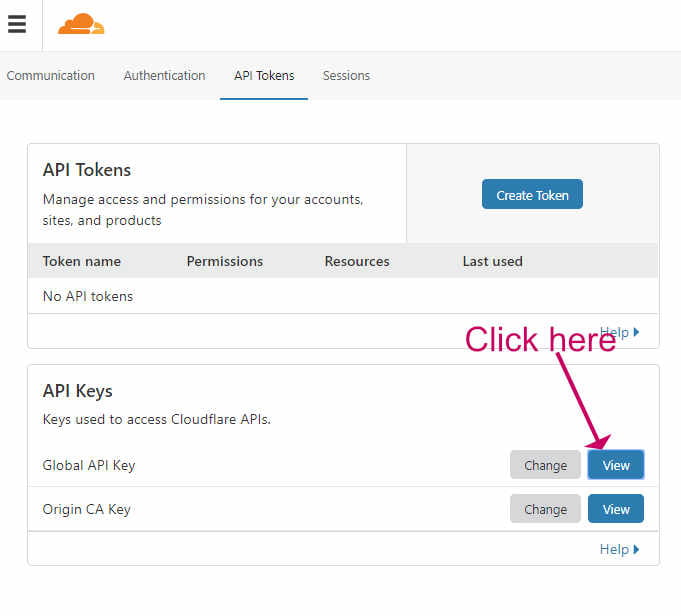
- Copy the API key
- Go back to WordPress and enter your Cloudflare email address and the API key you copied.
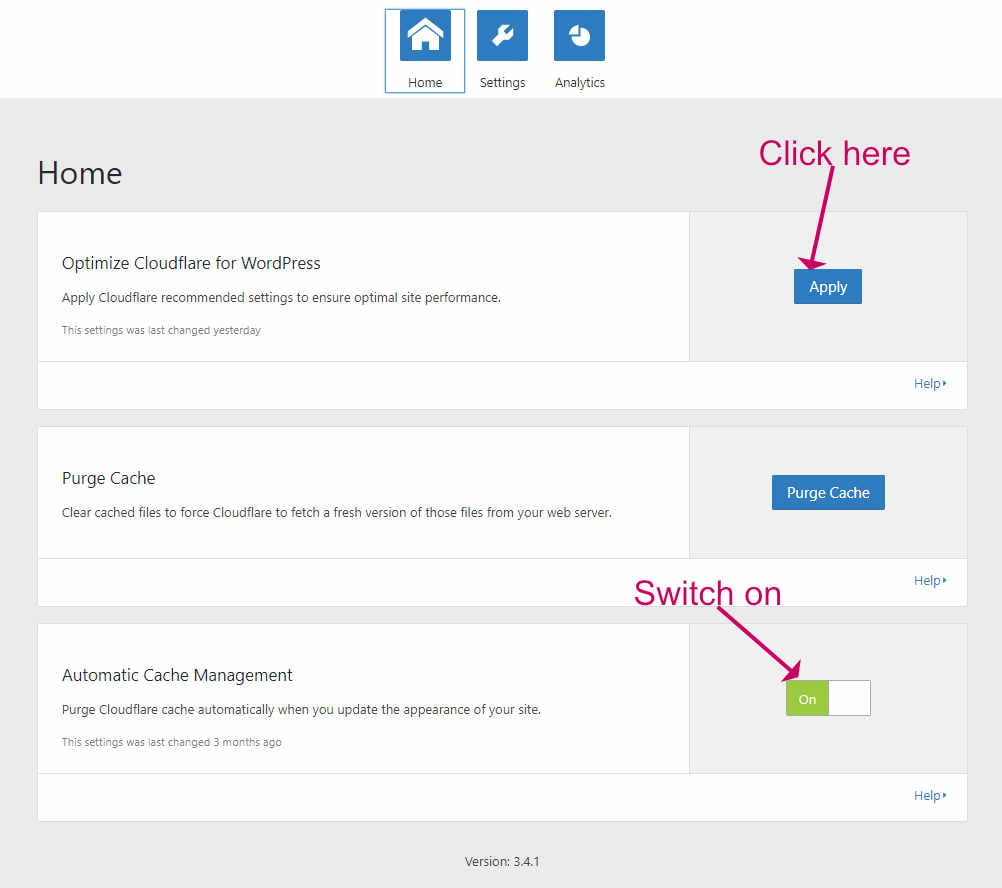
- Under the Home tab click Apply to enable the default settings for WordPress sites
- Make sure Automatic Cache Management is switched on so that the Cloudflare cache is purged when you update the site design.
That’s it! Cloudflare will continuously work in the background protecting your blog from attacks and caching it in locations near to your users.
FAQs
Here are some of the most common questions I get asked about Cloudflare. If you have any others, please do leave a comment below.
1. Create an account at Cloudflare
No, you continue to use your existing host. All traffic will now be routed via Cloudflare instead.
2. Add your site
Go to the DNS settings in your Cloudflare dashboard and switch off Cloudflare by clicking the orange cloud. This will stop traffic going via Cloudflare. Instead, all traffic will go straight to your website.
After you switch Cloudflare off, check everything is working correctly including HTTPS before you switch back.
3. Review DNS records
Your email should work as before. If it doesn’t work after the switch, it will be because Cloudflare didn’t correctly copy the MX records from your original nameservers. Go back to your original DNS records and check they are the same as Cloudflare’s. If there is still a problem, contact the host that provides your email for the correct settings.
4. Update the nameservers
No. The switch will not cause any downtime for your website.
5. Test your site
Browse to your website in Chrome browser and click the padlock icon, then choose Certificate Information. You will see mention of Cloudflare in the displayed information. You can also check your DNS here. You should find Cloudflare listed in the NS (name servers) section.
6. Install the Cloudflare plugin in WordPress
Yes, you still need a caching plugin such as WP Rocket. This is because Cloudflare does not cache the HTML on its servers. Cloudflare only caches static files such as images, CSS and JS files unless you upgrade to the premium service.
Finishing up
In this tutorial, we have found out how to protect and optimize our WordPress blog using Cloudflare CDN.
As well as set up Cloudflare, we also made some tweaks to the settings for WordPress by installing the official Cloudflare plugin.
Cloudflare is pretty much a ‘set and forget’ service. Once you set it up, you won’t have to fiddle around with settings.
Cloudflare is also a DNS service. When your website gets more traffic, and you find you need to rehost, just update the DNS at Cloudflare to point at your new host. If you have kept your email hosting separate to your hosting ( with a service like Google GSuite ), then your email is unaffected when you rehost too.


