In this tutorial, I will show you how to start a new WordPress blog on Bluehost.
If you have arrived here because you want to start your first blog, then let me tell you that you have made a great decision!
I love blogging. I especially love the writing aspect. Give me a laptop, and a quiet place and I will write and write. The great thing about blogging is that you can do it anywhere in the world, all you need is an internet connection!
I have to say though, and I’m sure you already realise this, that blogging isn’t a get-rich-quick kind of thing. If you want to make money with your blog, you have to be prepared to work at it, and there is a lot of learning to do too. It will take you only a few minutes to set up your new blog with Bluehost because the onboarding process is so streamlined; it is actually the best sign-up process I have come across.
However, you probably also know that setting up your new blog is only the start. There are many more hours to be spent, designing your blog, writing posts, marketing your content and lots more.
Fortunately, I have a huge number of beginner tutorials on this site. If you join my mailing list I will send you weekly tips.
Do check out the links at the bottom of this post, if you read all the posts in order you will have a very good understanding of how to use WordPress to make a successful blog.
Need more in-depth help? I’ve got that covered too. Have a look at the services I have on offer, or drop me a line and let me know what you are struggling with.
There are a number of great hosts around, and Bluehost is the top recommended WordPress hosting provider by WordPress.org.
Bluehost is perfect for beginner bloggers because it is all these things and more!
- Very affordable
- Very easy to set up your first blog using their sign-up process
- You get a free domain for the first year
- Great support
Before we start your first blog with Bluehost, or with any other provider, there is a very important task to carry out first.
Choose a domain name.
If you haven’t decided on a domain yet, here is some advice to get you started.
- Should be memorable
Test it out with friends and family, does it roll off the tongue, or is it too obscure? - Six letters or less is good
But not always possible, so don’t worry if you can’t do that. - Avoid hyphens
myfirstblog.com is preferable to my-first-blog.com - Is your domain available on social media Twitter, Facebook, Pinterest, Instagram?
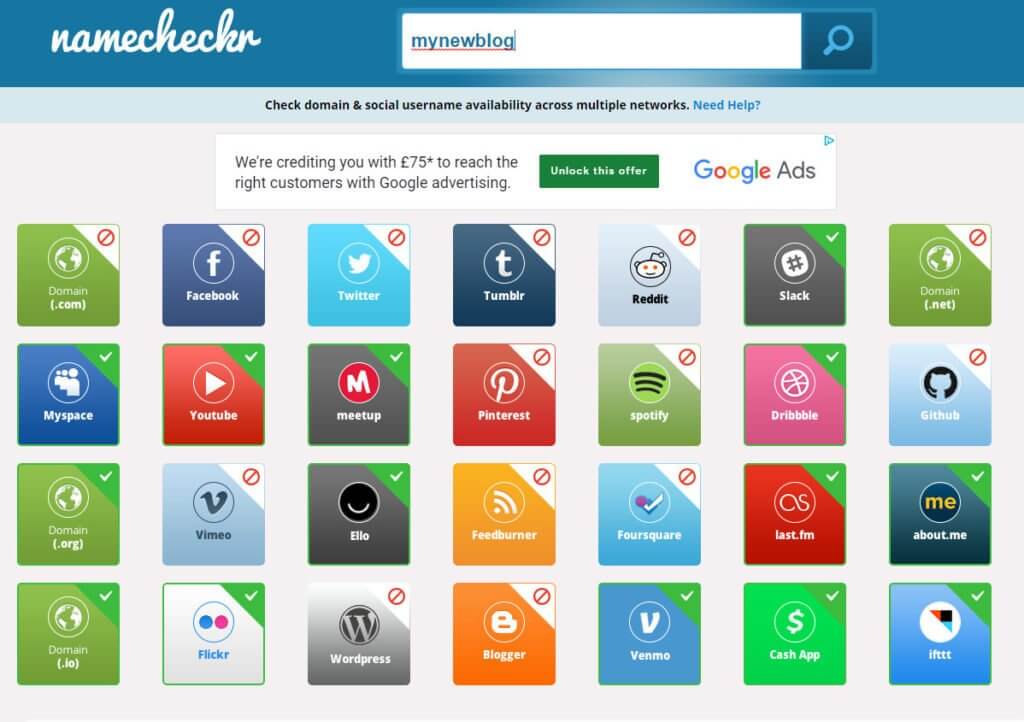
Namecheckr.com lets you know which handles are available.
Type the first part of the domain (with the .com bit) into Namecheckr, and it will let you know whether your choice is available as a .com URL (top left box) and whether it is also available as a username for all the main social networks too.
You might find your domain is available as a URL but if it is already taken as a username at Pinterest and Facebook, then it probably isn’t such a good idea to go forward with it.
My advice is not to get too hung up on your domain name!
It really doesn’t matter too much, as long as you don’t go for something that has no bearing at all on your blog content or could get misconstrued.
Try out your domain idea on your friends and family. Do they think they could remember it? What picture/feeling/emotion does the name conjure up for them?
You can register a domain with whomever you like, NameCheap, GoDaddy, 123Reg, to name a few.
You don’t have to register your domain with your hosting company. However, in the case of Bluehost, they offer FREE domain registration for the first year (saving you about $14.99). The domain registration process is done automatically along with account creation, so there is no need to fiddle around setting nameservers. That’s not to say that updating DNS records is difficult, it is just something else to do!
Do you have your domain chosen? Great! Let’s get on and create our new blog on Bluehost!
Step 1 – Open a new Bluehost account
- Pop over to Bluehost and click the big green getting started button.

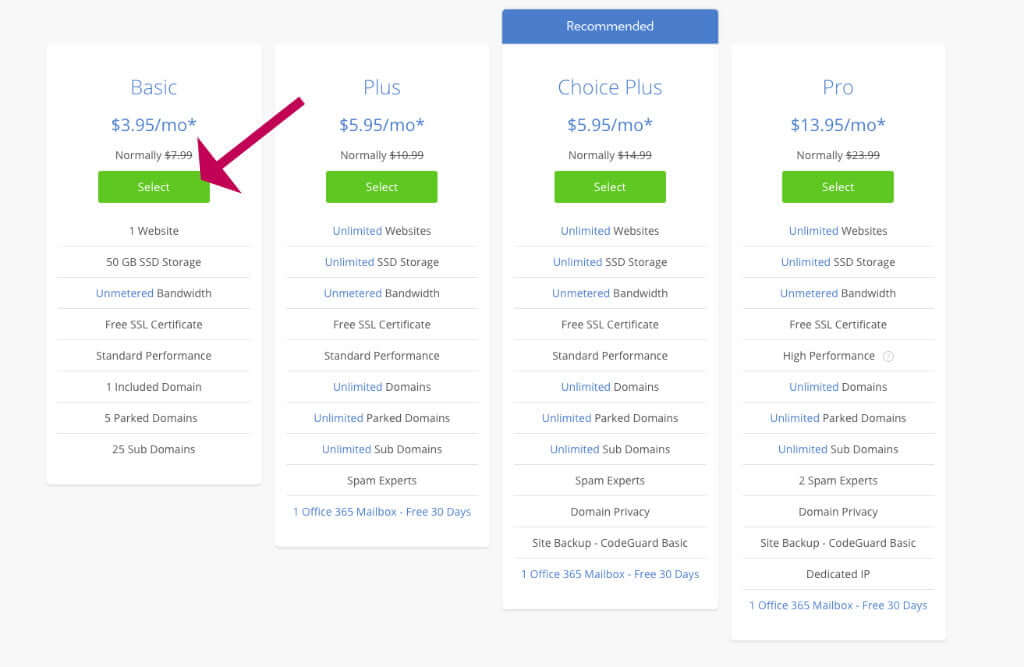
- On the next screen, you will select your hosting plan.
- I suggest you go for the first option at $3.95 per month. $3.95 is the monthly price if you purchase for 36 months upfront, it is more if you elect to pay monthly. I recommend you pay upfront because besides saving a lot of money, you don’t have the bother of renewing your hosting each month. One less thing to think about.
- You can, of course, upgrade to a higher plan during your subscription period if you find you need more capacity.
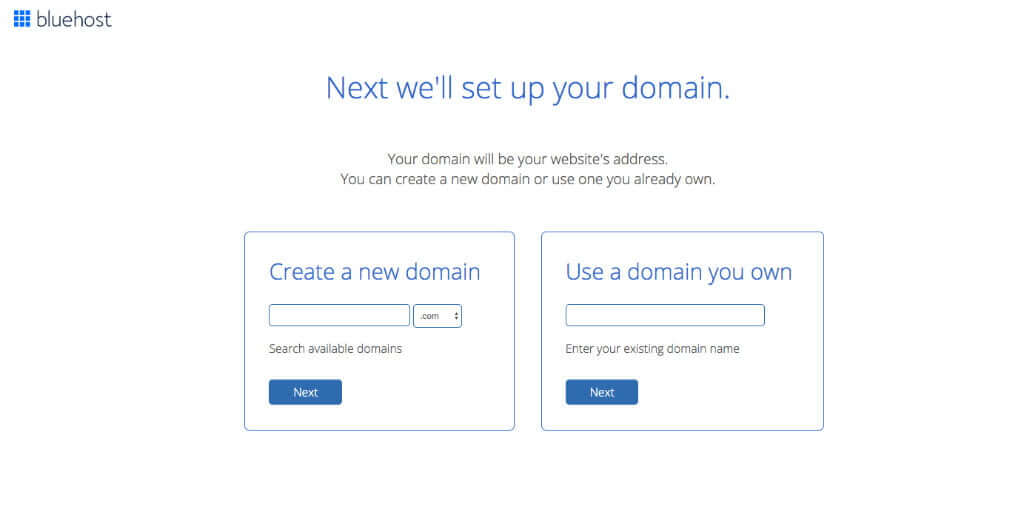
Next, we will set up our domain.
- If you already have a domain registered, enter it (including the .com) in the second box.
- If you haven’t yet registered your domain enter it in the first box.
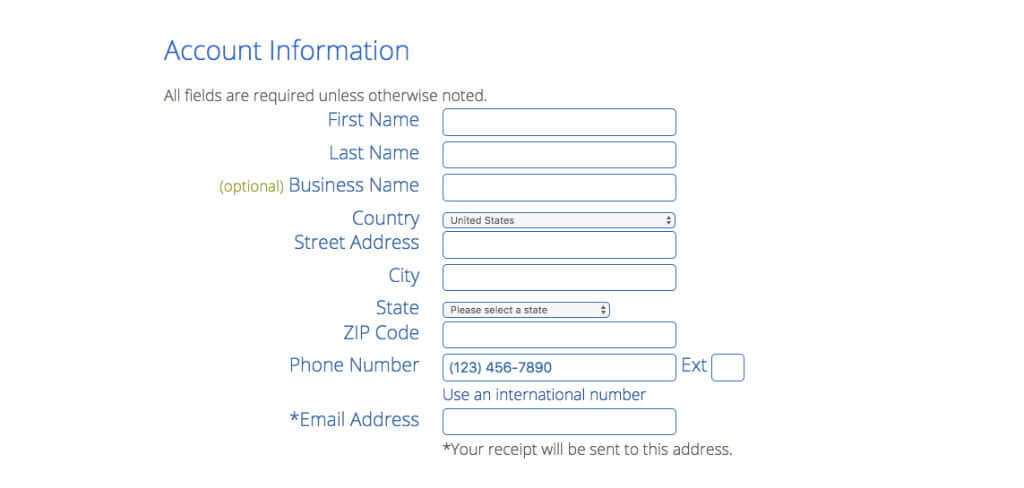
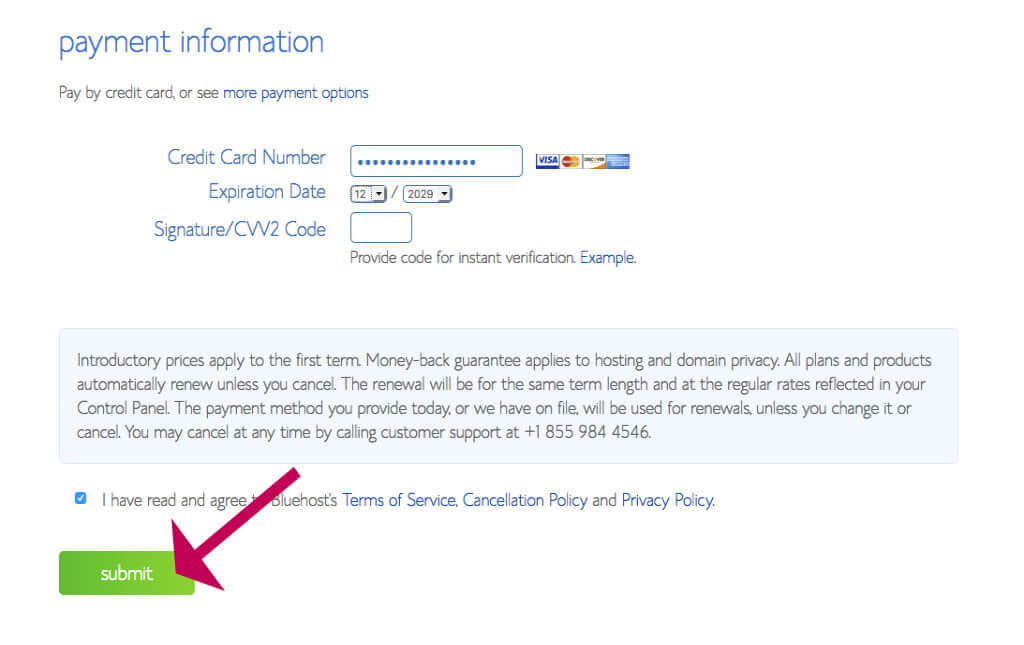
- Fill out your details in the next screen, then complete the payment information, and click the big green Submit button.
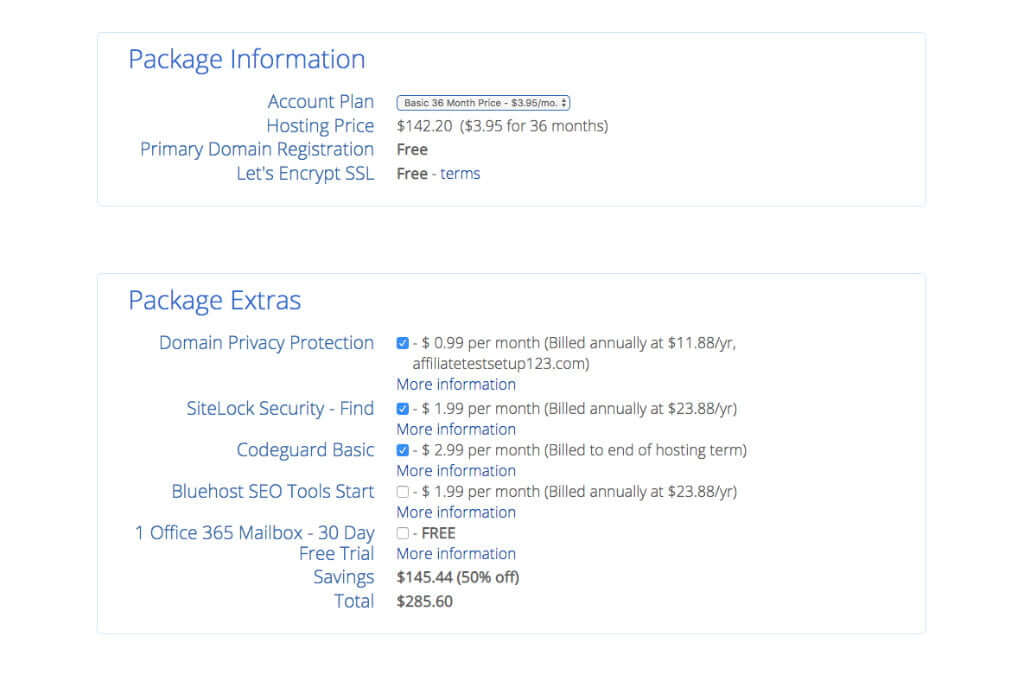
In the next screen, we choose the package (again!) and the package extras.
- Select your package (you need to choose the 36-month option to get the deal)
- Then choose the package extras.
The only extra you really need is the Domain Privacy Protection. This protects your identity as the domain owner.
The other options, Sitelock Security, Codeguard, and SEO Tools can be covered by free plugins, Yoast, and Wordfence, it is not worth paying extra for those, so I advise you deselect those extras.
Now create a password.
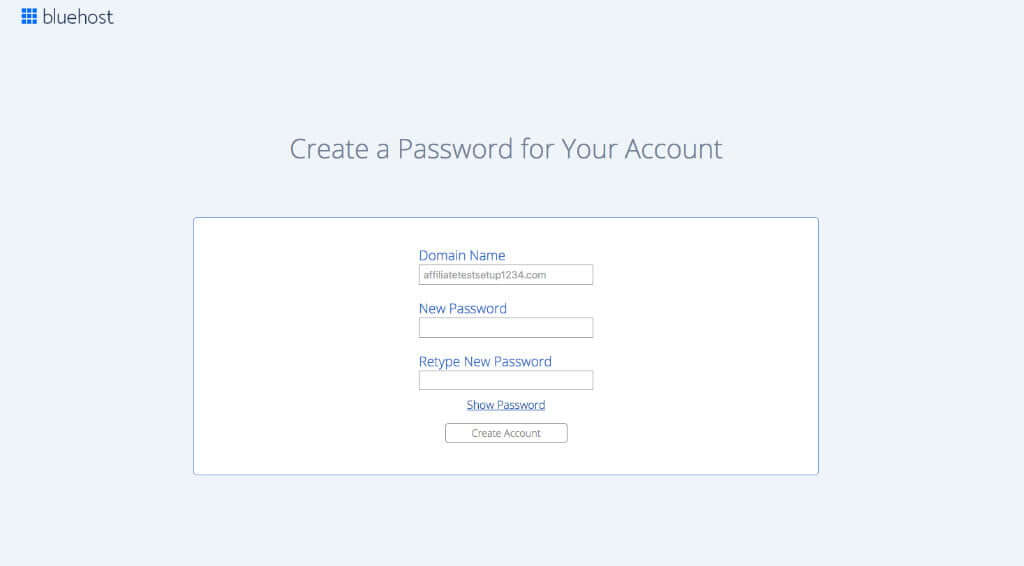
- Click the Create Account button
- Then click the blue go to login button on the next screen
- On the next screen login with your new password
You now have a Bluehost account and a new domain for your fantastic new blog!
Next, we will set up your new blog.
Step 2 – Setup up WordPress
- On the next screen, enter a name for your website. I would enter your domain name here, without the domain extension.
- Then enter a short description for your blog
- Toggle on Do you want a blog?
- Unless you know you need a store straight away, leave the Do you want an online store? option off. You can definitely add a store later if you need one.
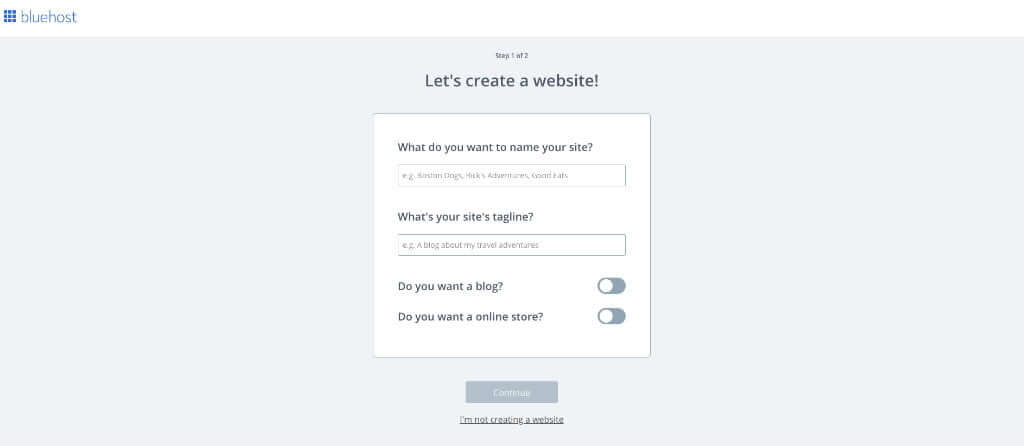
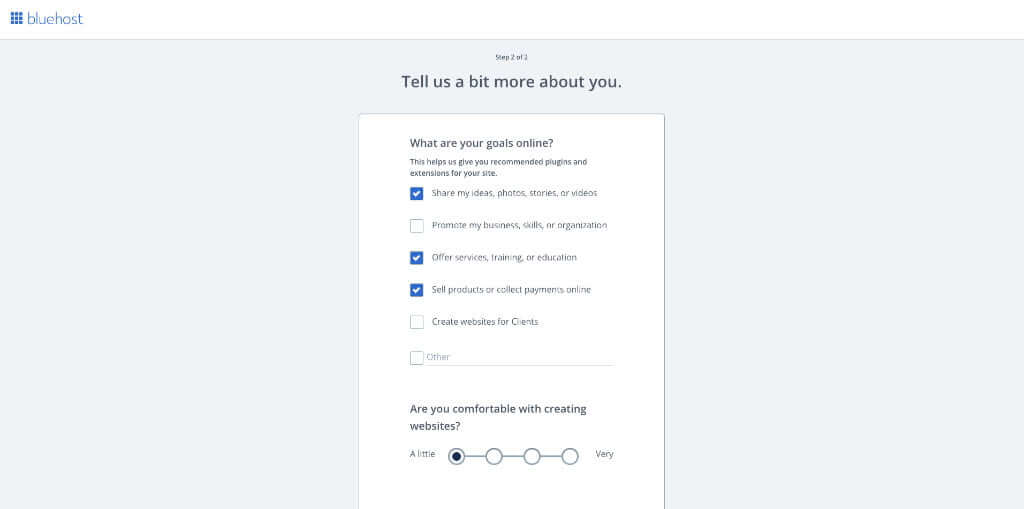
- Next, Bluehost would like to know a little more about what you will do with your website. For a blog you would definitely want to tick Share my ideas, then tick any others that apply.
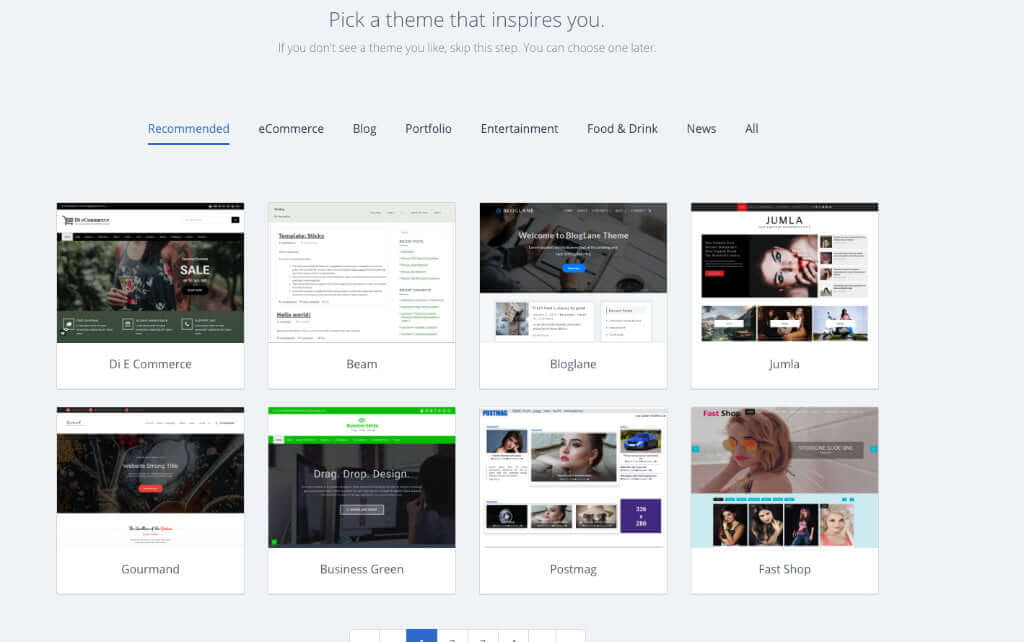
- Next, we pick a theme.
Don’t dwell on this screen for too long, you can change your theme later very easily.
I have a great post here to help you later: How To Pick a WordPress Theme
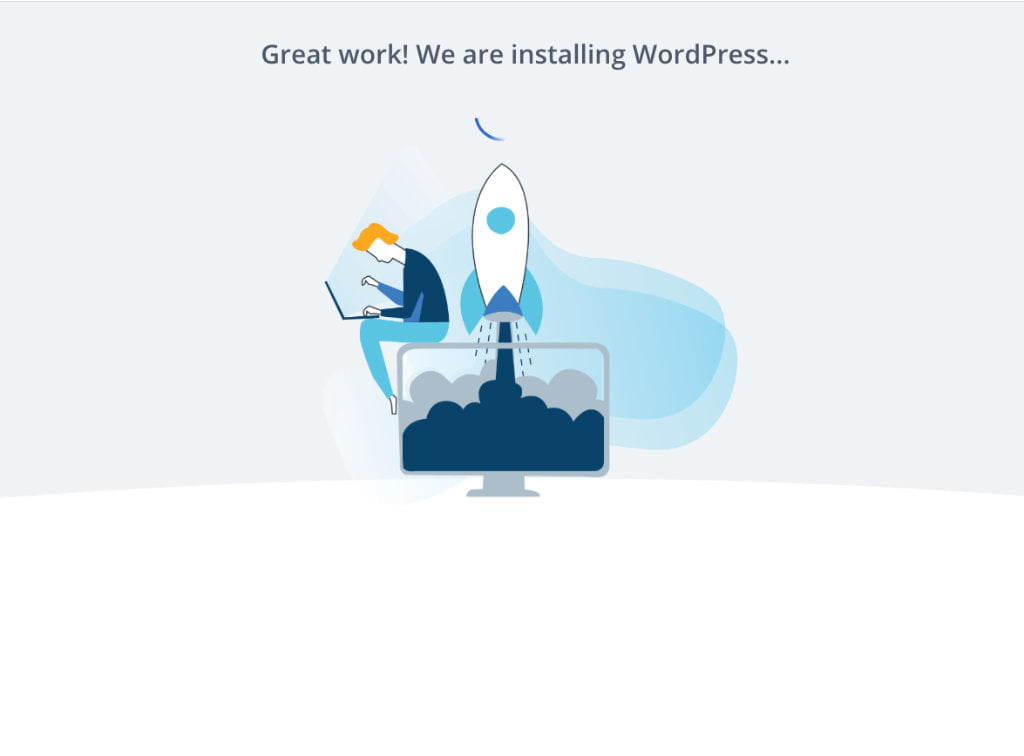
- You’re all done!
- Now, wait while Bluehost automatically installs WordPress for you.
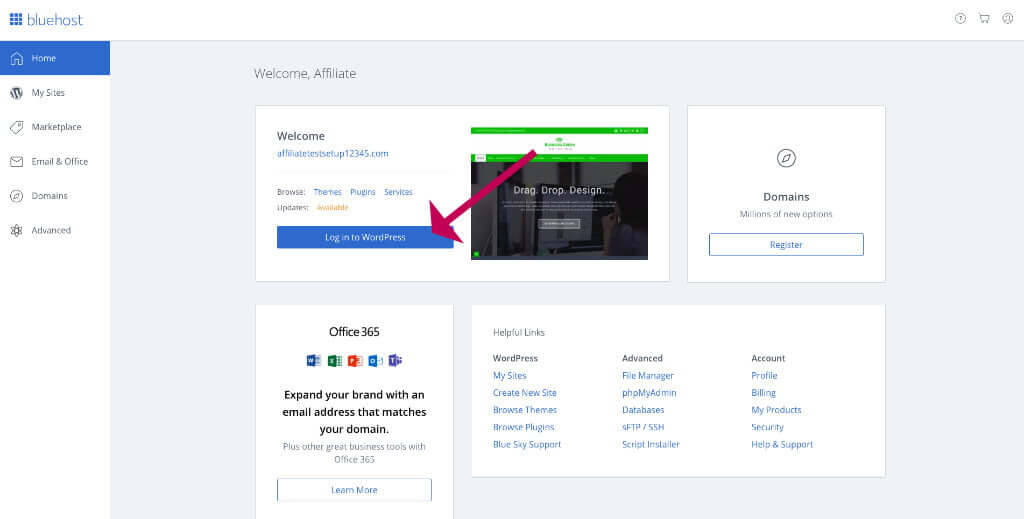
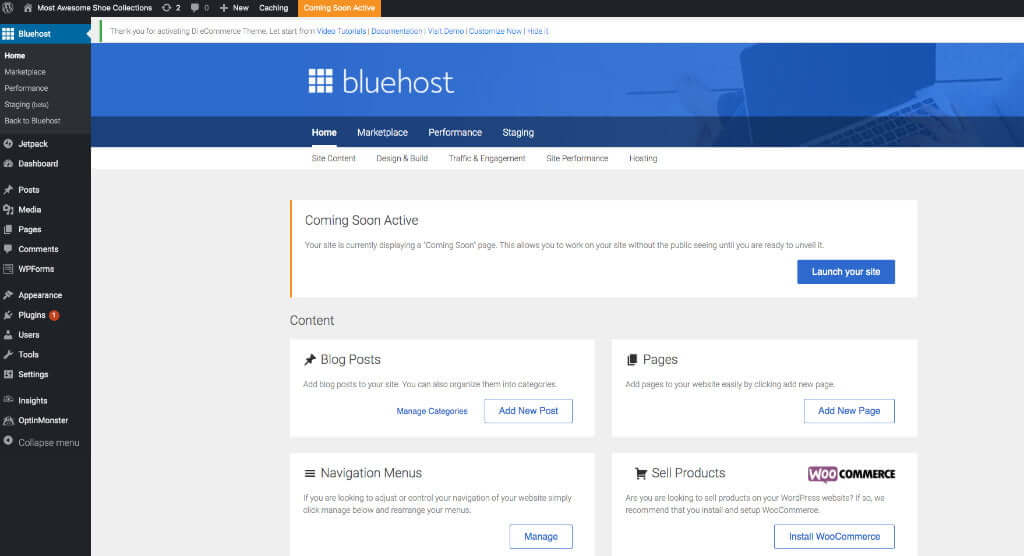
When the installation is finished you should arrive at the Bluehost control panel.
Click the blue Log in to WordPress button to open the dashboard of your new blog
Note: your website won’t work yet if you didn’t purchase a domain with Bluehost. See step 3 below for details on how to update your domain DNS.
If you bought your domain along with host, your new blog is ready to use and you can skip step 3.
Step 3 – Update the domain servers
If you registered your domain elsewhere you will need to update the domain servers to point to Bluehost. If you bought your domain along with hosting, then you can skip this step.
Log in to your registrar and enter the nameservers, ns1.bluehost.com and ns2.bluehost.com in the first two boxes.
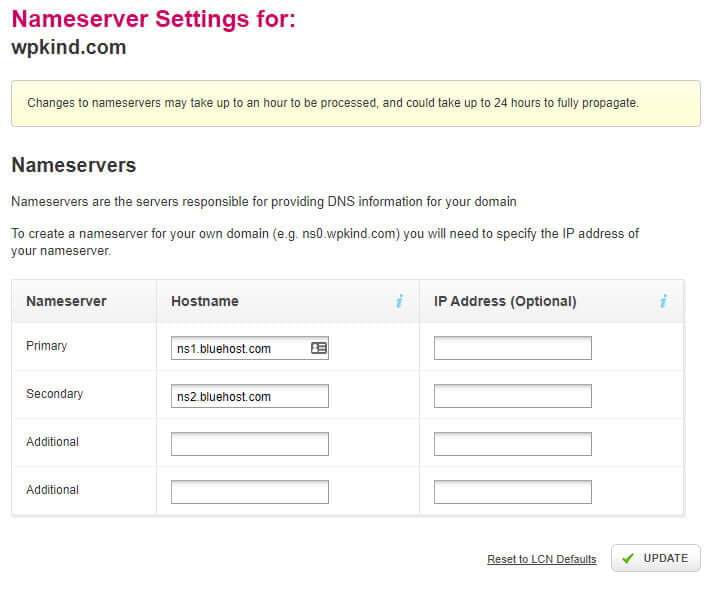
Changes to nameservers may take up to an hour to be processed and could take up to 24 hours to fully propagate. Your new domain may not work for at least an hour.
After the DNS changes are complete, you should find that when you browse to your domain URL, you see your new WordPress site.
Step 4 – Learn WordPress
Now for the interesting bit! If you are a beginner I have some great tutorials to get you started with WordPress here.
I recommend you spend some time upfront getting to know the WordPress dashboard, and how to write and publish posts.
There are also some design tasks to complete, such as choosing a theme, customising your theme, making a logo, setting up your menu and sidebar. I have tutorials below for all these tasks, so do dig in!
- A Complete Guide To The WordPress Admin Dashboard
- How To Pick a WordPress Theme
- How To Customise a WordPress Theme
- How to Add an About Me Section to Your WordPress Sidebar
- How to Edit Your WordPress Sidebar
- 24 Essential Settings After Installing WordPress
- How to Install a WordPress Plugin
- 15 Essential WordPress Blog Plugins
- What is the Difference Between Posts and Pages in WordPress?
- How To Write a Post With The WordPress Block Editor
- All About Images in WordPress
- How To Embed a Video In WordPress (with the block editor)
- How to Add a WordPress Navigation Menu
- How To Make A Logo For Your WordPress Blog
- How To Add A Contact Me Page To Your WordPress Blog
- How To Find And Use A Google Font On Your WordPress Blog
I also offer WordPress professional services. Check out my offers here, or drop me a line and let’s talk. Don’t forget to sign up to my mailing list below and I will send you weekly tips.
I wish you well on your blogging journey and I hope it brings you all the pleasure that it has bought me and many others in the blogging community.
Make sure you connect with other bloggers, joining some Facebook groups is a great start.
[socialpug_tweet tweet=”Those who are prepared to work at blogging, will reap the rewards.”]


