Recently I started to write all my WordPress blog posts in Microsoft Word, publishing directly to WordPress with a click of a button.
I love the fact that Word gives me clean HTML mark-up of the same quality I would expect from writing directly in WordPress.
If like me, you too are a Microsoft Word fan, then this post is for you!
Headsup: I don’t recommend you publish this way if your site is not SSL. Non-SSL websites allow usernames and passwords to be sent in clear text form which leaves you vulnerable to a man in the middle attack. If you don’t have SSL, here is my guide to getting SSL for free.
Why publish from Microsoft Word?
Here are some great reasons:
- You don’t need internet access to write posts
- You won’t lose your work
- Images upload along with content
- Clean HTML mark-up
- You get to use Word’s spell check, grammar check, and synonyms
- Works with Grammarly
And not so great:
- Does not play nicely with offline media plugins, images always upload to wp-content/uploads folder instead of an offline server
- Does not work fully with WordPress 5 Gutenberg, all content exports to a single classic editor block
How do I post to my WordPress blog using Microsoft Word?
- Start Microsoft Word
- Open a new document
- Select the Blog Post template
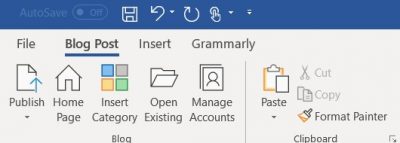
Notice there is an extra tab in the top left of the screen called Blog Post.
Before you can begin publishing, we need to set up a connection with your WordPress blog.
- Click the Manage Accounts button
- Select WordPress

- Click the Next button
- In the next window, enter your domain URL followed by /xmlrpc.php.
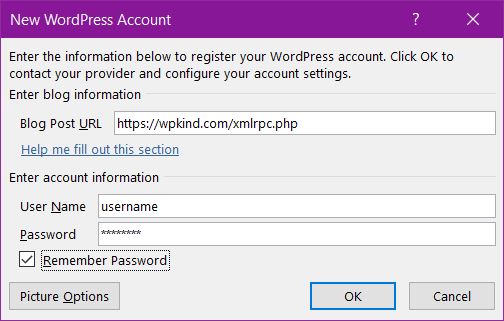
If your site domain is https://mydomain.com, for example, the Blog Post URL would be https://mydomain.com/xmlrpc.php.
- Enter your username and password for WordPress
- Click Remember Password so you don’t need to type it again
The Picture Options allow you to specify whether pictures upload along with the blog post.
I have found that the upload function does not work for a WordPress setup where images are stored on another server such as Amazon S3. If you have this kind of arrangement on your WordPress blog, it is best to switch off picture upload and do it manually instead.
I have also found that Word changes the image names (that I had previously carefully chosen for better SEO), which is another reason to choose the manual upload method.
How to write blog posts using Microsoft Word
- Enter the title of the post at the top
- Underneath the title, the category drop-down allows you to select from a list of categories defined on your blog.
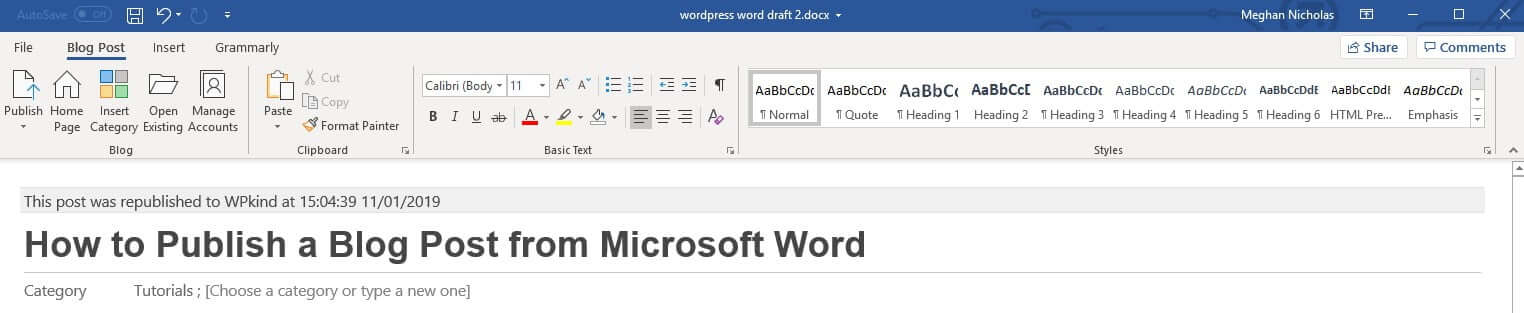
- Type your blog post
- Use the top right-hand styles selector to choose heading types. Bold, underline, and italic styles will all translate directly to WordPress HTML, as will links.
- Add pictures using the Insert tab.
How to publish a blog post from Microsoft Word
When you’re ready to publish the post, click the top left Publish button.
You can also publish as a draft which I prefer to do first, that way I can make changes to the post in WordPress before it goes live, such as edit the post URL, set the tags and do some tweaks for SEO.
In WordPress 5+, the new post exports to a classic editor block rather than individual blocks.
You can convert a classic block to individual blocks easily by selecting the block options and then Convert To Blocks.
Using the Open Existing button, you can open a post on your blog, make amendments and then re-publish.
Wrapping up
In this post, I have taken you through connecting Microsoft Word to your WordPress blog, writing your post and then publishing it.
If you are familiar with Word, you will feel right at home making posts this way.
Images can be an issue. Be aware that the nice name you gave it will be overwritten with something unfriendly, so it is best to avoid putting images in the post until it gets into WordPress.


