Speed is critical for the success of any blog, and it is one of the reasons why I like to choose the plugins I use on my WordPress blog very carefully.
When you first start your WordPress blog, it is tempting to get a bit plugin a happy.
Remember though, that the more plugins you install, the slower your blog will become, which is why, when I find a plugin that fulfils more than one function, I am delighted!
Elementor Pro is an excellent example of an incredibly multi-functional plugin. Among its many features, it now has a popup creator and a contact form creator. I have been able to reduce my plugin count a lot because Elementor does so much.
Before you install anything on your blog, there are are a few considerations to make first (particularly if it is a free plugin):
- Check the last time it was updated, is it recent?
- Does it have a good star rating or excellent reviews?
- Does it have any known security flaws?
- Is it well supported?
Decent support is a bonus, but don’t expect too much if the plugin is free.
Some of the plugins I talk about below are free, and some have premium upgrades.
Not sure how to install a plugin? See my guide to installing a WordPress plugin.
Akismet Spam Protection
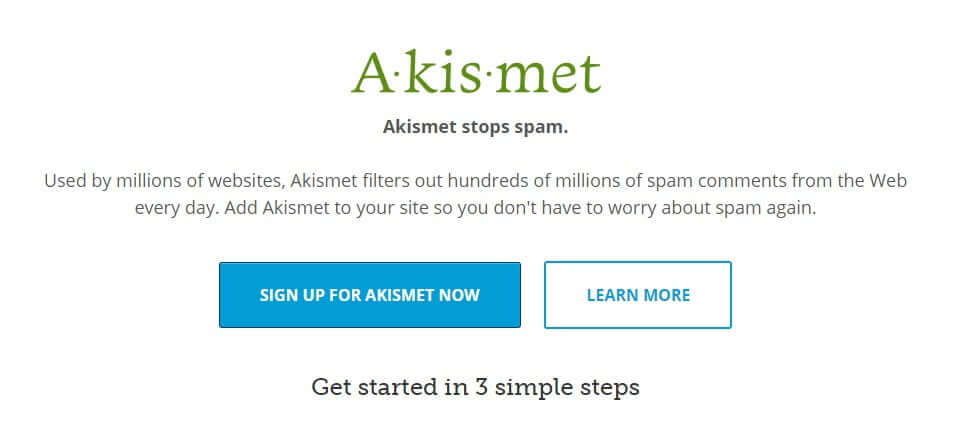
The Akismet Spam Protection plugin is my plugin of choice for preventing spam arriving in my blog.
There are two ways that spammers can worm their way in, and that is through the comment form, and through any contact forms you have on your site.
You might be thinking, that you could disable comments and therefore spam is no longer a problem. However, it is so easy to solve the problem, that it is a shame to let reader engagement suffer by turning off them off.
There is also the option of using Facebook or Disqus comments instead.
When you activate the Akismet plugin, it will begin its job of sifting through every comment as it comes into your site and silently discarding the worst offenders.
Akismet is so good at picking up spam; it rarely needs manual intervention. If you find that spam is slipping through you could try reducing the number of allowed links in a comment by heading over to Settings->Discussion and modifying the Comment Moderation options.
One of my reasons for loving the Site Origin Widget bundle, so much is that it has a contact form that is compatible with Akismet. All you need to do is tick a box, and all messages filter through Akismet, so you don’t need an annoying Recaptcha, fantastic!
To use the Akismet service, you need to sign up for an account. Akismet is free for non-commercial sites or £4 per month for business accounts. I have a great post here – How to Prevent WordPress Spam which gives you directions on how to set up the plugin.
There is another free spam plugin called Antispam Bee, but I haven’t tried this plugin yet, so I will report back when I have given it a whirl.
Update: I have reviewed it here and compared it with Akismet – Antispam Bee VS Akismet – Which Is Best?
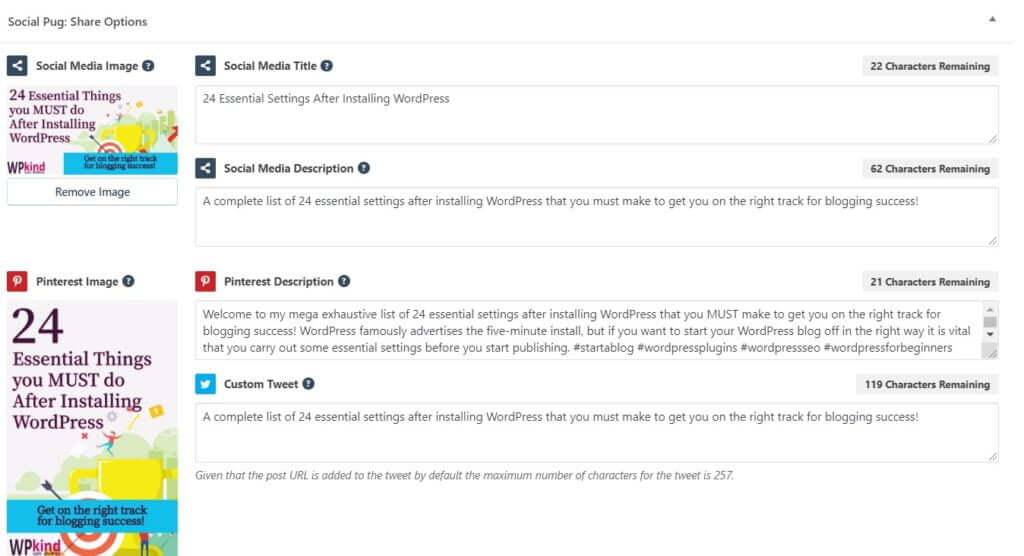
Social Pug social sharing plugin with premium upgrade (now called Grow)

When you start publishing blog posts, you will need to share them on social media sites, and as well as that, you need to make it easy for other people to share your posts too.
The best way to do this is with a social sharing plugin. My favourite plugin for social sharing is Social Pug. Social Pug was recently bought by Mediavine, who have renamed it to ‘Grow’.
Using Grow, you can set up the networks you want to make available for sharing, and the style of the sharing buttons, along with an optional share count. You can place your social share icons above or below your content, or both (as I do), or anywhere else on your post using a shortcode.
You can also set up some follow icons which you can repeat anywhere on your blog, such as the sidebar or footer by entering a shortcode or adding the provided follow widget.
The pro version of the plugin allows you to set additional images and meta descriptions for Facebook, Pinterest and Twitter, which makes it an essential upgrade.
Yoast SEO

WordPress is inherently very search engine friendly, but there is room for improvement.
The Yoast SEO plugin can help you optimise your post content and allows you to modify the metadata (titles and descriptions) that will show up on Google searches.
The plugin also has a unique traffic light system that allows you to measure how well optimised your post is for the chosen keyphrase. It also generates site maps to help Google index your site.
If you are going to be using Pinterest and want to use Rich pins, then you need to have the Yoast SEO plugin activated to get verified.
There is a premium version (£79 per year) which gives you more SEO friendly goodness:
- Suggestions as to which internal posts to link to within the text
- Help with optimising for keyphrase synonyms
- An insights tool, which lets you know which phases your content focuses, great for keeping on track
- Automatic redirections should you change the URL of your post. No more 404 (page not found)!
Elementor Page Builder

The Elementor page builder plugin has become essential for me, so I now include it my list.
Some of you may know that I was previously a SiteOrigin page builder user. But, because I’ve found Elementor to be so fantastic for creating opt-in popups, forms and adverts (plus a shiny new sidebar), I’ve decided to settle on Elementor as my page builder of choice.
I do like SiteOrigin for its simplicity and lightness. It’s still an excellent choice, but for anything more complicated you need something like Elementor. A huge selling point of Elementor is that all design work occurs on the front-end; there is no need to keep switching back and forth to see how things look.
The free version Elementor has a lot of functionality, but if you really want to reap its benefits, you need to upgrade to the pro version.
The pro version adds some fantastic features:
- Premium widgets such as the ability to add post listings, social media icons, opt-in/contact forms, slide shows and more.
- 300+ premade templates
- Popup builder
- Reusable theme elements
- And lots more
Recently I’ve been using Elementor to create advert sections that I can repeat in various locations of my blog.
I’ve also used it to create all my popup opt-ins. I particularly like how great Elementor’s popups look on mobiles. Everything fits in perfectly; you don’t have to make your user scramble around for an X button that has gone out of view.
To easily add widgets to the Gutenberg editor and sidebars, there is another useful plugin (free) plugin, made by the creators of Elementor called Elementor Blocks For Gutenberg.
Related reading: How To Create A Stunning Home Page For Your WordPress Blog
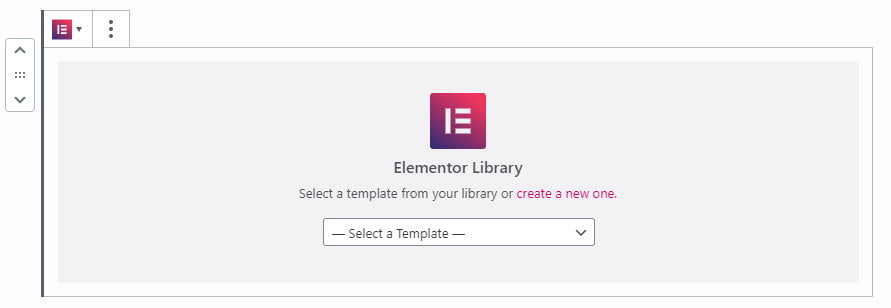
Elementor Blocks for Gutenberg
The Elementor Blocks for Gutenberg plugin works in-tandem with Elementor and Elementor Pro. It provides a way to add Elementor templates such as sections and global widgets directly to the Gutenberg editor or other widget areas, including sidebars.
It’s a free plugin, and it is so simple I wonder why it’s functionality hasn’t been incorporated into the main plugin.
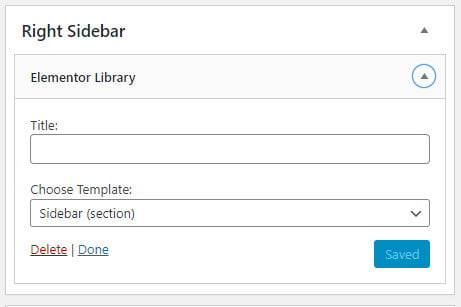
This plugin provides a new Gutenberg block called Elementor Library. To use an Elementor template in Gutenberg, select the Elementor Library block from the available blocks and then select the Elementor template you need from the list.
You can add Elementor sections to sidebars by dragging in an Elementor Library widget.
Here’s how I used this plugin for my new sidebar:
- Create a sidebar section with Elementor Pro and name it ‘Sidebar’
- Go to Appearance->Widgets
- Drag an Elementor Library Widget into the sidebar
- Select the ‘Sidebar’ section I made earlier.
Page Builder by SiteOrigin
I include the Page Builder by SiteOrigin plugin in this list because with it you can to create beautiful layouts for your posts and pages, while the CSS code it adds to your site is minuscule, only 375 bytes to be precise! Compare this with a page builder like Elementor which adds 92 Kilobytes. However, Elementor is a much more sophisticated plugin with an incredible amount of functionality.
SiteOrigin isn’t as functional as other page builders, and you may find it is not as intuitive to use, but it is a trade-off for a lighter page load. If you find you do need something flashier, then Elementor is a fantastic choice.
It’s useful to know that both page builder plugins exist on your blog at the same time, without conflict.
When you pair the SiteOrigin Page builder with the SiteOrigin widgets bundle, you get a whole array of different widgets that you can add to your landing pages.
SiteOrigin Widget Bundle

I’ve mentioned a bit about the SiteOrigin Widget Bundle earlier. It is a set of widgets that work with or without the Page Builder by SiteOrigin plugin.
Put simply, the page builder plugin turns your page into a big widget area divided up into rows and columns. You can place one or more widgets in each area, to make your perfect page layout.
The page builder is perfect for something like a contact page where you could have two columns, with a contact form on the left and your social network follow me buttons on the right, and a map if you have a physical office.
All the widgets also work with the Gutenberg editor too. So you don’t need to have the SiteOrigin page builder installed.
Here are some of my favourite widgets included in the bundle:
- Contact form, with of different types of field
- Call to action, a box with a call to action button
- Layout slider, turn your content into a slider
- Post carousel, show your best posts in a carousel
- Icon, with many types to choose from including FontAwesome
There is also a premium plugin which adds some snazzy stuff, like animations, parallax, and lots more, take a look.
Nofollow for External link

Every time you link to an external site, you give a bit of your site ranking ‘juice’ as its called to the linked site. For a small blog, giving link juice to a higher ranked site could be damaging for your own ranking, so you don’t want to be doing this too often.
However, on the other side of the coin, Google looks favourably on posts that link to other sites, because outbound links add richness to the content, so you still want to do it, but without giving your juice away!
So how do you link to another site without giving away link juice?
The answer is to give the link a ‘nofollow‘ attribute. Nofollow tells Google, not to follow the link when it indexes your site, meaning that your juice is not given away!
It is possible to add the nofollow attribute to links manually if you don’t mind editing HTML, but do you think you are likely to remember to do it every time you link externally?
Well, I certainly cannot rely on myself to remember! This is where the No follow for external link plugin comes in because it will scan each page for external links and automatically add nofollow, so you never have to remember to do it. Fantastic.
Related reading: This One Tweak Can Improve SEO Ranking Immediately
WordPress Editorial Calendar

All good bloggers should have a posting schedule. When you have a strict posting schedule, your readers get to know when to check back to your site, and it sets a standard for consistency which is so crucial for a successful blog.
My posting schedule is currently twice per week. However, for the first time in about six months, I will be posting just once this week due to the epic size that this post has become!
When activated, the WordPress Editorial Calendar plugin, adds a calendar to the Posts submenu, allowing you to drag posts onto the date you want them published. This has the effect of setting their scheduled dates.
The great thing about scheduling a post is that WordPress will automatically publish it when the scheduled date arrives. Often I might be out and about during the publish time, and it feels so good checking my mobile to find my next post appear without me being there to hit the button!
I must confess that I don’t use this plugin that much. I prefer to use the Todoist task app. I have a Todoist project called Editorial, where I add all the posts I am working on as separate tasks.
I set the due date of the task to the scheduled date of the corresponding WordPress post. When I visit the Todoist, I get a nice view of what I am working on as a list along with due dates. I also have a list of post ideas in a project call Post Ideas, which I drag into the Editorial project when I am ready to start work on a post.
I find that the WordPress Editorial Calendar plugin is useful for getting an overall view of what posts are coming up, and I’ve added it to this list because I know that some bloggers make much more use of it than I do.
Smush Image Compression and Optimisation

All good blogs should have fast loading pages. While good hosting has a lot to do with this, you can help things immensely by only uploading images that have been resized to about the largest size specified in Settings->Media.
On my blog, the largest image size is 1024px X 1024px, so there is no point in uploading images any bigger than this because they will always get resized downwards.
The WordPress editor gives you the option to display an image at full size, which is a setting you should only use if you know that the full-sized image is not too big. The last thing you want to do is to turn users away because they can’t be bothered to wait for your huge image to load in their browser!
Google now includes page load time in its ranking algorithm, so that’s another reason to keep image sizes low.
If you don’t resize images, you also waste space on your hosting server, and if you keep doing it, at some point, your host will tell you that you are using too much space and expect you to delete things or move to a more expensive plan.
Heads up: Never download a full-size image from a site like Unsplash or Pexels and upload it straight up to your Media library. Always downsize it first, because usually, the resolution is so high on these images that they are sometimes up to 10meg in size. A rule of thumb is to never upload anything over 1meg in size, which is still quite big.
You can resize images using the free Preview app on a Mac or the Paint app on Windows. I am a big fan of Affinity Photo, which does a great job of resizing and optimising images at the same time. When you go to resize, Affinity also estimates the eventual file size, which is a handy gauge.
Once you are ready to upload your suitably resized image, it is the Smush Image Compression and Optimisation plugin’s turn to do its job optimising the image even further, including the smaller sizes that WordPress automatically creates.
There isn’t much more to say about this plugin, you activate it, and it silently does its job each time you upload media to your library, helping you to have a super-fast site.
So it is a must-have plugin.
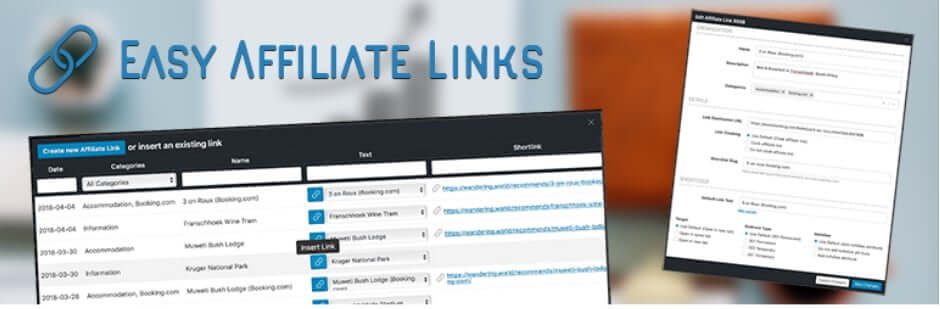
Easy Affiliate Links
If you intend to make some money from your blog, then affiliate sales are likely to form a part of your revenue plan.
Affiliations are relationships that you set up with a company such as a web hosting site like SiteGround, or Amazon.
When you set up an affiliate account, you will receive a link that you can add to your blog posts when you mention or promote the affiliated company.
When a site visitor clicks your affiliate link, and that click results in a sale, you then earn a small commission on that sale.
The Easy Affiliate Links plugin allows you to manage your affiliations in one place on your site. It also makes a pretty link for you to use in your post, for example:
https://mydomain.com/go/siteorigininstead of:
https://siteorigin.com/widgets-bundle/?ref=44When you click the prettier link, the Easy Affiliate Links plugin redirects the browser to the original, unpretty link, and then records the click in its database. It won’t tell you how much money you are making, you would need to head across to the affiliate site for that, but it is useful to know how many clicks you are getting on your links.
Regenerate Thumbnails

The Regenerate Thumbnails plugin is an essential admin tool that I always have installed, and it’s free.
For whatever reason, sometimes WordPress fails to create all the required media sizes, and you can use this plugin re-create the image sizes should there be a problem.
This plugin comes into its own when you switch themes, and the featured image dimensions are different.
Themes often set custom image sizes. If your shiny new theme can’t find the image size it expects, it will display the nearest size it can find, which often is the full-size version.
To regenerate new images sizes, head over to the Media Library and click on an image, then click the Regenerate Thumbnails button.
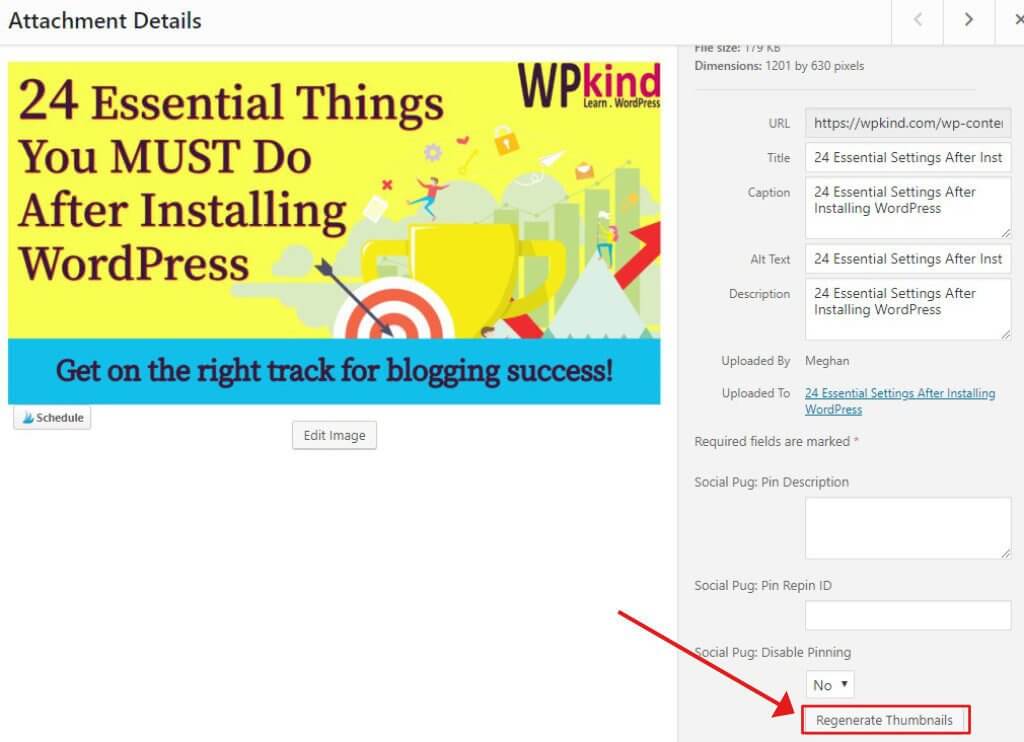
There is also a bulk option which you can run by selecting images and then Regenerate Thumbnails from the bulk options dropdown.
UpdraftPlus
Setting up a backup is one of my 24 Essential Settings After Installing WordPress and the best plugin for the task is the Updraft plugin.
A good host will create backups for you. However, you should not rely solely on your host for backups; you should always make them yourself too.
The Updraft plugin allows you to create as many backups as you need.
When you set up your backup schedule with Updraft, you can also set the backup’s location, and this can be Dropbox. This is a lot safer than keeping them in your hosting account.
I have much more information here on how to backup your site using Updraft.
WordFence
My favourite security plugin is Wordfence.
Wordfence is a free plugin (with a premium upgrade) that protects your site in a multitude of ways. The biggest one in my view is limiting the number of login attempts that anyone trying to access the admin side of your blog can make.
Bots like to try and guess passwords, but doing so requires multiple failed login attempts. The Wordfence plugin will block any users that exceed the number of allowed ‘guesses’.
If anyone does manage to log into your site, you get an email to that effect, so at least you can do something about it. Hopefully, that shouldn’t happen.
Another function Wordfence has is to scan your website for code changes. Code changes can occur in the event of a hack.
WP Rocket
Fast loading sites are critical nowadays.
Google now uses page load time as a ranking factor, so we had better make sure our sites are fast! Fortunately, it isn’t difficult to speed up your site if it lacks in that area.
Many hosts now offer in-built caching, so you don’t have to do much. If your host doesn’t provide caching, or you don’t have a high enough plan to use it, then a caching plugin such as WP Rocket plugin is essential.
Caching works by saving the original WordPress PHP pages as pure HTML for much faster access. PHP is the coding language that WordPress is written in.
After a page has been cached (usually after the first visitor requests the page), any subsequent page requests are served the cached HTML page instead of the original PHP page.
Cached HTML pages load much faster because it takes much less time to run them due to not needing to access the database or the WordPress source code.
The plugin will automatically flush the cached pages for you when you update a page or post.
WP Rocket is a complete site optimisation solution, doing many jobs that would have been done by several separate plugins, such as lazy loading of images, CSS and JS minification, browser caching and more.
Related reading: 15 Super Easy Ways To Speed Up WordPress Today
Wrapping up
In this post, I have talked about all the plugins that I consider to be an essential part of a successful blog made with WordPress.
If you have a plugin that you would like to add to this list, please comment below, and I will have a look. There are many thousands of plugins in existence, and lots more added all the time, so this list is bound to change from time to time, so do check back!
Just one last thing to say …
If you stop using a particular plugin, it is a very good idea to deactivate and then delete it.
Unfortunately, plugins with known exploits are a target for hackers. A deactivated plugin is still a risk even though it is not in use, so it is safest to just delete anything you are not actively using.


