In today’s post, I look at how to convert existing WordPress Posts to Gutenberg blocks.
WordPress introduced Gutenberg blocks in version 5.0 of WordPress. Since then, the features in the block editor gradually improved. At the time of writing, we are now at version 5.3.
Related reading: What’s New in WordPress 5.3
What is the Gutenberg Block Editor?
If you are not on at least WordPress 5.0 yet, then the block editor might be a bit of mystery. Or perhaps you upgraded but then installed the WordPress Classic Editor plugin, and then silently ignored it?
If you are not yet using the editor, then let me tell you that you are missing out! Spending just a little time getting to know the new editor will make you realise how quickly you can write fabulous looking posts.
What’s great about the block editor you may well ask?
Let’s have a look at the things I think are most useful:
- Each element of a post, paragraph, image, heading etc. is one entity with its own settings. That means you can set the font colour or size of a particular paragraph without affecting any of the others.
- You can move blocks around and duplicate them.
- You can make blocks reusable and have them repeat in posts across your whole blog and update in one place only!
- The block editor is much more visual, i.e. the fonts you type in, the heading size, the background colour, and the page width are the same they are when you view the post on your blog.
How do I upgrade to WordPress 5.0 – will posts look the same?
I have a very simple to follow post here: How to Update WordPress the Right Way, which takes you through how to update WordPress. Remember that you should always back up your blog before you update anything. My post tells you exactly how to do back up, so you are covered.
Upgrading to the latest version of WordPress from pre-version 5.0 will not cause your posts to display differently.
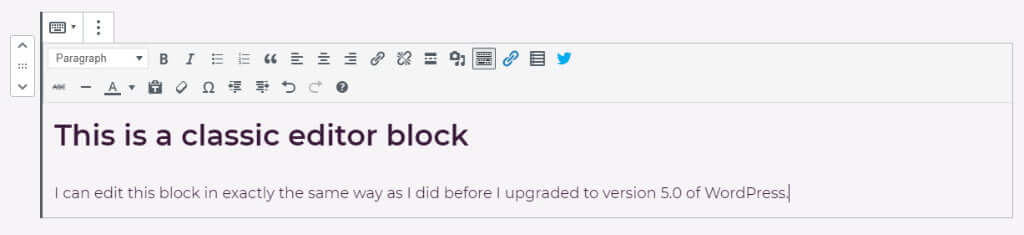
After an upgrade, you will find that when you view an old post in the Gutenberg editor, all text becomes one big Classic Editor block.
The features of the Classic Editor block, i.e., the toolbar, the method of adding headers, images and links are the same as the old editor, so you should feel right at home using it.
If you feel that that you really want to keep using the old classic editor as it was before upgrading, there is a plugin you can install called the WordPress Classic Editor. After you install and activate the plugin, you can set it up so that the classic editor becomes the default editor. The post editor will then look exactly the same as it did before you upgraded, and you can pretend the new block editor never existed!
How to convert blog posts to the new editor
As I said, after the upgrade your whole post will become one big classic editor block, which you can continue to use if you feel most comfortable doing that.
The other option is to convert the big classic editor block to individual blocks so that you can start making using of the Gutenberg editor properly; this is very easy to do with just a few clicks.
- Click on the classic block menu (three vertical dots)
- Click Convert To Blocks
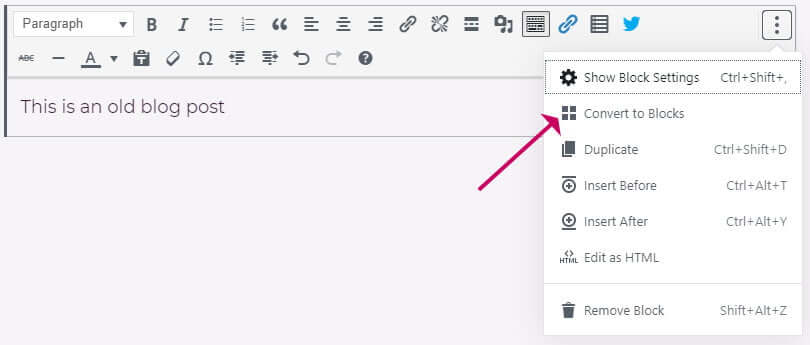
Each element of the post, e.g. paragraphs, heading, images, lists, etc. will be converted to individual entities. The post will continue to display in precisely the same way on the frontend, but now you can edit your post as a series of blocks rather than one big one.
Block Editor Crash Course
I have a very detailed guide here: How To Write a Post With The WordPress Block Editor (Gutenberg) which I recommend you go through, but here is a quick rundown of the ten most important things to know about the block editor.
- Each block has its own settings in the Block tab on the right. As you click on each block, the settings on the right will update depending on which block you selected.
- Links can be added in the same way as before by highlighting the text and pressing CTRL+K.
- Each block (when clicked on) has a menu which comes up when you click on the three vertical dots on the right.
- You can reorder blocks, by clicking on the up/down icons that appear on the left when you click on a block.
- Add a new block, by adding a return after the last block or use the + icon.
- All new blocks are paragraph blocks, but you can quickly select a different kind of blocks using the forward-slash character / then start typing the block name. So for a heading, you could type /head.
- You can transform a block to a different kind of block, e.g. change a paragraph block to a heading block using the top left icon on the toolbar that comes up when you click on a block.
- You can view the full structure of your block post using the i icon in the toolbar at the top of the post.
- You can make settings that affect the whole blog post, such as setting the featured image, set the category etc. in the Document tab on the right-hand side.
- To quickly save a post use CTRL+S
Wrapping up
In this post, I have taken you through how to convert old blog posts to the new block editor, plus I have given you a crash course on using it.
I have a library of posts on how to use the block editor, which I recommend you visit. Once you know how to use the block editor, you will find that you can create posts just as quickly as you did before if not more so!
Let me know in the comments below if you have any questions or anything I missed; I am always looking out for new blog post ideas.


