Creating a blog post that people will want to read and Google will want to index, is unfortunately not just a case of just writing your heart out and hoping for the best.
There are several things that you must take care of before you hit the publish button, to ensure that millions flock to read your post!
Do these 21 things before you publish your blog post, and you will be on the right track to creating a well-structured, focused and engaging article that gets ranked on Google.
If you haven’t done so already see my post 24 Essential Settings After Installing WordPress which will give you a headstart before you begin.
1. Do your keyword research, choose a keyword phrase
Keyword research deserves its own post, but here are some pointers to help you choose.
Before you start writing you should always have some keywords in mind and ensure that your content is based around those keywords.
To find keywords, search for a phrase that you think people might use for your chosen topic and then refine that phrase into a few words.
Here are some free tools to help you find keywords:
Once you have your keywords find some long-tail keywords that you can also use within the content using Yoast Suggest.
Long-tail is a refinement of the main keyword, for example, ladies summer shoes is a long-tail of shoes. It is going to be much easier to rank for ladies summer shoes than on shoes alone.
Depending on the popularity of your main keyword, it might be better to write your whole post about a long-tail keyword instead because you are more likely to rank for it.
Here is a post from Yoast.com that I found helpful: How to choose the perfect focus keyword.
2. Make an outline
Once you have decided on keywords, take those words and then search again. The type of posts that come up will give you an idea of what kind of articles people are seeking and is known as search intent.
Are you seeing lots of list posts, instructional how-to guides, recipes, products to purchase? This information will help you to decide on a structure for your post.
In the previous step, you decided on your keywords and if you also found some long-tail keywords to include, use them to create some or all of your headings.
If you are making a list post, write down all your points.
For each heading or list item add a short summary, and any research notes and links you have found. This helps to prompt you what to write when you come back to the post later.
3. Make sure you have a catchy title and edit the permalink
Create a compelling title that hooks your audience’s attention and makes them want to click onto your post.
- Try to convey what they have to gain by reading your post
- Include your keywords
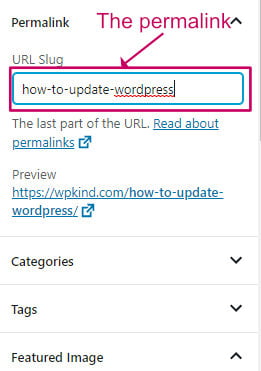
The permalink is the last part of the URL and should contain your keywords in a more succinct form. e.g.
https://wpkind.com/how-to-update-wordpress
Think about future updates to the post when you set the URL. For example, I have a post called 15 Essential WordPress Plugins. The permalink is:
https://wpkind.com/essential-wordpress-blog-plugins/
Notice that I took 15 out of the name. Doing that means that I can keep the same URL should I update the post later to include more plugins.
You can check and update the permalink in the Document settings.
- On the right-hand panel, click on the Document tab
- Scroll down to Permalink
- Update the URL Slug
4. Write the post – content is king!
I’m thinking you probably won’t forget to write the content haha!
But, here are some things to ask yourself before you hit publish:
- Does the post have an endearing introduction that draws your reader into the rest of the article?
- Is your content focused on the subject of the post?
- Is it interesting?
- Does it address the need of your intended audience?
- Is it too short? (Google favours longer posts)
- Is it too long and rambling?
- Does it have a strong conclusion/final thoughts/wrapping up section at the end?
5. Optimize your content for keywords
Make sure you have used your keywords in the post title and multiple times within the post content, especially within the introduction.
The free Yoast plugin will help you with this because it analyses the content, and you can use the results as a checklist.
When you have installed and activated the Yoast plugin. Scroll down to the bottom of the post and you should see a new panel.
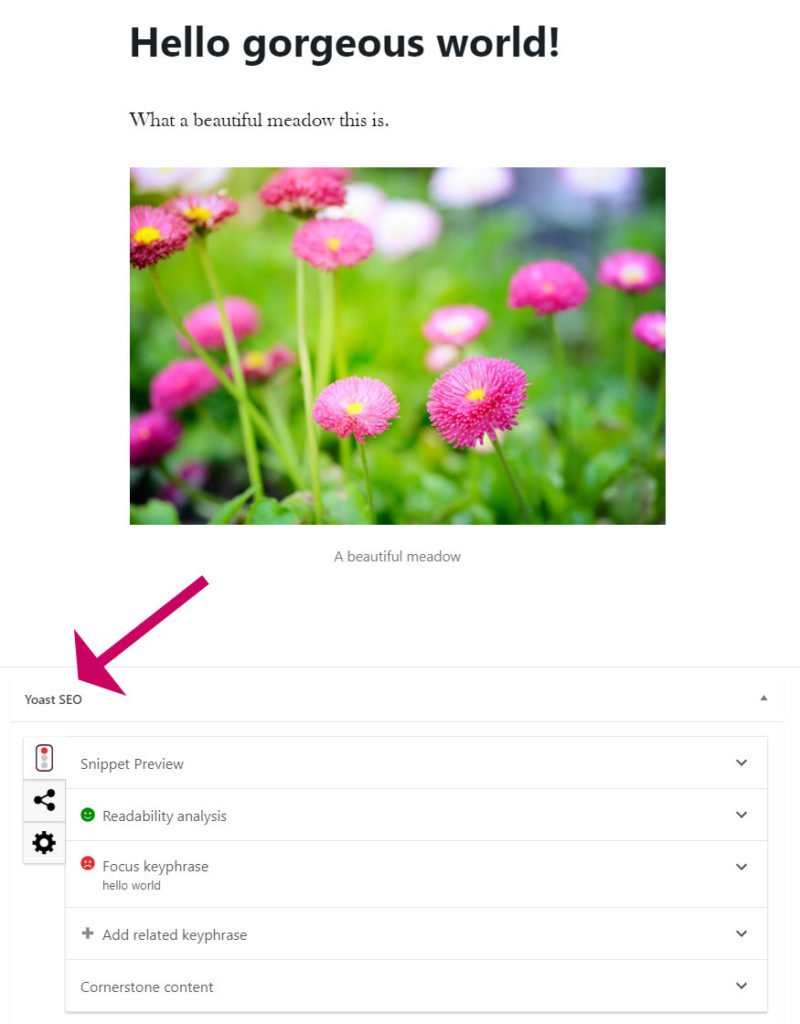
- Click on Focus keyphrase to expand the panel.
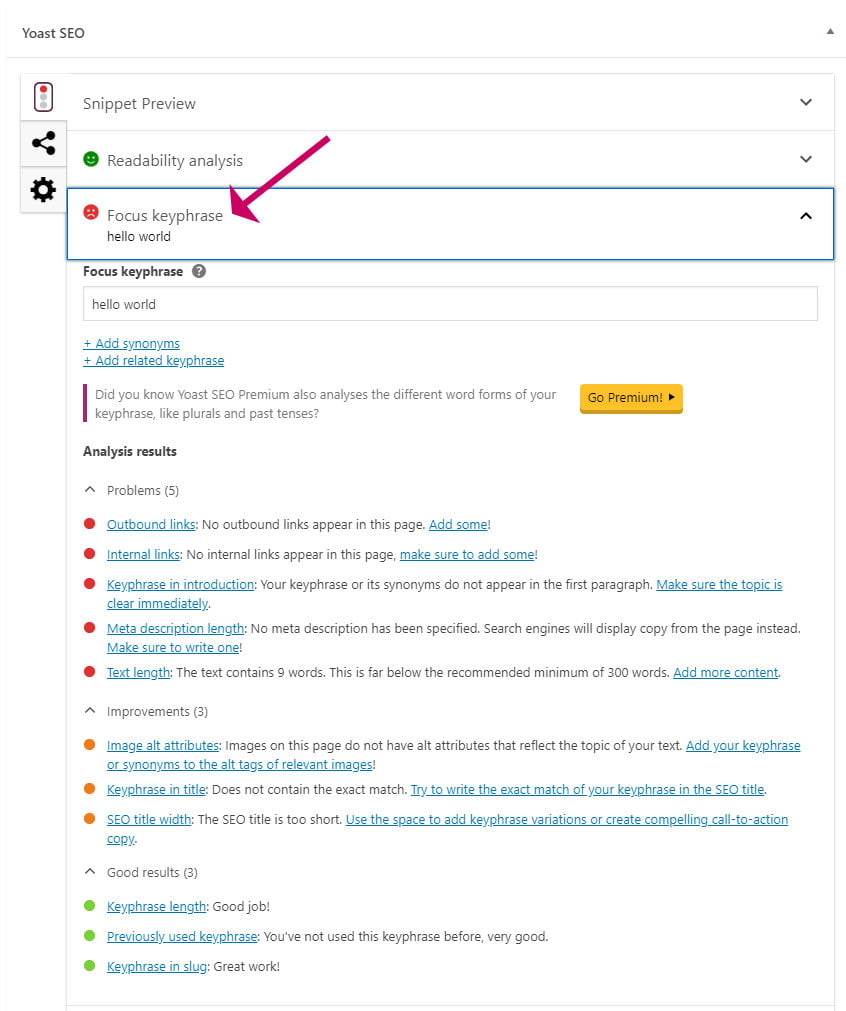
The Analysis results section will prompt you to include more keywords if needed for better SEO.
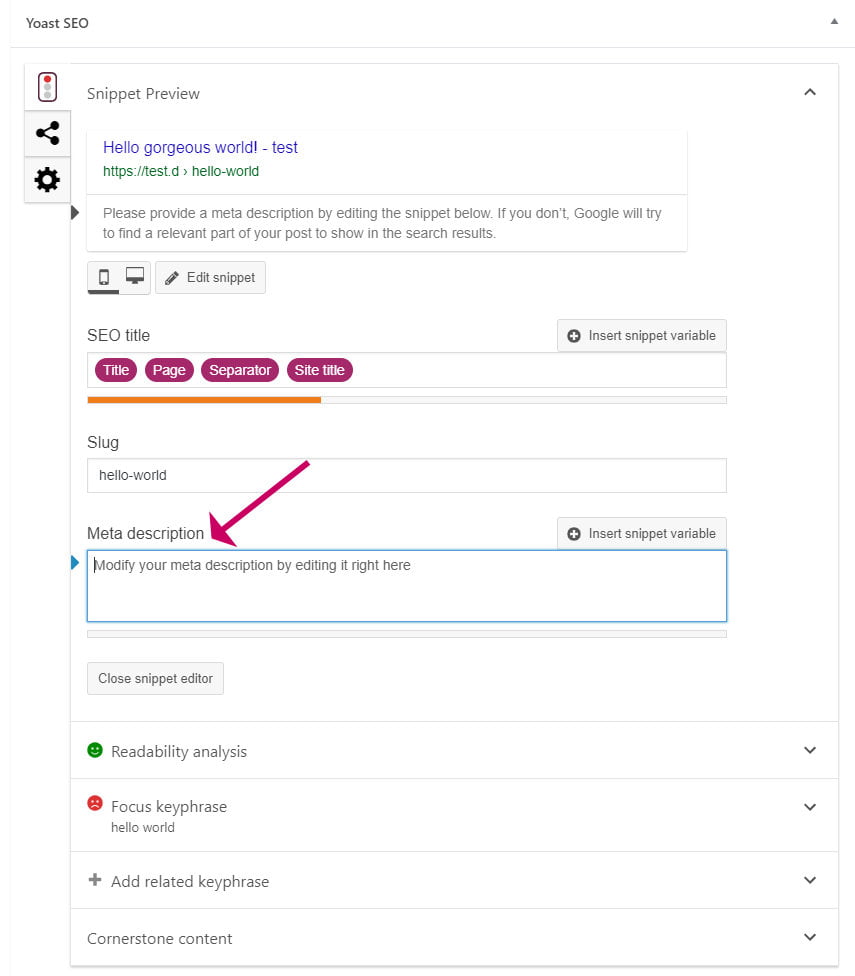
6. Set the post meta title and description
It is important for SEO to add the post’s meta title and description because this is what will be displayed in search results.
If you do nothing then Google will use the post title and a snippet of the post content, but you can control what is displayed with the free Yoast plugin.
When you have the plugin installed and activated:
- Scroll down to the bottom of the post to the Yoast SEO panel
- Click on Snippet Preview to expand it
- Enter a Meta description
- Include your keywords in the description, but at the same time making it readable. Yoast will prompt you if the text gets too long.
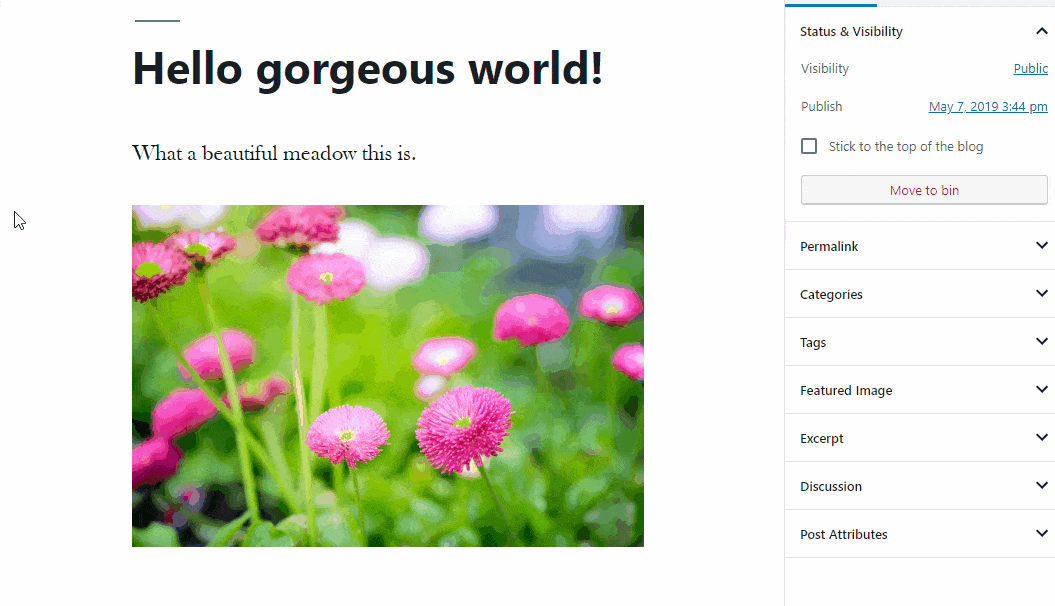
7. Add ALT text to images
When you include an image in your post content, always add ALT (alternative) text.
The ALT text should describe what the image is about and can also include your keywords if it makes sense to do that.
Adding ALT text to images helps with accessibility, and also helps Google to understand what the image is about.
Additionally, before you upload images, give them a descriptive name, for example, toffee-crisp-biscuit.jpg is far better than img4582.jpg.
You can add ALT text by editing the image properties in the image library or in the block settings. You could also add a descriptive caption under the image.
8. Check the structure
Often people can become a bit overwhelmed when faced with a large block of text with no breaks in it. When I see a post with a long rambling structure, I usually look elsewhere for the information I seek.
1. Do your keyword research, choose a keyword phrase
Nowadays people have much less time to read articles. Scanning is much more common. It helps out all types of readers if you break up your text into paragraphs, with each one making no more than a single point.
2. Make an outline
Headings help your reader to find specific information.
Group related paragraphs under headings, with an H2 tag and further sub-divide with H3 if it makes sense.
I don’t usually like to go any deeper than an H3 heading, as text starts to appear messy. You want your article to appear well structured and well thought out.
Remember that an H1 heading is always used for the post title, so never use that within the content.
9. Check the category and tags
If you have set up your blog correctly you should have some helpful categories set up on your blog for each topic area that you blog about.
Don’t forget to add your new post into one of those categories. If you are using tags then add those too.
10. Add links to other posts
Linking to related post within the text is helpful for your reader, because it leads them to other articles on your site, keeps them engaged for longer, and helps to reduce your bounce rate.
Bounce rate is the rate in which people navigate away from your site after arriving. A low bounce rate means that people are spending longer on your site, and indicates greater engagement.
If I am writing a post and I know that I have another post that contains more in-depth information then I will link to it and sometimes also repeat a bit of the content in-case people don’t want to click away just yet.
Internal linking helps Google to understand your site structure. If you have a lot of internal links to one particular posts, Google recognises that it is an important post.
You can add links within your text, and or repeat those links at the end of the article, in a further reading, or related posts section.
11. Add outbound links to other sites and check it is ‘nofollow’
An outbound link is a link to another site other than yours.
Outbound links add richness to your content. It shows that you respect the opinions of other content creators, and according to Yoast:
We help Google to connect the dots.
Yoast.com
See what I did there? I referenced Yoast.com and added a link to them.
3. Make sure you have a catchy title and edit the permalink
Every time you link to an external site, you give a bit of your link juice as its called to the external site. For a small blog, giving link juice to a higher ranked site could be damaging for your own ranking, so you don’t want to be doing this too often.
So how do you link to another site without giving away link juice?
The answer is to give the link a nofollow attribute. Nofollow tells Google, not to follow the link when it indexes your site, meaning that your juice is not given away!
It is possible to add nofollow to links manually if you don’t mind editing HTML, but I prefer to use a plugin so I don’t have to keep remembering to do it.

The No follow for external link plugin automatically adds a nofollow attribute to all externals link, so you never have to remember to do it.
12. Check the spelling and grammar
I don’t know what I would do without Grammarly.
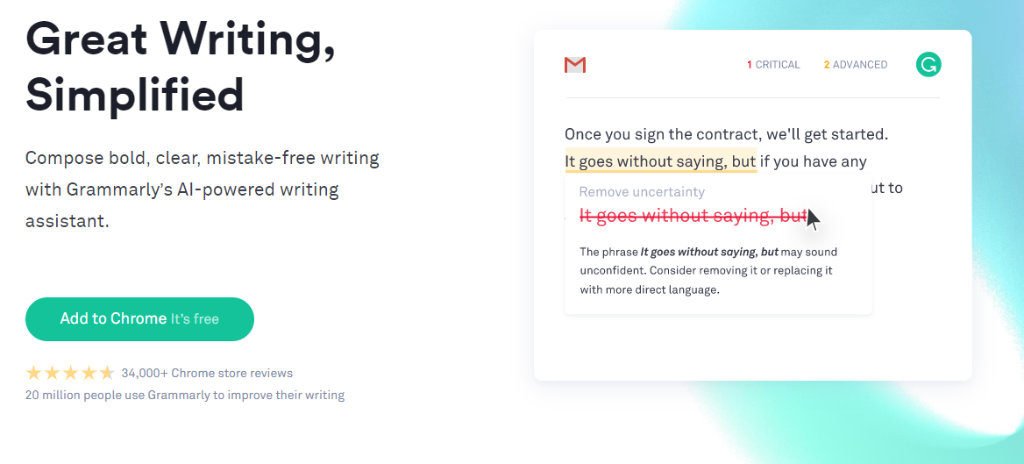
Even though English Literature was part of my B.A degree, I am pretty rubbish at grammar. My spelling is fairly good, but unfortunately, my grammar is woefully bad!
If you aren’t yet using Grammarly I thoroughly recommend doing so. It doesn’t pick up everything and sometimes it will make suggestions that don’t make sense, but on the whole, I wouldn’t do without it. I have actually learned better Grammar by using it!
You can run it as a browser extension and it will check everything that you write on the internet, including your WordPress blog posts, email, and social posts.
I had trouble using it with the Gutenberg editor, but those initial problems seem to have been ironed out and it works well now.
I have the premium version because it gives you a greater depth of checking, which I recommend if budget allows.
13. Ask someone else to proofread
It helps to get a second pair of eyes to read your material before you publish because another person can often pick up on things that you have become blind to during editing.
Failing that. Wait a few days, or overnight before re-reading your post. I often pick up on things that way too.
Here are a few tips:
- Keep paragraphs short, they are much more readable that way and easier for scanners to read.
- Add some images to enhance your point to and add some interest.
- Don’t waffle, keep to the point.
- Break up your text with headings and sub-headings.
14. Make an eye-catching featured image
I spend more time marketing my posts than I do writing them! If you have a good image to share with your post it makes this job much easier.

A beautiful image to accompany your post helps to engage the reader
You can find free images on sites like Pexels, Unsplash, and Pixabay and there are many more. If you have the budget to pay for images, then you are much less likely to find that the same image used elsewhere.
My personal favourite is Envato Elements. For a monthly fixed fee, you can download unlimited images, video and graphics. Most of my graphics come from there including the image above.
Envato Elements now have a free WordPress plugin, which allows you to select and import their images directly into WordPress.
Wherever you obtain images always make sure you have permission to use it.
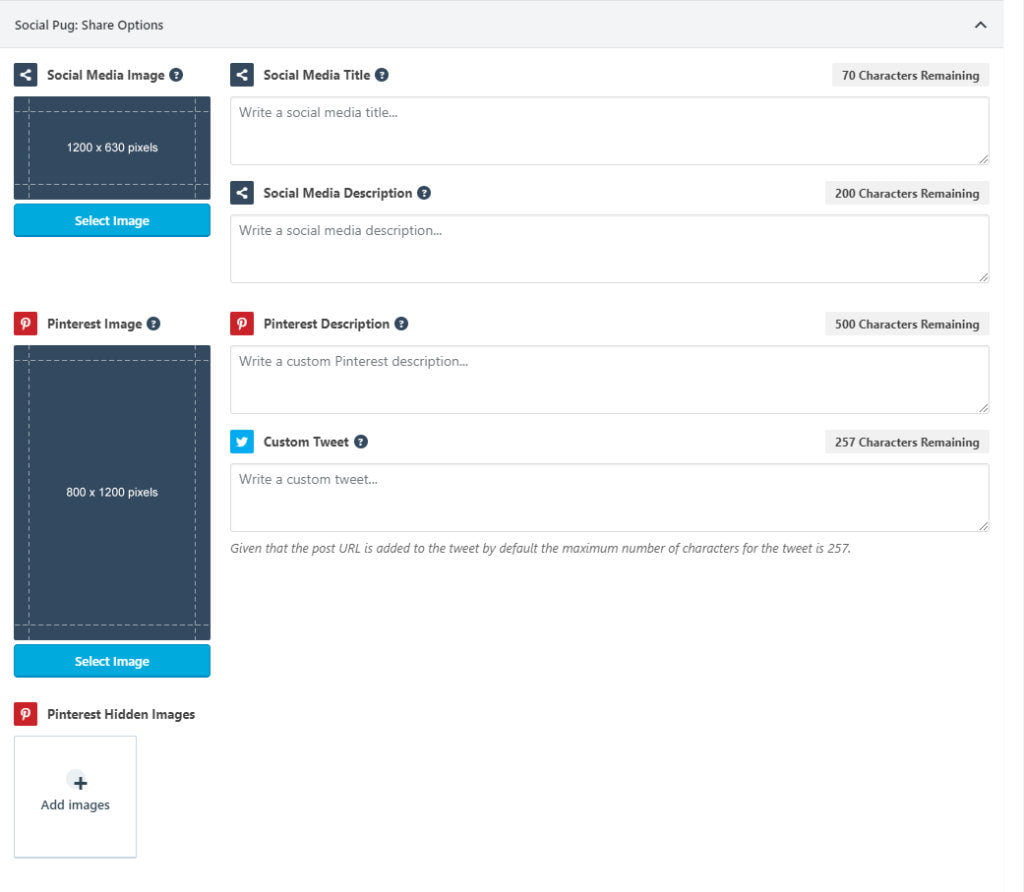
15. Make additional Pinterest and Facebook sharing images
The image dimensions that you use for your featured image will not necessarily be optimal for Facebook and Pinterest image sharing.
Facebook images look best at 1200 x 630px, and Pinterest much prefers tall images at 800 x 1200px.
Adding these extra sizes makes you look much better on those networks.
You can make your own Pinterest Pins and Facebook sharing images on Canva or Adobe Spark or on Photoshop if you have it. I use Affinity Designer to make mine, which is a cheaper (but just as good) alternative to Adobe Illustrator.
Once you have your new images you can use a plugin like Social Pug to hide the extra images on your post.

The Social Pug premium plugin is a social sharing plugin that allows you to add sharing buttons on your posts. It also allows you to enter different images for Pinterest and Facebook, which will be grabbed instead of the featured image when people share to those networks.
16. Add social sharing buttons
Make sure that your post is shareable on all the main social platforms. There are a lot of social plugins. Social Pug which I recommended earlier is the plugin that I use for social sharing, and I am very happy with it.
Other plugins you can use are:
You only need to set up the social sharing plugins once. Whichever plugin you select, it should have options to add sharing buttons at the top/bottom of posts.
17. Add a tweet box
Another reason why I like Social Pug is that it allows you to add a tweet box. This is a great way to encourage your readers to share your post with the text.
[socialpug_tweet tweet=”A socially optimized post is a happy post.” style=”1″]
18. Check affiliate links
If you have linked to products or services that you are affiliated to, make sure that you have added your personal links.
I use the free Easy Affiliate Links plugin to manage all my affiliate links and I am very happy with it so far!
19. Add a call to action
A call to action (CTA), is an action that you want your reader to take, such as join a mailing list or buy a product.
Every post you write should have a call to action of some sort, usually at the end of the post, but you can also put CTA’s in the body of the post too.
A call to action might include:
- Email list signup
- Affiliate link
- Product buy now button
- Social sharing buttons
- Invitation to follow on social media
20. Create a content upgrade
An effective way of encouraging your readers to do something, such as joining your mailing list, or liking your social media page, is to provide a content upgrade relevant to the post they are reading. This might be a useful checklist, to accompany the post topic, some extra points in a list post.
You could offer the content upgrade when they sign up to your mailing list.
As you can see, I am taking my own advice, and I have created a checklist that accompanies this post, which I will email you immediately when you subscribe :).
21. Make a video
If it makes sense for the post topic, it is a fantastic idea to include a video, demonstrating what you wrote about in the post. Here’s why:
- It gets you exposure on Youtube
- You can get traffic from Youtube to the post by adding a link to the video description
- Google loves video. If you have a video in your post you will be ranked higher than a post that doesn’t have one.
Wrapping up
In this post, I have taken you through everything you need to do to prepare your post for publishing so that it is perfectly ready for your readers, for social sharing and for excellent ranking on Google.
All these things combined will ensure that your new post gets maximum exposure that people can’t wait to click and devour immediately!


