In today’s post, I take you through how to write your first post with the WordPress block editor.
You may already know that I absolutely love the block editor and I wouldn’t go back to the old one for love nor money.
If you’re already sold and you just want to get to know how to use it, jump right in here, if not read on and I will persuade you!
The history behind the Gutenberg block editor
In January 2019, Automattic (the developers of WordPress) released a major update to the WordPress post editor.
Known as Project Gutenberg, this update changed the face of the editor from being a single body of content to one where each component of a post (paragraph, heading, image) became a single block.
Blocks could be rearranged with ease and new blocks created by simply pressing the return key.
Initially, like many others who had become so used to the old editor, I was sceptical at first. But since the bugs have been ironed out and the new editor bedded in, I wouldn’t go back to the old one if you paid me!
Why you should use the block editor
Here are seven reasons why I made the switch to the block editor.
The history behind the Gutenberg block editor
A significant thing I disliked about the old editor was how visually different my post looked in the editor, compared to how it would eventually look when published.
The block editor allows you to write in the same font as your theme, with the same background colour, content width and paragraph spacing. Now you don’t need to keep switching to preview mode to see how it’s going to look.
How do I take the jump and use the block editor, or do I have it already?
Alignments are so much easier to handle now. Did you ever try to line up an image on one side and some text on the other? It was a nightmare, wasn’t it? The new Media & Text block allows you to easily add perfectly aligned text to accompany an image.
The components of a WordPress post
You can save a block editor post with a shortcut key (CTRL+S), or not bother at all and let it auto-save for you. When you click save or use the shortcut key, the whole page does not reload, so you never lose your place in the editor, BOOM!
The WordPress Block editor options
Reusable blocks are a game changer for me. Now a block can be marked as reusable and used again and again anywhere on your site. What’s more, you can update it in one place only. I just love time-savers like that!
Wrapping up
Prior to Gutenberg, you could only put widgets in the sidebar and footer. Now you can embed any block-enabled widget right into the content. For example, you can use the MailChimp for WP widget to add a sign-up form in the middle of your post.
1. What you see is what you get (WYSIWYG)
Blocks can be rearranged with drag and drop, or duplicated and deleted with a shortcut key. You can manipulate a single block individually. You can even switch a single block to HTML view, whereas previously you would have to view the whole post as HTML.
2. Alignments
The info icon allows you to get an overview of the structure along with the word count. It is so much easier to write posts when you can see the overall picture.
I hope I have convinced you. If not you can disable the block editor with a plugin called WordPress Classic Editor. Sooner or later WordPress will withdraw that option and you will have no choice, so my advice would be to take the jump now. You know you want to!
How do I take the jump and use the block editor, or do I have it already?
Simply update WordPress to the latest. Make sure you deactivate or delete the WordPress Classic Editor plugin if you have installed. That’s it!
An overview of the new block editor
Before we jump in and create our first post, let’s take a quick look around. It’s always better to get familiar first.
The post editor is split into three areas; the main content area, right-hand settings panel, and a toolbar across the top.
The main content area
This is where you enter the title and body of the post.
3. Saving
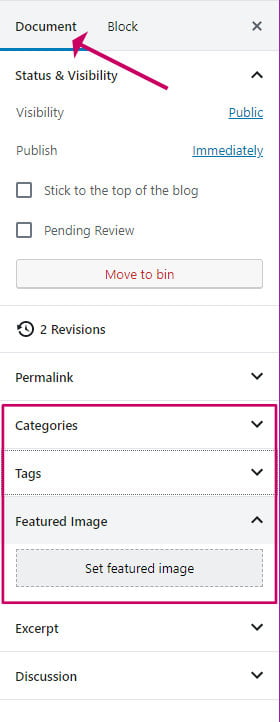
- You will use the right-hand panel a lot. It has two tabs, Document and Block. The Document tab allows you to make settings that apply to the whole post, for example, setting the permalink (URL), the category, tag and featured image. Use the Block tab to view and modify the settings for the current block you have selected on the left.
- You can toggle this panel on and off using the Settings (cog) icon on the top right of the screen.
The top left toolbar
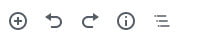
The icons from left to right, allow you to:
- Add a new block
- Undo the last change
- Redo an undo
- Display information about the content, including the word count and document structure
- Navigate through your blocks
4. Reusable blocks

The icons from left to right, allow you to:
- Save your draft, or switch to draft if your post is already published
- Preview the post in the browser
- Publish, or Update if your post is already published
- Toggle the settings panel display on and off
- Access the WordPress block editor options ( more about that later )
The components of a WordPress post
What actually is a post anyway? Well, a post equates to an article and it is comprised of the following:
- A title, for example, ’20 ways to change a light bulb’
- A permalink, this is the part of the URL after the domain, for example, https://example.com/20-ways-to-change-a-light-bulb
- A category, for example, you might have a category called DIY. A post is usually only in one category but can be in more than one. Categories are hierarchical, i.e. your DIY category could have sub-categories called painting and wall-papering.
- An optional tag. You can describe a post further by giving it a tag, for example, you might tag a post easy-project or 5-minute-job to indicate the difficulty and time to do the job.
- Featured image. This is again optional but recommended. Themes usually display a featured image at the top of the post and in the archive. It also may be used as the sharing image for Facebook and Twitter etc..
- Content, the body of the post.
How to create a new blog post using the block editor
- Select Posts->Add New
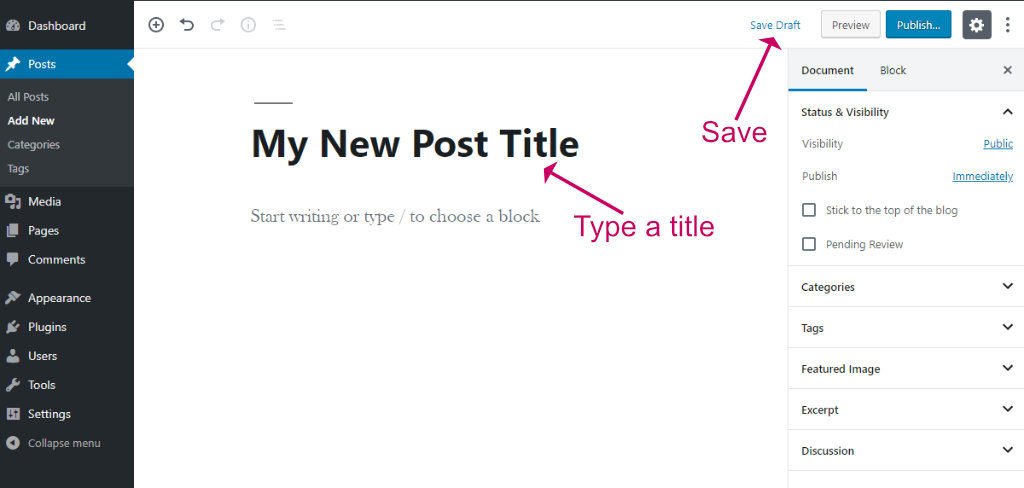
- Type the Title of the post
- Click Save Draft in the top right toolbar
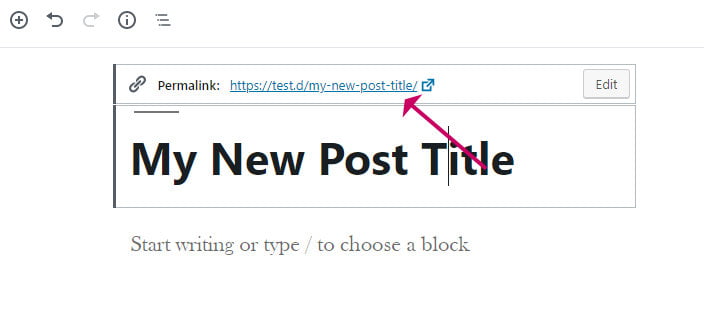
- Click on the Title again and you can then optionally edit the permalink. If you do not edit the permalink it will be set to the title text with spaces replaced with dashes.
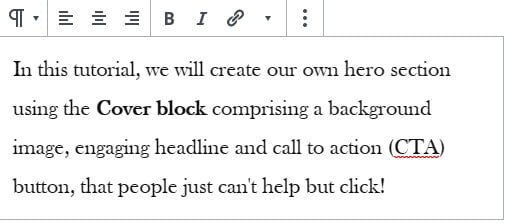
- After the Title text press return or click on ‘Start writing …’ and you can begin typing your content in a new block.
- Another way to start a new block is to click on the plus icon that appears either side of another block or in the top toolbar, then select the type of block you need.
- New blocks default to the Paragraph block type because this is the most common, but you can quickly change to a different block type such as an image or heading by typing /heading or /image or /list (for a bulleted or numbered list)
- The post will be auto-saved as you edit, but if you need to save manually click Save Draft or Update depending on whether the post is in draft or published mode. You can also use the shortcut key CTRL+S.
- Optionally give your post a featured image, by clicking Featured Image on the Document Settings Panel
- You can also put your new post in a Category or Tag, again using the Document Settings panel on the right.
You will find as you type that you don’t need the mouse very much. When you need to start a new paragraph block simply press return and carry on typing.
To add links highlight the text to be linked and press CTRL+K or click the link icon in the block’s toolbar.
When you need to add an image simply start your new block by typing /imageand drag your image into the block area or click Media Library to select an existing one.
There are lots more blocks you can choose from, including a video, columns, widgets, quote, spacers and buttons. To prevent this post from becoming overly complicated directions for using other types of blocks are (or will be) covered here.
5. Widgets
When you are ready to publish, click the Publish button, and your post will then be live on your blog. After publishing, you can carry on editing. Click Update to make your updates live.
How to make edits to your post
If you write posts as I do then you will want to rearrange, delete, and duplicate things a lot. Fortunately, this is very easy with the block editor.
How to modify a block
Click on the block and a toolbar will appear on the top of the block. The type of toolbar you see will depend on what type of block it is.
6. Block manipulations
You can move blocks around by dragging and dropping.
- Click on the block
- Move your mouse over to the left and hover over the six dots. The cursor will change to a hand.
- Hold down the left mouse button and drag to the new position
- The blue solid line indicates where the block will be positioned when you stop dragging
[socialpug_tweet tweet=”Not using the block editor yet, or struggling to understand? This is the tutorial for you. Find out how to write your first blog post with the WordPress Gutenberg block editor.”]
The WordPress Block editor options
Using the block editor options (three dots on the top right), you can make some global settings to the post editor. Changes you make here will effect all your posts.
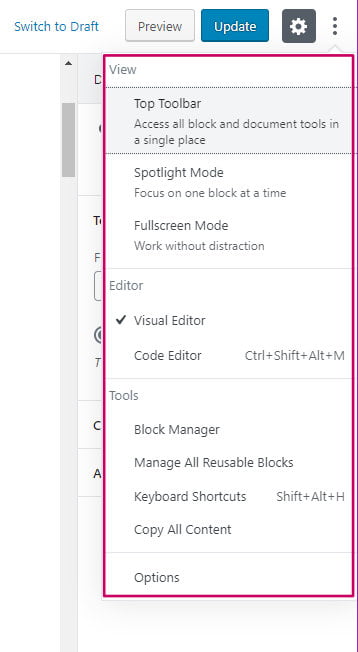
Let’s have a look at what options you can set.
7. More information
- Use the Top Toolbar setting to change where the location of the block toolbar. You can have it display at the top of the block or the top of the editor.
- Spotlight Mode will highlight the current block that you are editing. With this turned on, it can make it easier to see where you are in the post.
- Fullscreen Mode will turn off all menu panels, allowing for distraction-free writing. This can be useful if you are on a small screen such as a laptop.
The right-hand settings panel
Click Code Editor to view the whole post as HTML or use the shortcode CTRL+SHIFT+ALT+M.
The top right toolbar
- The Block Manager allows you to toggle the various block types on and off. If you know you are only going to use paragraphs, headings and images, for example, you could turn off the rest.
- You can access all the blocks you have marked as reusable using the Manage All Reusable Blocks link.
- If you a keyboard fan (like me) you can see all the available shortcuts using the Keyboard Shortcuts option or use SHIFT+ALT+H to bring them up at any time.
- Copy All Content allows you to send a complete copy of the post to the clipboard which you can then paste into another post. I find this option really useful.
- The Options link allows you to toggle the various panels on and off. For example, if you are not interested in seeing comments you could untick Discussion.
Wrapping up
In this article, I have given you an overview of what the block editor can do and how to create your first post using it.
If you were not sure about using it, I hope I have persuaded you how great it is.


