Today we will be learning how to use MailChimp with our WordPress blog.
I will show you how to use MailChimp to send out an automated email (or email series) that is triggered when a reader responds to a lead-magnet, such as a checklist, content upgrade or cheatsheet.
This tutorial takes you from ground zero up. If you don’t have MailChimp yet, never fear, I have you covered. I will show you EXACTLY what to do to set it up.
I will show you how to send out an automated content upgrade, or a series of emails triggered (for example an email course) when a user specifically signs up for it.
I will also show you how to configure everything so that if the subscriber is already signed up it will simply add them to that interest group rather than throwing up an error to say that they are already subscribed.
We will create a fabulous sign-up form that we can use again and again on our blog, in posts, and on a landing page, and on our sidebar.
If you don’t have a content upgrade ready yet you can still use this tutorial to learn how to integrate MailChimp with your blog.
You could also use this tutorial to find out how to create an email course that is sent out in a series of emails.
We will be keeping things really simple using the very best tools for the job. Here is what we will use:
- MailChimp
- MailChimp for WordPress plugin
- WordPress Gutenberg block editor (you need to be on at least Version 5.0 of WordPress)
- Optional – A cheatsheet/checklist PDF saved to the media library. You will need the URL of the file which you can find in the attachment details of your WordPress media library
Although the basics of what we will be doing are quite simple there are quite a lot of steps. I will describe everything in detail so you can understand completely what is going on.
Step 1: Set up MailChimp
Many people knock MailChimp.
I admit, figuring MailChimp out CAN be a little tricky at times. There is one area that I think can be confusing, but I will iron that out for you later.
Just in case you need persuading, here is why I love MailChimp (and I hope by the end of this tutorial you will love it too):
- Free for the first 2,000 subscribers
- Allows you to group and tag subscribers so you can keep one list (and only pay once per subscriber)
- You can group and tag subscribers automatically as they sign up
- You can automate a series of emails, and create autoresponders welcoming your subscribers
- Integrates with Woocommerce, so you know who has bought what product
- There is a fantastic plugin available for WordPress sign-up form integration
Let’s get started!
Step 1: Set up MailChimp
Open up your MailChimp account. If you don’t already have a MailChimp account, you can open one here.
If you haven’t already done so, an extremely important step is to verify your domain. Do not skip this part, doing so will cause your newsletter emails to go to the spam folder.
Step 2: Create a list/audience with MailChimp
Although emails will be sent via MailChimp’s servers, you will be using an email address from your domain as the from address. If you don’t have this setup, the emails are very likely to go to spam, i.e. no one will receive them!
First, you need an email address set up for your domain, and you can do this in your hosting account. The method you use will depend on your hosting provider.
If you have cPanel, go to Email->Email Accounts and you can set one up there. If you can’t figure it out do raise a ticket with your host.
Assuming you now have a working email address, such as [email protected], go back to MailChimp and carry on with the setup.
The following directions have been taken from the MailChimp help page:
- Navigate to the Domains page in your Account Settings.
- Scroll to the Emails section and click Verify Domain.
- Enter the email address containing the domain you want to verify and click Send Verification Email.
- When you receive the verification email, click the link in the email or enter the verification code in the pop-up window in your account and click Verify. Domain verification links and codes expire after seven days. If your link or code has expired, you’ll need to repeat these steps to request verification again. If you don’t receive the verification email, take a look at our troubleshooting tips.
- The screen will refresh and display a success message in a pop-up window. Click Done to close the pop-up window and return to the Verify domains page.
You can now use the verified email address as the From Email in your campaigns. Great!
Step 2: Create a list/audience with MailChimp
Let’s clear up one source of confusion right away.
MailChimp now calls a list of subscribers an ‘audience’.
Most of the other list providers use the list word, but from now on I will use audience so we can all get used to it.
You can have more than one audience, but I highly recommend that you only have one. The reason is that MailChimp will charge you for each subscriber. If you have the same subscriber in more than one audience you will pay twice, or it will use up your free allowance at double the pace.
Only consider having more than one audience if you have two very different sets of subscribers that will never coincide. In that case, though, I would suggest you have two separate Mailchimp accounts, thereby getting another free allowance of 2,000 subscribers.
When you first open a MailChimp account, an audience is already created for you. Since you will only be having one audience, this step is very easy!
You can see an overview of your audience under the Audience Link.
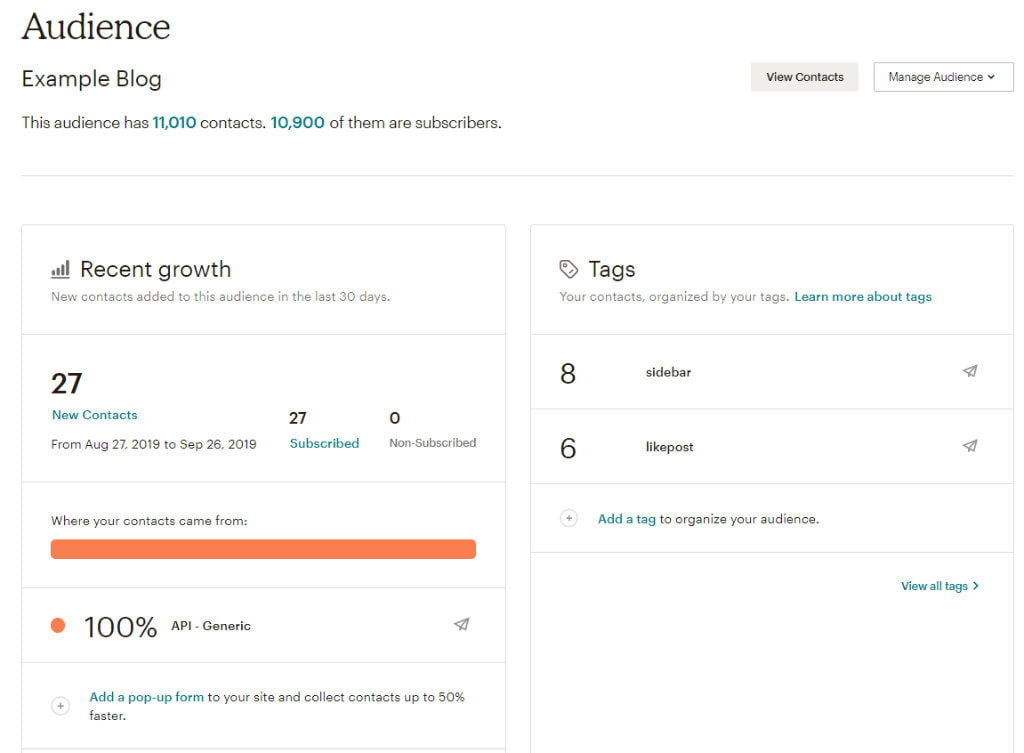
- You could rename your audience if you wanted by going to Audience->Manage Audience->Settings->Audience Name and Defaults.
Step 3: Create a MailChimp form and a group
This is where I think that MailChimp gets a little confusing.
In this step, we appear to be designing a form, but actually what we are doing is defining the data that we want to store against each subscriber, and at the same time, designing a form.
Since we will be using a plugin to make the opt-in form, in this step we just define the data, it doesn’t matter what it looks like, because we will be doing the pretty stuff later.
If we were going to use the HTML that MailChimp gives us directly on our WordPress blog, then we would want to pay attention to the design at this stage. But we are not going to do that, we are using a fantastic plugin instead!
Confusing I know, I hope I’ve cleared that up!
- Click on Audience from the top menu.
- Click on the Manage Audience button and then select Signup forms.
- Click Form Builder
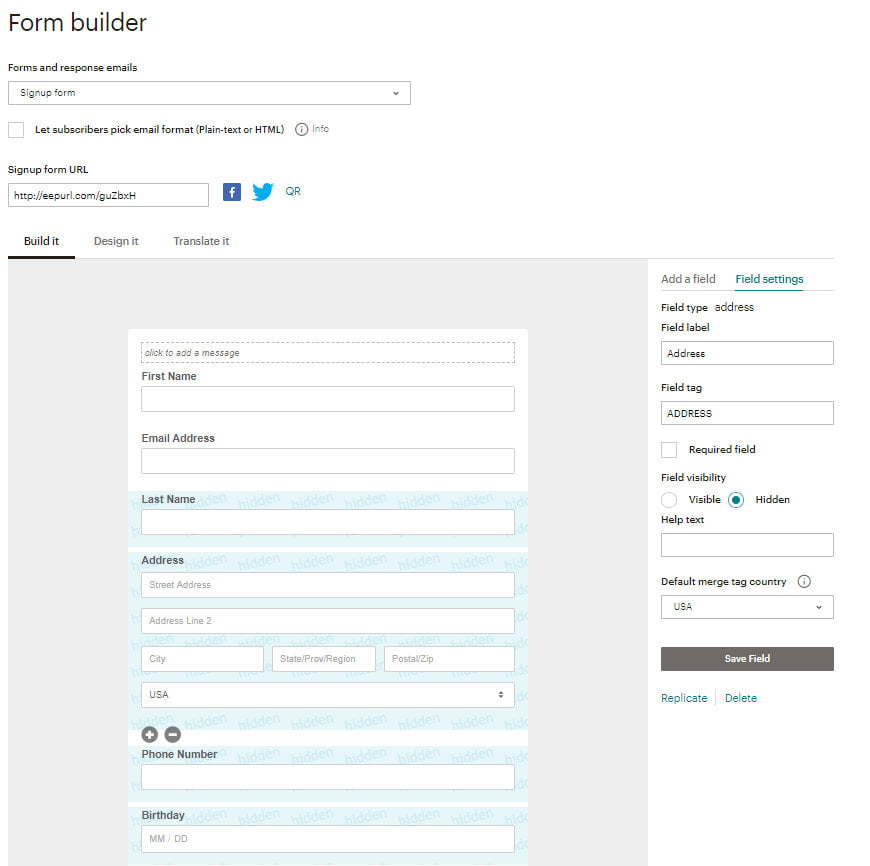
We are going to keep the form as it is, but we are going to add a new group to this form.
- Click Add a Field
- Choose Check Boxes
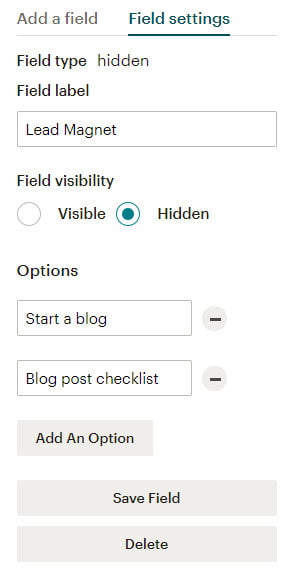
- Type the name of your group in the Field Label e.g. Lead Magnet
- In the Options add a new option, entering a name for your lead magnet, e.g. Blog Post Checklist
- If you have more than one lead magnet, enter more options.
Step 4: Create your automated email
Next, we will create an email in MailChimp that will get sent out as soon as the subscriber signs up to a lead magnet option, for example ‘blog post checklist‘.
This is where the clever bit happens!
- Click Campaigns in the top menu
- Click Create Campaign
- Select Email
- Select Automated
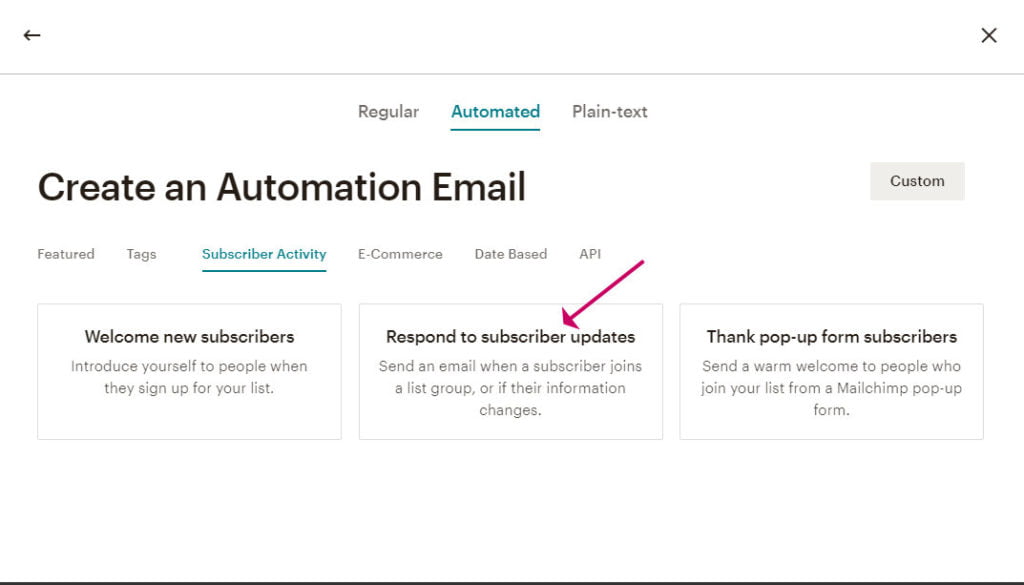
- Click Subscriber Activity tab
- Click Respond to subscriber updates box
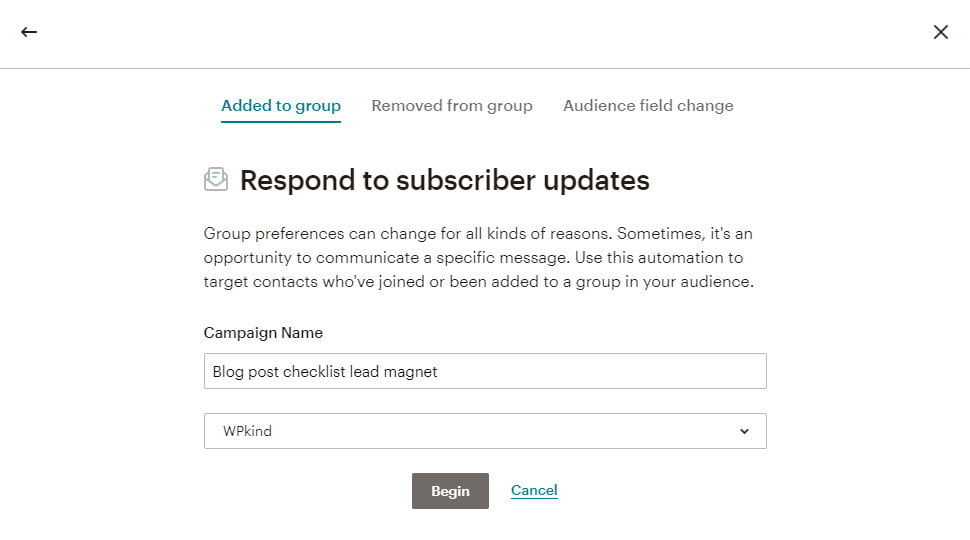
- In the next screen type a name for your new automated email and select an audience if you have more than one.
On the next screen, we set up automated emails.
MailChimp allows you to automate just one email or several that trigger after a certain time, one after another. This is very useful if we are making an email series.
The most important part is to set the trigger for the first email. In this case, the first email will be sent as soon as the subscriber is added to our lead magnet group option.
- Click the Edit link at the end of the line that starts with Trigger.
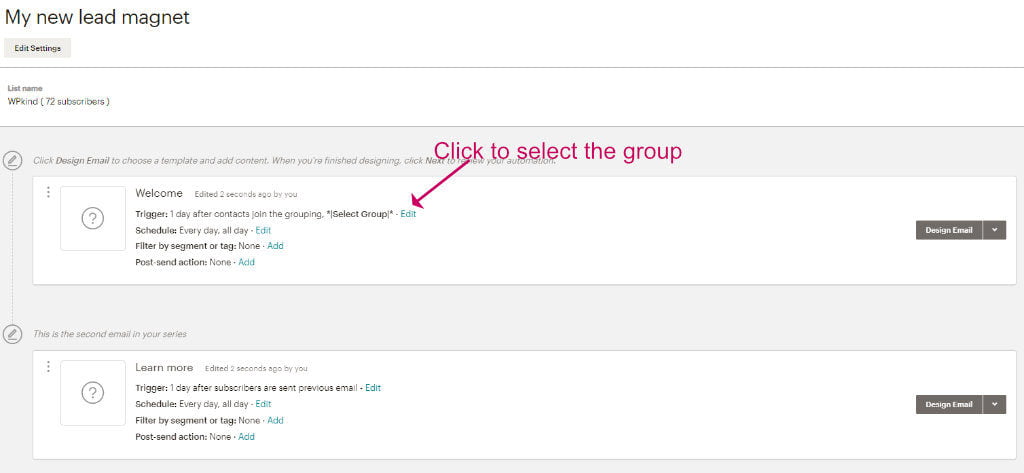
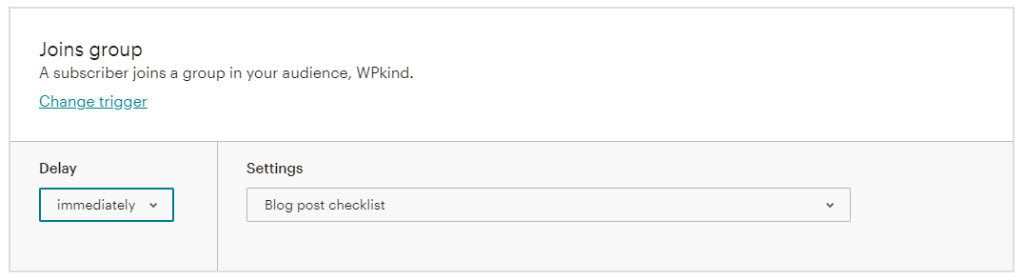
- Then select the group that you made earlier and the delay after the subscriber joins the group that the email will be sent. For this email, we could send it immediately.
- Underneath the first email, a second is automatically added, and you can add more by clicking the Add Another Email link and then edit the trigger. For subsequent emails, we will want to add a delay.
- Add as many emails as you need, but if you only want one email, select Delete Email under the Design Email dropdown of the second email.
The next part is where we design the email(s). These directions will be the same for each email.
- Click Design Email
- Enter the name of your email, .e.g. welcome (your subscriber will not see this)
- Enter a subject for the email e.g. Congratulations, here is your freebie cheatsheet.
- Enter From Name
- Enter From email address. It should be an email address from the domain that you verified when you set up MailChimp earlier.
On the next screen select a starting template, or to start with a blank canvas, select the Simple Text template. Often simpler is best.
Now we start to design our email content.

Here are some tips for creating your first MailChimp email:
- On the left-hand side are the content blocks. These can be rearranged, deleted and duplicated using the toolbar at the top of the block.
- To add a new block, for example, a button, click Save & Close on the current block, then drag a button block into the left-hand content area.
- Click on a content block to begin editing it on the right-hand side.
- If you capture names in your subscriber list you can use the Merge Tags button to add merge data such as First Name.
- Add links by highlighting the link text, and pressing CTRL+K on PC or CMD+K on Mac.
- If you will be adding a link to your freebie PDF you can get the link for it from the WordPress media library
- Check your writing with Grammarly.
When you have finished editing click Save & Close then Save & Continue.
If you are adding subsequent emails, repeat the above to design each of them.
- You can preview the email by clicking the thumbnail on the left.
- When you are finished. Click the Next button.
- If you need to go back and edit anything click the Edit link, and when if you are happy with your emails click the Start Sending button.
We now have everything set up in MailChimp, congratulations!
Step 5: Install and set up the MailChimp for WordPress plugin
In this step, we go back to WordPress and install the MailChimp for WordPress plugin.
You can download the plugin from the WordPress.org repository and then upload it to WordPress, or:
- Go to Plugins->Add New
- Search for MailChimp for WordPress
If you are not sure how to install a plugin, see my guide – How to install a WordPress plugin.
Step 3: Create a MailChimp form and a group

If you haven’t done so already, create your account at MailChimp before you carry on.
Once you have installed and activated the MailChimp for WordPress plugin, you are ready to connect it with your MailChimp account.
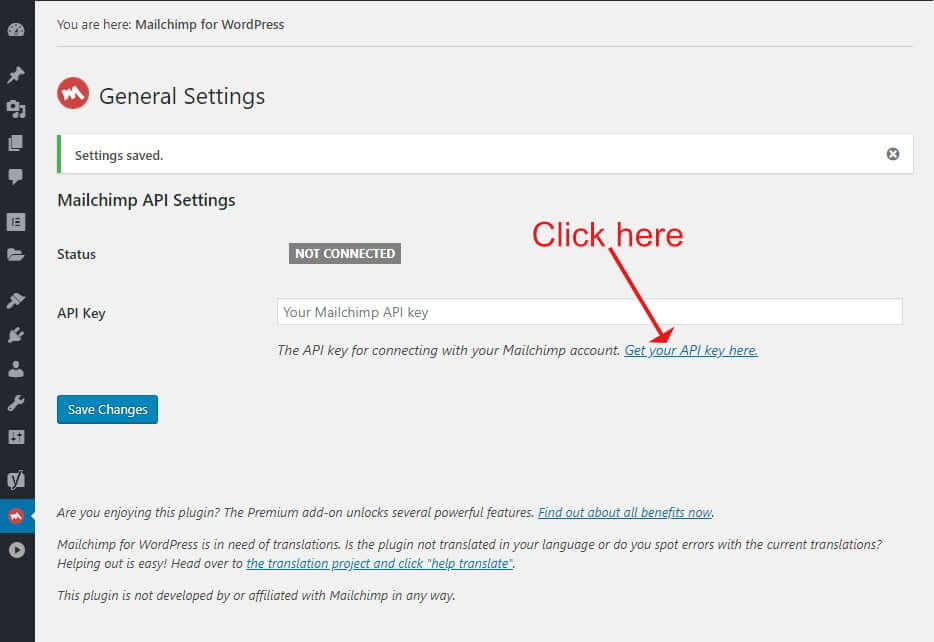
- Go to MC4WP->Mailchimp
- Click the link Get your API key here which will take you to the API page of your MailChimp account.
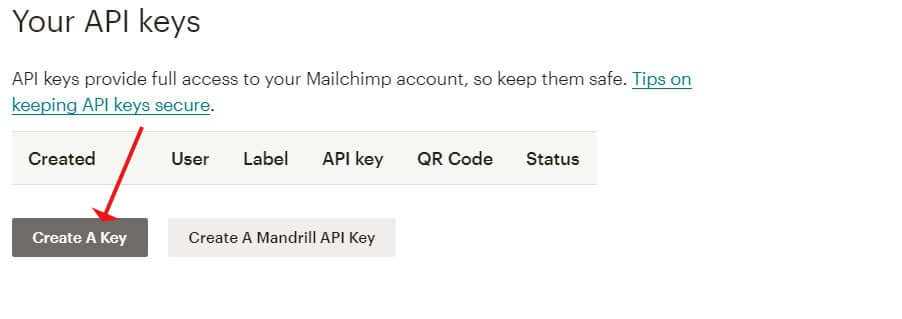
- Scroll down to Your API Keys.
- Click Create a Key.
- Copy the API key that has been created.
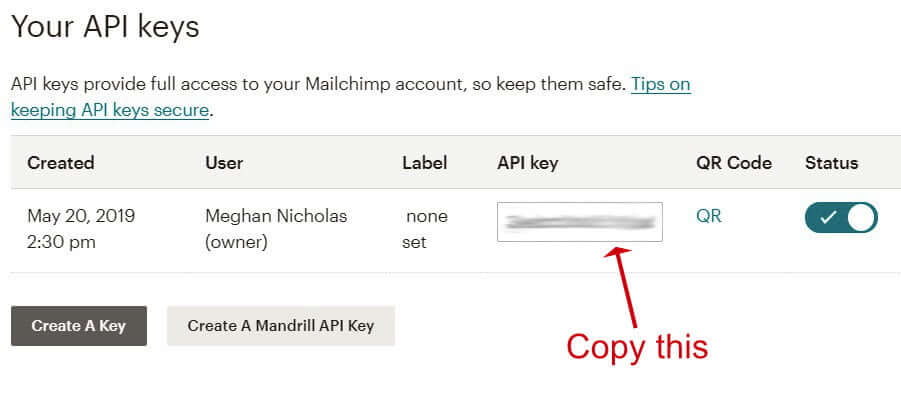
- Switch back to WordPress and paste the API key into the General Settings form.
- Click Save Changes.
- The plugin will then connect to MailChimp and should show a green Connected label and your MailChimp Audience list should appear below.
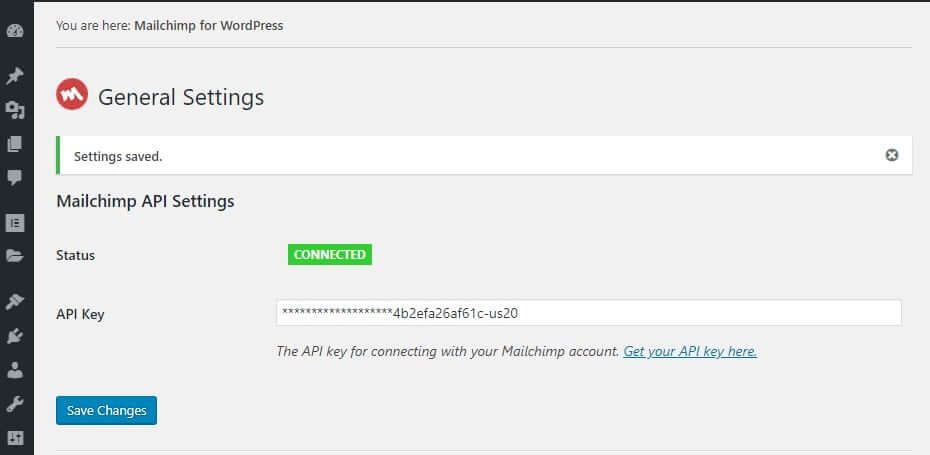
- That’s it! Your MailChimp account is now connected to WordPress.
Step 6: Make a sign-up form
Next, we will make a sign-up form.
- Go to MC4WP->Form
- Type in the name of your form (this is just for your reference) and select the audience list you wish to use if you have more than one.
- Click the Fields tab and from there you can view the signup form that has been created, where you can add or remove additional fields
- Use the Interest Categories button to add your new Lead Magnet to the form as a hidden field. This means that anyone who signs up with the form will be assigned to that group or groups. If you have more than one group delete the ones you don’t want. Separate each group name with a | (pipe) character.
- To make the form GDPR compliant you could also add an Agree to Terms field
- Click the Settings tab. There are a couple of settings that are very important to make.
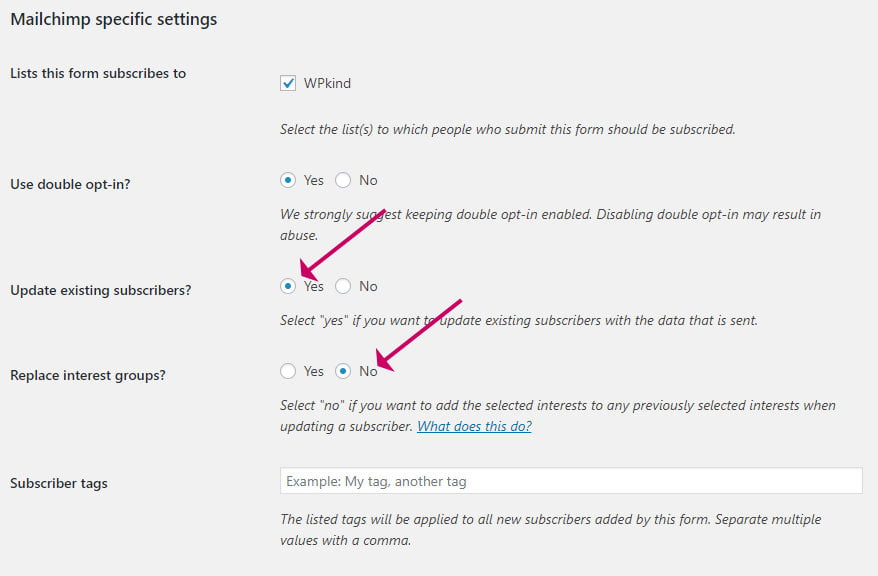
- Tick the list that the form should subscribe to if you have more than one
- It is a good idea to use double opt-in to stop spammers
- Select Yes to update existing subscribers. This will allow existing subscribers to sign-up for your opt-in
- Select No for replacing interest groups. This will allow groups to be added together.
- Optionally add a Subscriber Tag
- Click the blue Save Changes button.
Step 6: Embed the sign-up form in a post or anywhere else on your blog
You can now embed your new sign-up form directly within a post.
- Add a new block
- Select the MailChimp for WordPress Form block
- Select your new form from the dropdown list
This is how it looks in the post, the styling might be slightly different depending on what theme you are using.
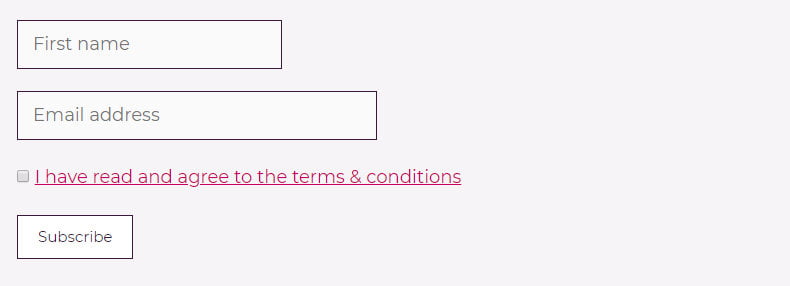
The MailChimp for WordPress widget can be used anywhere on your site that accepts widgets. This can include your sidebar and footer but depends on your theme.
You can also add the widget to a landing page for the opt-in.
Step 7: Prettify the opt-in form (optional)
I’ve made this step optional because there is so much covered in this tutorial, I don’t want to overwhelm! So if it is too much to take in at this stage, do come back later.
The design in the above step doesn’t look too enticing! Here is a trick to make it into a reusable block with some extra interest to draw people in.
- Add the MailChimp form block to your post and make it reusable, you can do this by clicking the options icon for the block, then click Add To Reusable Blocks.
- Type a name for your block and click Save.
- I have more on reusable blocks here if these type of blocks are new to you – How to Use Reusable Blocks in WordPress Block Editor (Gutenberg).
- Now click the options icon at the very top right of the post and select Manage All Reusable Blocks
- Find the block you just saved in the list and click Edit
Now we can edit the block as if it was a page on its own, adding headings, paragraph and image blocks, it is so cool!
Here is what I created but of course there are lots of different designs you can do.
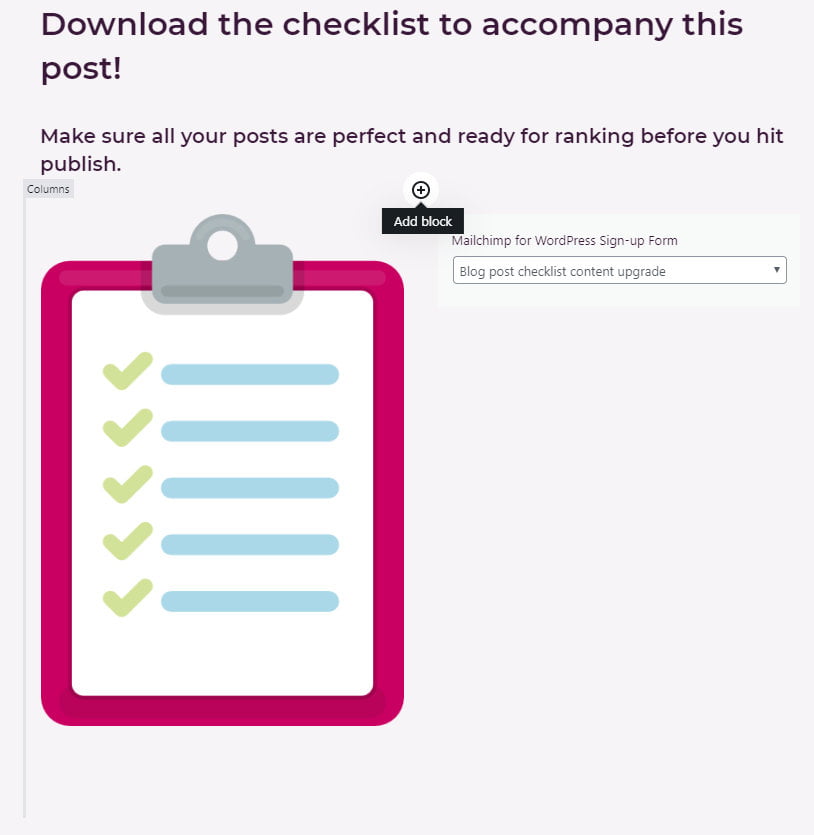
I added an H2 Heading block with an H3 block underneath. Then I added a two-column block and put an image on the left and the MailChimp For WordPress sign-up form widget on the right.
- Now go back to your post and insert the reusable block that you made instead of the MailChimp widget.
The great thing is that you can go back to and edit the block and it will update in all the places that you used it!
Step 8: Make a landing page
This is an optional step too, but it is a great idea to also create a landing page for your new lead-magnet.
As we already have our opt-in form made it is a simple task of just adding the MailChimp for WordPress Form block and then selecting our new form.
If you did Step 7 above and made your opt-in more elaborate, you could just make a new page and add the reusable block you made to it. Job done!
Another option is to use the page builder Elementor.
Elementor is great for creating landing pages and has much more power than the WordPress Block editor. I have a tutorial here which helps you to create a home page with Elementor but it is also a useful guide for creating a landing page too – How To Create A Stunning Home Page For Your WordPress Blog.
You can’t add reusable blocks to an Elementor page layout, so the reusable block we made would be redundant, but you can add the MailChimp for WordPress widget to an Elementor page.
Test
The last and very important step is to test our opt-in form.
Check that you can sign up to your own list using the form. If you are already signed-up, check that you have been added to the group when you re-opt-in.
- Open MailChimp
- Click Audience then View Contacts
- Click the search icon to search for the email address that you used in the test
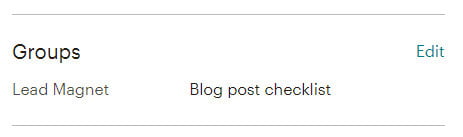
- When you view the test subscriber you should find that the Groups section shows the correct group.
Wrapping up
We have done so much in this tutorial and learned an awful lot!
Here is rundown of what we did.
- Created a MailChimp account
- Verified our domain
- Set up our Audience
- Created a form with a group
- Designed an automated email, or a series of emails triggered when a subscriber is added to the group
- Installed and set up the MailChimp for WordPress plugin
- Created an opt-in form
- Added the opt-in to a post
- Created a reusable block for the opt-in form and made it prettied it up
- Created a landing page for our new sign-up form
I hope you have a long and satisfying relationship with MailChimp now that you know how to use it in your blog.
Any questions please do comment below.


