In today’s post, I will take you through precisely what WordPress maintenance tasks you should be doing on your blog to keep it perfectly maintained, backed up, and up-to-date.
Your blog is your asset, and you must keep it well-tended and serviced, just as you do for anything else you rely on in life, such as your car.
If you are skimming this post, make sure you read the first section on backing up your blog first, as this needs to be done before many of the maintenance tasks detailed later on.
For each of the tasks, I recommend the frequency and go through the practical steps needed for each job.
1. Backup your blog
I thoroughly recommend that you set up a scheduled backup for your blog, but I also recommend you take a manual one from time to time for extra safety.
Manual backups are wise because you are covered if the scheduled backup stopped running for any reason.
1. Backup your blog
Once per week, or before you do a maintenance task.
2. Update WordPress, plugins and themes
I have a fantastic post here – How to Take a WordPress Backup that takes you through exactly what you need to do. Have a good read, and pop back here when you have your backup set-up.
Have you set up your scheduled backup? Great!
- Now, go to Settings->Updraft Backups
- Click the blue Backup button
- Wait while the backup runs
- When the backup completes, click each backup component to download it to your computer.
2. Update WordPress, plugins and themes
Keeping WordPress, plugins and themes up to date is vital for a secure site.
If you don’t keep your blog up-to-date:
- Your blog could be more likely to get hacked
- You don’t reap the benefits from the enhanced functionality
- Your host could suspend an out of date WordPress website, yes really!
If you don’t do the updates frequently:
- Updates will mount up, making them take longer to complete, and issues more challenging to solve.
1. Backup your blog
Once per week.
4. Test opt-ins
I have detailed directions for updating WordPress here.
WordPress will automatically apply minor updates unless you specifically turn it off. These small updates are usually security-related rather than functional and essential to have installed immediately.
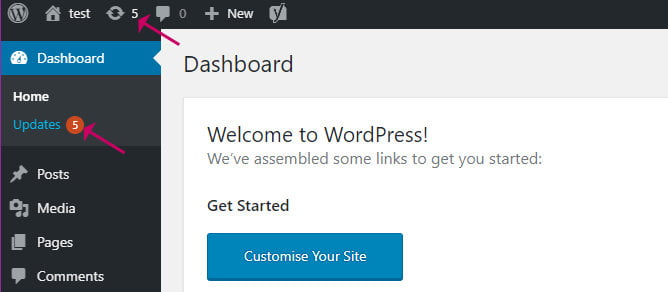
You know if updates are due because you will see an Updates link with a number on the side and in the top bar. Click either of these icons to open the WordPress Updates screen.
- Take a backup.
- Click the Updates icon to open the WordPress Updates screen
- Click the blue Update Now button to update WordPress (you should always update WordPress first)
Test your blog before you carry on.
- If all is well, update the themes if available
- Tick Select all
- Click Update Themes
Test your blog again.
- Now update the plugins
- Tick Select all
- Click Update Plugins
Test your blog.
If you come across any issues, you may need to raise them with the respective plugin or theme developer.
When an update results in a broken site, I have directions on how to restore it here at the bottom. If a restore will not work, raise a support ticket and ask your host to run a restore. You could give them the files you downloaded when you made the backup.
Related reading: How to Recover From the White Screen of Death.
3. Test contact forms
It is a great idea to have a contact form on your WordPress blog. If you don’t have one yet, see my post – How To Add A Contact Me Page To Your WordPress Blog.
The health of the contact form can be affected by any changes made on the hosting server (which may be beyond your control), as well as incorrect settings on the contact form itself. Even if you have made no changes to the settings recently, it is still a good idea to give it a test.
1. Backup your blog
Once every one or two weeks.
6. Clear out spam comments
Very straightforward to do. Pop over to your contact page and send yourself a message, or ask someone else to fill it in for you.
If you don’t get the email, there are a couple of things you can do:
- Check the contact form settings, have you completed them correctly, i.e. entered a recipient email address?
- Check your spam folder
- Some messages can get picked up by your email provider as spam before they get to you, check deliverability with MailTester.
The Mailtester site will help you find out how deliverable the message is and gives you a score indicating how likely it is to go to the spam box.
Use the same email address you set as the From address in the contact form settings to send a mail to the address displayed on the MailTester site.
If you don’t have an email client set up, pop over to the webmail app at your hosting control panel and send a message from there.
A low score from Mailtester will be the source of your problems. Your web host should be able to help you improve it.
4. Test opt-ins
If you have a mailing list set up for your blog, you should test the opt-in is working; you could be losing subscribers if it is not working correctly.
If you don’t have a list yet, I have a complete guide here – How To Use MailChimp With Your WordPress Blog.
1. Backup your blog
Once every one or two weeks.
8. Check broken links
You may have more than one opt-in, you should check everywhere your opt-in appears.
If you have an opt-in at the bottom of all your posts, you only need to check one post.
Check you are can complete the form and receive the welcome email. Or ask a friend to check
5. Check speed
Speed is crucial to a successful blog. An awful lot hangs on a fast loading site, including better page ranking, better user experience, lower bounce rate, to name the most important.
I have a whole post on the subject – 14 Super Easy Ways To Speed Up WordPress And Get Massive Traffic. If your site is currently slow, I highly recommend you pay a visit to that article.
Several things can slow down a previously speedy site:
- A rogue image, larger than it needs to be, see 7 Mistakes You Are Probably Making With Images – And How To Fix Them.
- A new plugin
- A change of theme
- More traffic
- Denial of service attack
1. Backup your blog
Once a month, or whenever you suspect a slow-down.
Wrapping up
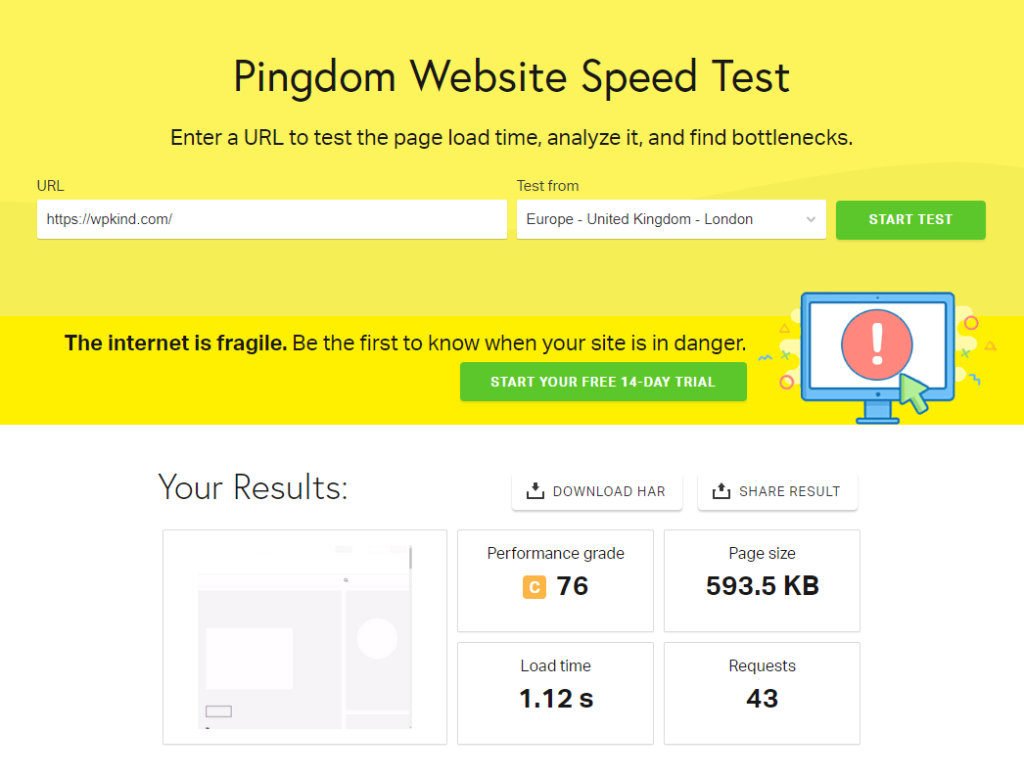
My favourite way to check site speed is with the free Pingdom tool. Enter your website URL, and you can run a test from various locations around the world.
Whichever location you choose, anything under 2 seconds loading time is acceptable.
How often
If a previously fast site has become sluggish, here are a few things to check:
- Has your traffic gone up, perhaps you need to consider re-hosting?
- Check your page the speed checker results; they should give you an idea of what aspects of your blog are slow
- For large images, it could be that you selected an incorrect size in the image block’s settings; perhaps you set it to full-size instead of thumbnail?
- Disable plugins, recheck the speed, then add them back one-by-one, rechecking as you go.
- Switch your theme out to the default Twenty Nineteen theme, does it make a difference?
There are lots more things to check in my post – 14 Super Easy Ways To Speed Up WordPress And Get Massive Traffic.
Before you do the above checks, your site could become inaccessible, or unrecognisable. It is better to do the tests on a staging site instead if you can.
You can set up a staging site in your hosting account’s control panel. If you need help doing it, your web host provider should provide the support.
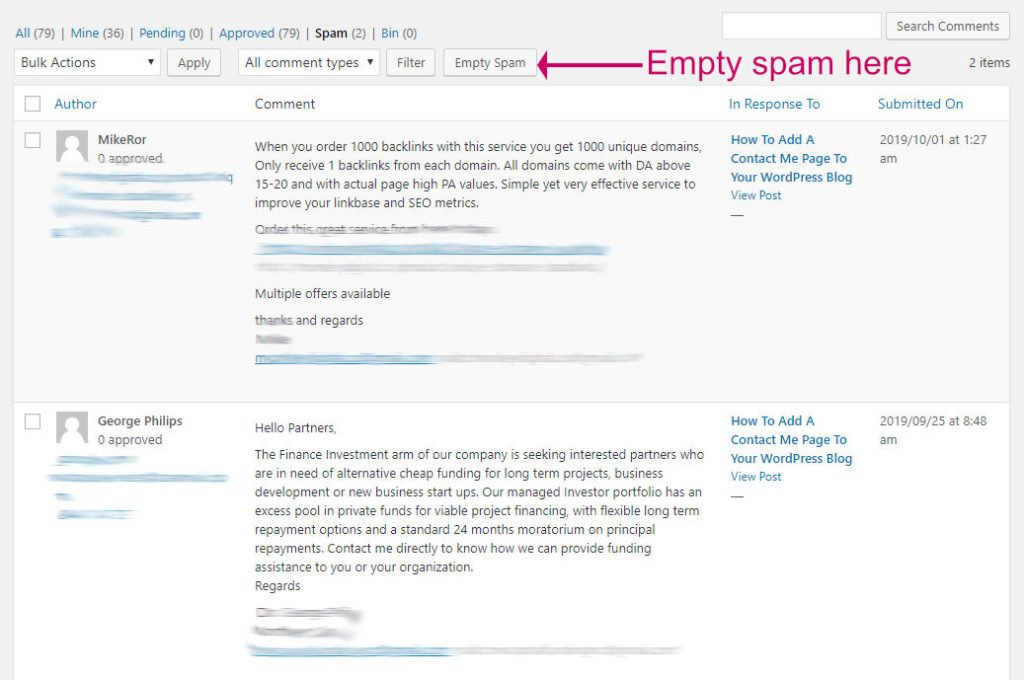
6. Clear out spam comments
A lot of spam comments can cause a site slow-down. It is a good idea to clear out spam periodically.
If you have a contact form on your site, or you allow comments, then spam is a given, unfortunately!
You can turn off comments to prevent spam, but there is a handy plugin available called Akismet Anti-Spam by Automattic, the creators of WordPress.
Akismet is free for non-commercial websites and blogs, or a very reasonable £4 per month for commercial sites. It is very effective at dealing with WordPress spam, and it is one of my essential plugins.
I have a whole post – How to Prevent WordPress Spam with some super information for dealing with spam.
1. Backup your blog
How regularly you need to clear out spam depends on how busy your blog is. If you have a lot of comments coming in, then it could be a daily task or only weekly/monthly for small blogs.
How often
- From the admin screen, go to Comments
- Click the Spam link
7. Optimise your WordPress database
WordPress stores all your post content and WordPress settings in a database. Over time the database can become less efficient, causing access times to be slower.
From time to time, it is a good idea to optimise the database so that access times are as fast as possible.
1. Backup your blog
Once per month.
How often
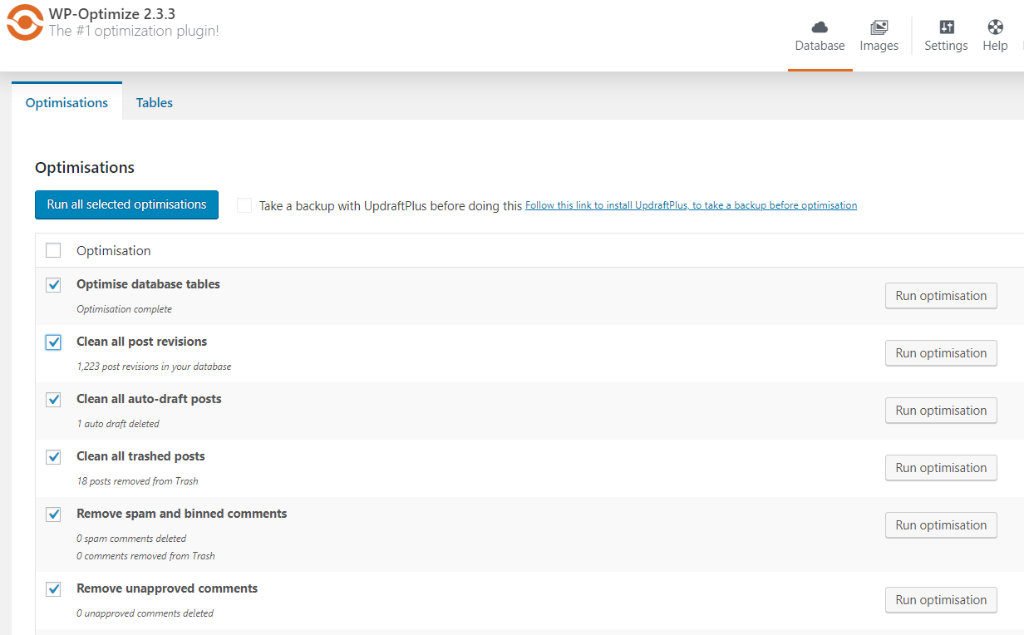
You can optimise the database with a plugin called WP-Optimize.
The WP-Optimize plugin helps you to remove old post revisions, spam comments, and trashed posts. The result is a much leaner database that performs much better for you.
- Backup your WordPress blog.
- Install and activate the WP-Optimize.
- Click WP-Optimize on the left menu
- Click on the buttons on the right to run individual optimisations or click Run all selected optimisations to run everything in one go.
8. Check broken links
Broken links are internal or external links that lead to unknown pages (404).
Even though you might be very vigilant about your internal links, you can’t control the external ones. Sometimes sites you link to may go offline, or they remove or move pages.
1. Backup your blog
Once per month should be enough.
How often
There is a great plugin called Broken Link Checker by ManageWP.
The broken link checker plugin runs in the background crawling through all your web pages, following links and checking they lead to valid pages.
- Install and activate the plugin
- The plugin will immediately start checking for broken links in the background
- To check the broken links, go to Tools->Broken Links
- From there you can open the post with the broken link, or edit the URL directly
Go to Settings->Link Checker, and you can make some settings such as the frequency of the check and a notification email address.
How to test contact opt-ins
In my experience, I have found that the broken link checker plugin can slow down a website. Some web hosts ban it from use because it causes high server load. WPengine is one such host that prohibits it.
If you decide to run it, my advice would be to let it run once per month and then disable it.
9. Check images
Large images can lead to a slow site. I have a whole post on common mistakes – 7 Mistakes You Are Probably Making With Images – And How To Fix Them.
The biggest mistake people make is uploading an image straight from a stock photography site without resizing it first.
If you then choose the full-size version for your post by mistake. Your webpage becomes bigger by several megabytes as a consequence.
The error is sometimes not apparent because although the image displayed is the full-size version, it may look smaller on the webpage if it has to fit in a smaller space.
1. Backup your blog
How to check the speed
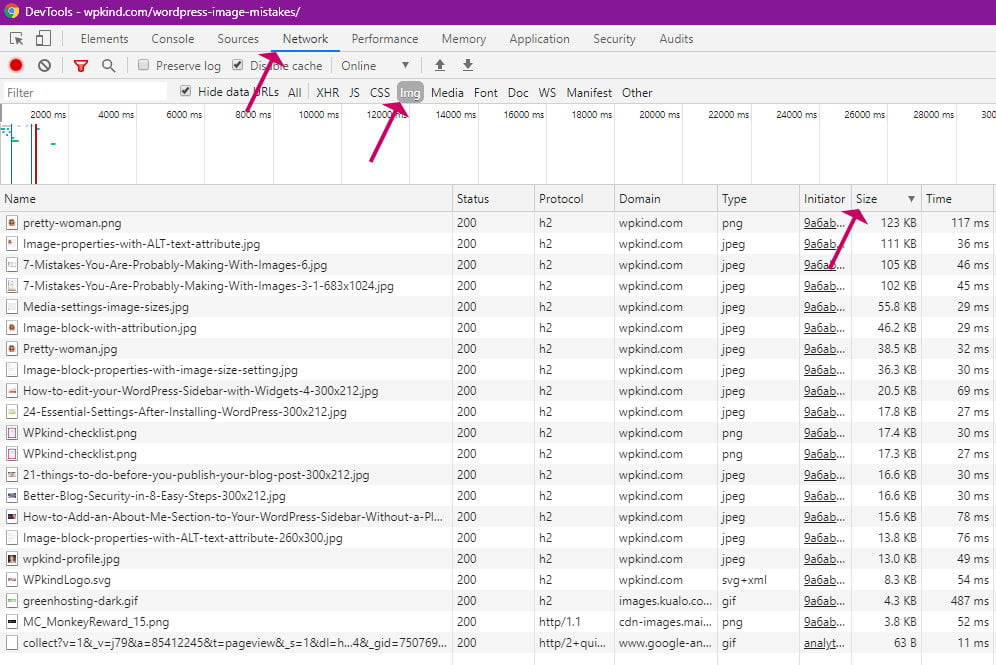
When you finish up a post, a way to test for large images is to open your webpage in the Chrome Developer tools. Here is how to do it:
You will need the Google Chrome browser for this; you can download it here if you don’t have it.
- Navigate to the post you want to check using your Google Chrome Browser app.
- Open the Chrome Developer Tools (SHIFT+CTRL+I or SHIFT+CMD+I on Mac)
- Click the Network tab in the right panel, then reload the web page behind
- Click Img to filter on all images
- Click the Size tab to order the files by size
- Look for any file that is 500kb or above
What to do if your blog becomes slow
- If you find a large image using the Inspector tool above, make a note of the name and pop over to the WordPress Media Library and search for the file name in the search box.
- Copy the File URL
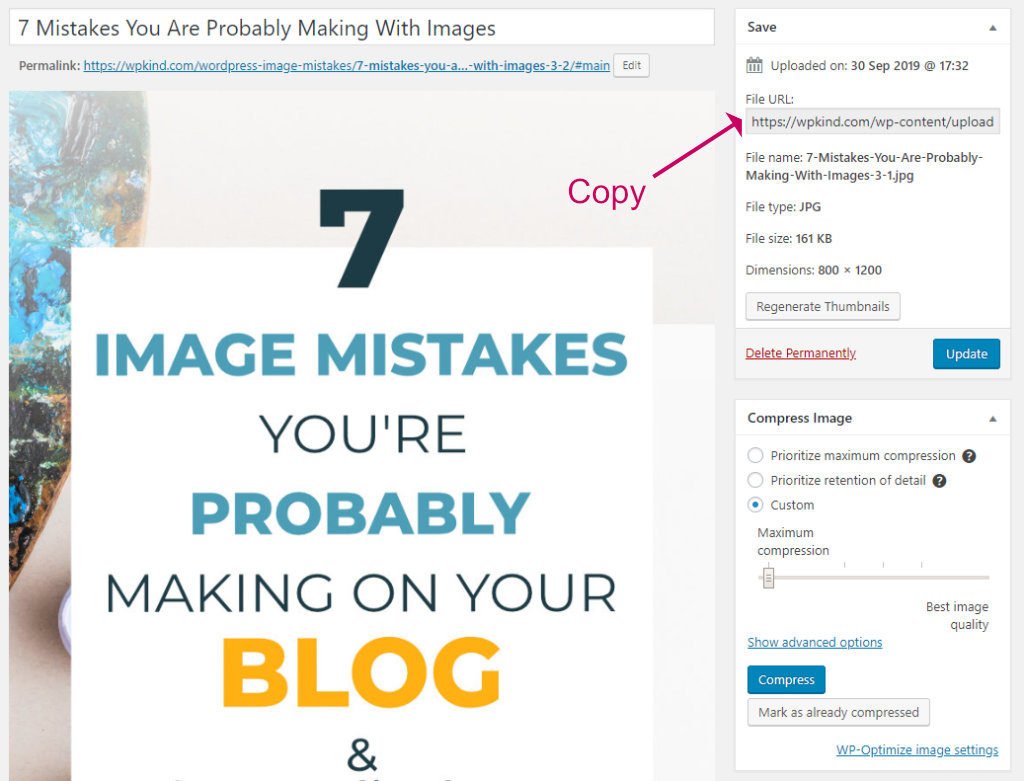
- Paste the URL into your browser and drag the image on to your desktop.
The next step is to resize the image.
- Open the downloaded image in an image editor, resize it and re-save.
I like to use Affinity Photo for this, but you can also use Photoshop or a free photo editor such as Gimp, or the free apps that come with Macs or PCs, (Preview and Paint respectively).
On any photo editing tool, there is usually a resize button where you can specify a percentage reduction or a pixel dimension.
You can use both methods, but if you choose pixel, enter the largest pixel size that you have for the large image size in the media settings, (e.g. 1024px).
You can check this by going to Settings->Media.
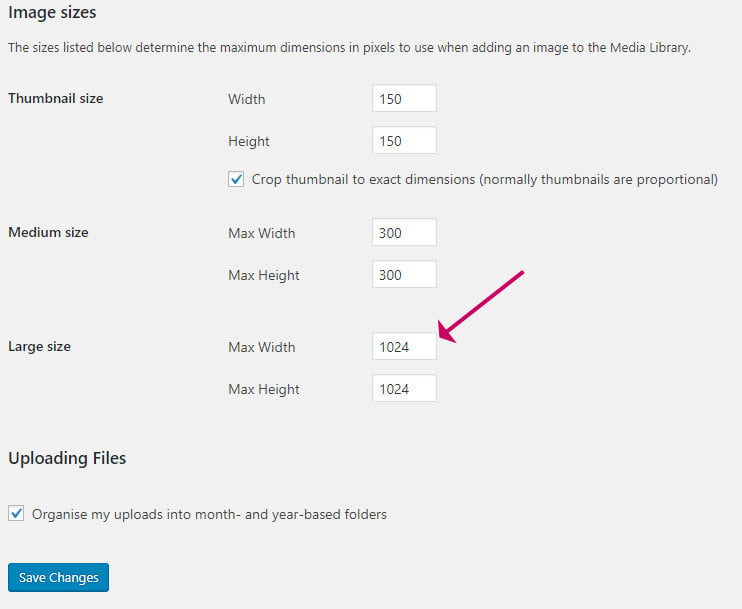
If the image isn’t square, make sure you maintain the aspect ratio as you resize, there will usually be an option to tick.
- Upload the new image into the Media Library and update the image in the post.
Wrapping up
In this post, I have taken through the crucial tasks that you need to be doing on your blog to keep it lean, well oiled and ready for any amount of traffic you might send it.
Remember, before you start many of these tasks, you should take a backup first. Doing so will ensure that you don’t lose any of your precious work should the site get broken as a consequence.


